
When someone no longer needs access to your Zefort account, you can inactivate or delete their user profile.
- Inactivation lets you restore access later.
- Deletion removes the user from user management and transfers their responsibilities to another user when needed.
Prerequisites
To manage users, you need an administrator license and the Can manage users and groups permission.
Difference between inactivating and deleting a user
| Inactivate user | Delete user | |
|---|---|---|
| System access | The user can no longer sign in to the account or access its contracts. | The user can no longer sign in to the account or access its contracts. The profile disappears from the user list. |
| Profile details and audit trail |
Keeps the user’s name, email address, permissions, and profile details in place.
Keeps the user’s name visible on all past actions, including contract audit logs. |
Removes the profile from user list.
Replaces the user’s name and email with a system user ID across all historical audit logs. |
| Contract ownership | Keeps contracts assigned to the user. Responsibilities do not move automatically: reassign contract ownership manually if a colleague needs to take over. | All items and responsibilities are transferred to another user. |
| Notifications | Inactive users do not receive notifications. Update reminder recipients manually if needed. | Reassigns reminders and tasks to the user you choose during the transfer process. |
| User license | Frees up the license for someone else to use. | Frees up the license for someone else to use. |
| Reversibility | Reversible. You can reactivate the exact same profile whenever a license is available. | Permanent. You cannot undo deletion. To give the person access again, you must invite them as a new user. |
| Example use cases |
|
|
Inactivate user
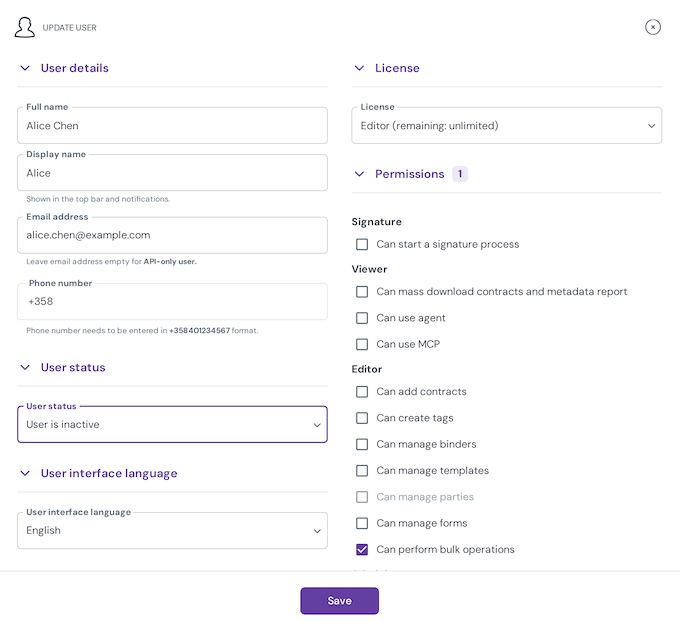
- In Users & groups, click the user’s name. You can also open the three-dot menu on their row and select Edit user….
- Under User status, select User is inactive.
- Click Save.
- A notice opens: click Confirm to apply the change.
What to check before you inactivate a user
Inactivating a user leaves their contracts, reminders, and signature processes in their name. Inactive users do not receive notifications, so alerts stop completely if they are the only recipient.
If a colleague needs to take over their work, review these optional steps:
- Reassign contract ownership. Use bulk actions to move contracts to another user who needs to manage them. (You need the “Can manage all contracts and binders” permission to change contract ownership.)
- Update reminder recipients. Review upcoming activities and switch the recipient if needed.
- Check binder permissions. Adjust binder permissions, in case another user needs full permission to same binders as the inactivated user.
- Review active workflows. Check and update pending e-signatures, integrations, and public inboxes that rely on this user.
Inactivate multiple users in bulk
- In Users & groups, select users’ row checkboxes
- Click Status in the selection toolbar
- Under User status, choose User is inactive and click Apply
- Click Confirm to complete the inactivation.
Reactivate the user
- In Users & groups, open the inactivated user’s profile
- Under User status, choose User is active
- Click Save.
Delete a user
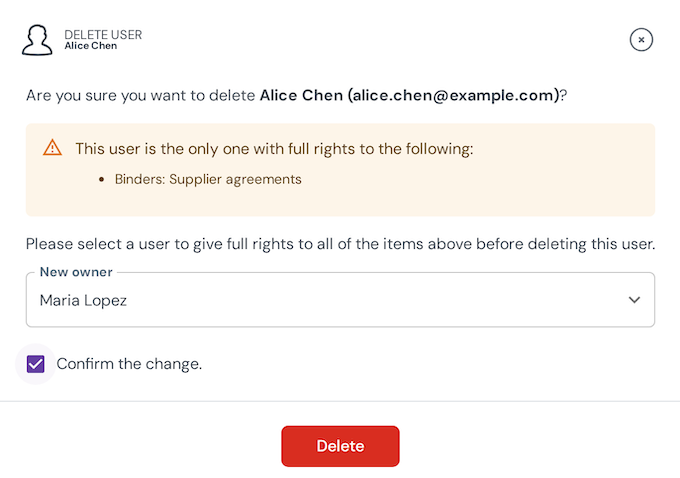
- In Users & groups, open the three-dot menu on the user’s row and select Delete user….
- In New owner dropdown, select another user inheriting the deleted user’s items. If the user has no items requiring a transfer, the dialog lets you delete them without choosing a new owner.
- Contracts owned by the user.
- Full binder access where no remaining user would otherwise retain full access.
- Pending signature processes and in-progress bulk signature requests.
- Reminder recipient assignments.
- Public inbox contract ownership.
- Contract-owner assignments in forms and integrations.
- Check Confirm the change and click Delete.
Delete multiple users in bulk
Bulk deletion also requires the Can perform bulk operations permission.
- In Users & groups, select the checkbox of each user you want to delete. A bulk toolbar opens above the user list.
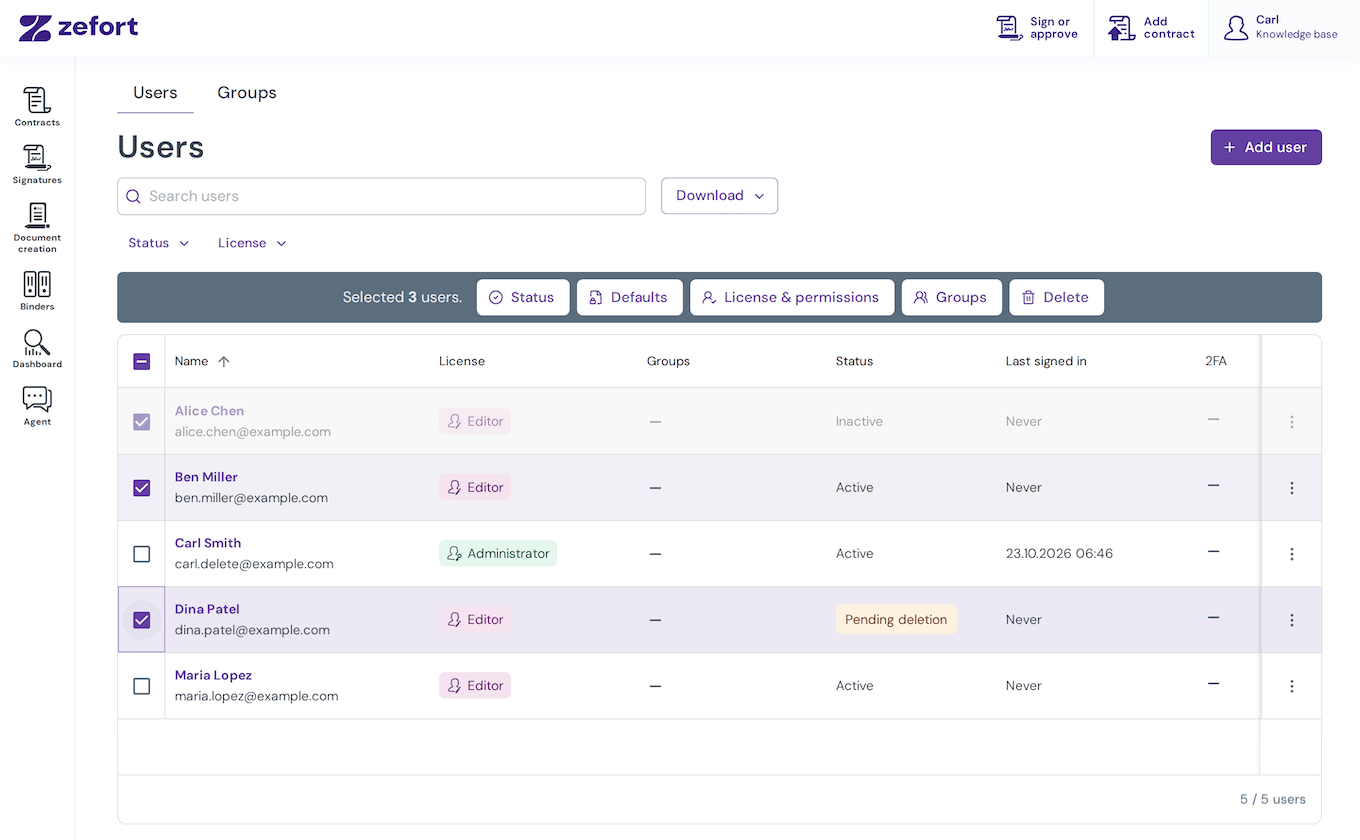
- Click Delete in the toolbar.
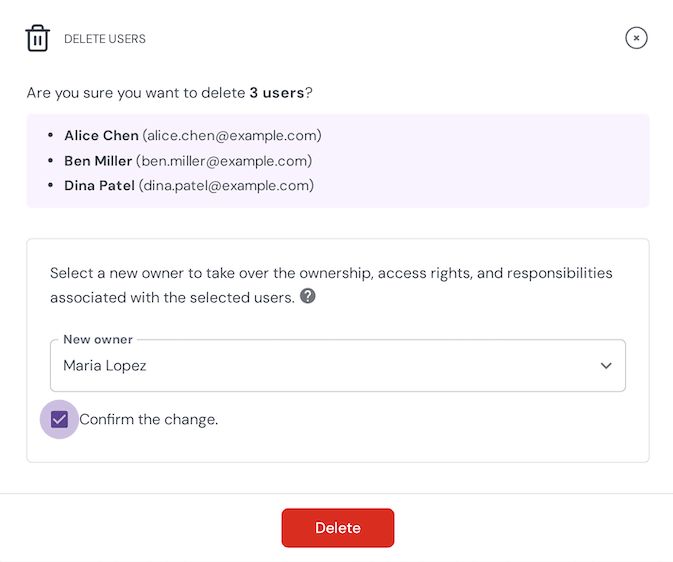
- Review the selected users in the Delete users dialog.
- Select one New owner for all selected users. The new owner must be outside the selection.
- Check Confirm the change and click Delete.
Bulk deletion runs in the background. Once the operation is finished, refresh the user list to verify the result.
What does “Pending deletion” mean?
The pending deletion status means a user was removed through your identity provider’s SCIM provisioning. The user loses access immediately and no longer uses a license.
The profile stays in your account so you can choose who takes over their contracts, reminders, and other responsibilities.
This status does not delete the user automatically after a waiting period. To remove the profile from your user list completely, an administrator must finish the deletion manually. If you want to keep the user’s name visible in your audit logs, you can leave their profile set to pending deletion.