You can configure Zefort Sign emails to send from your organization’s own domain.
Setting this up consists of two main phases: verifying your domain and activating it for email delivery.
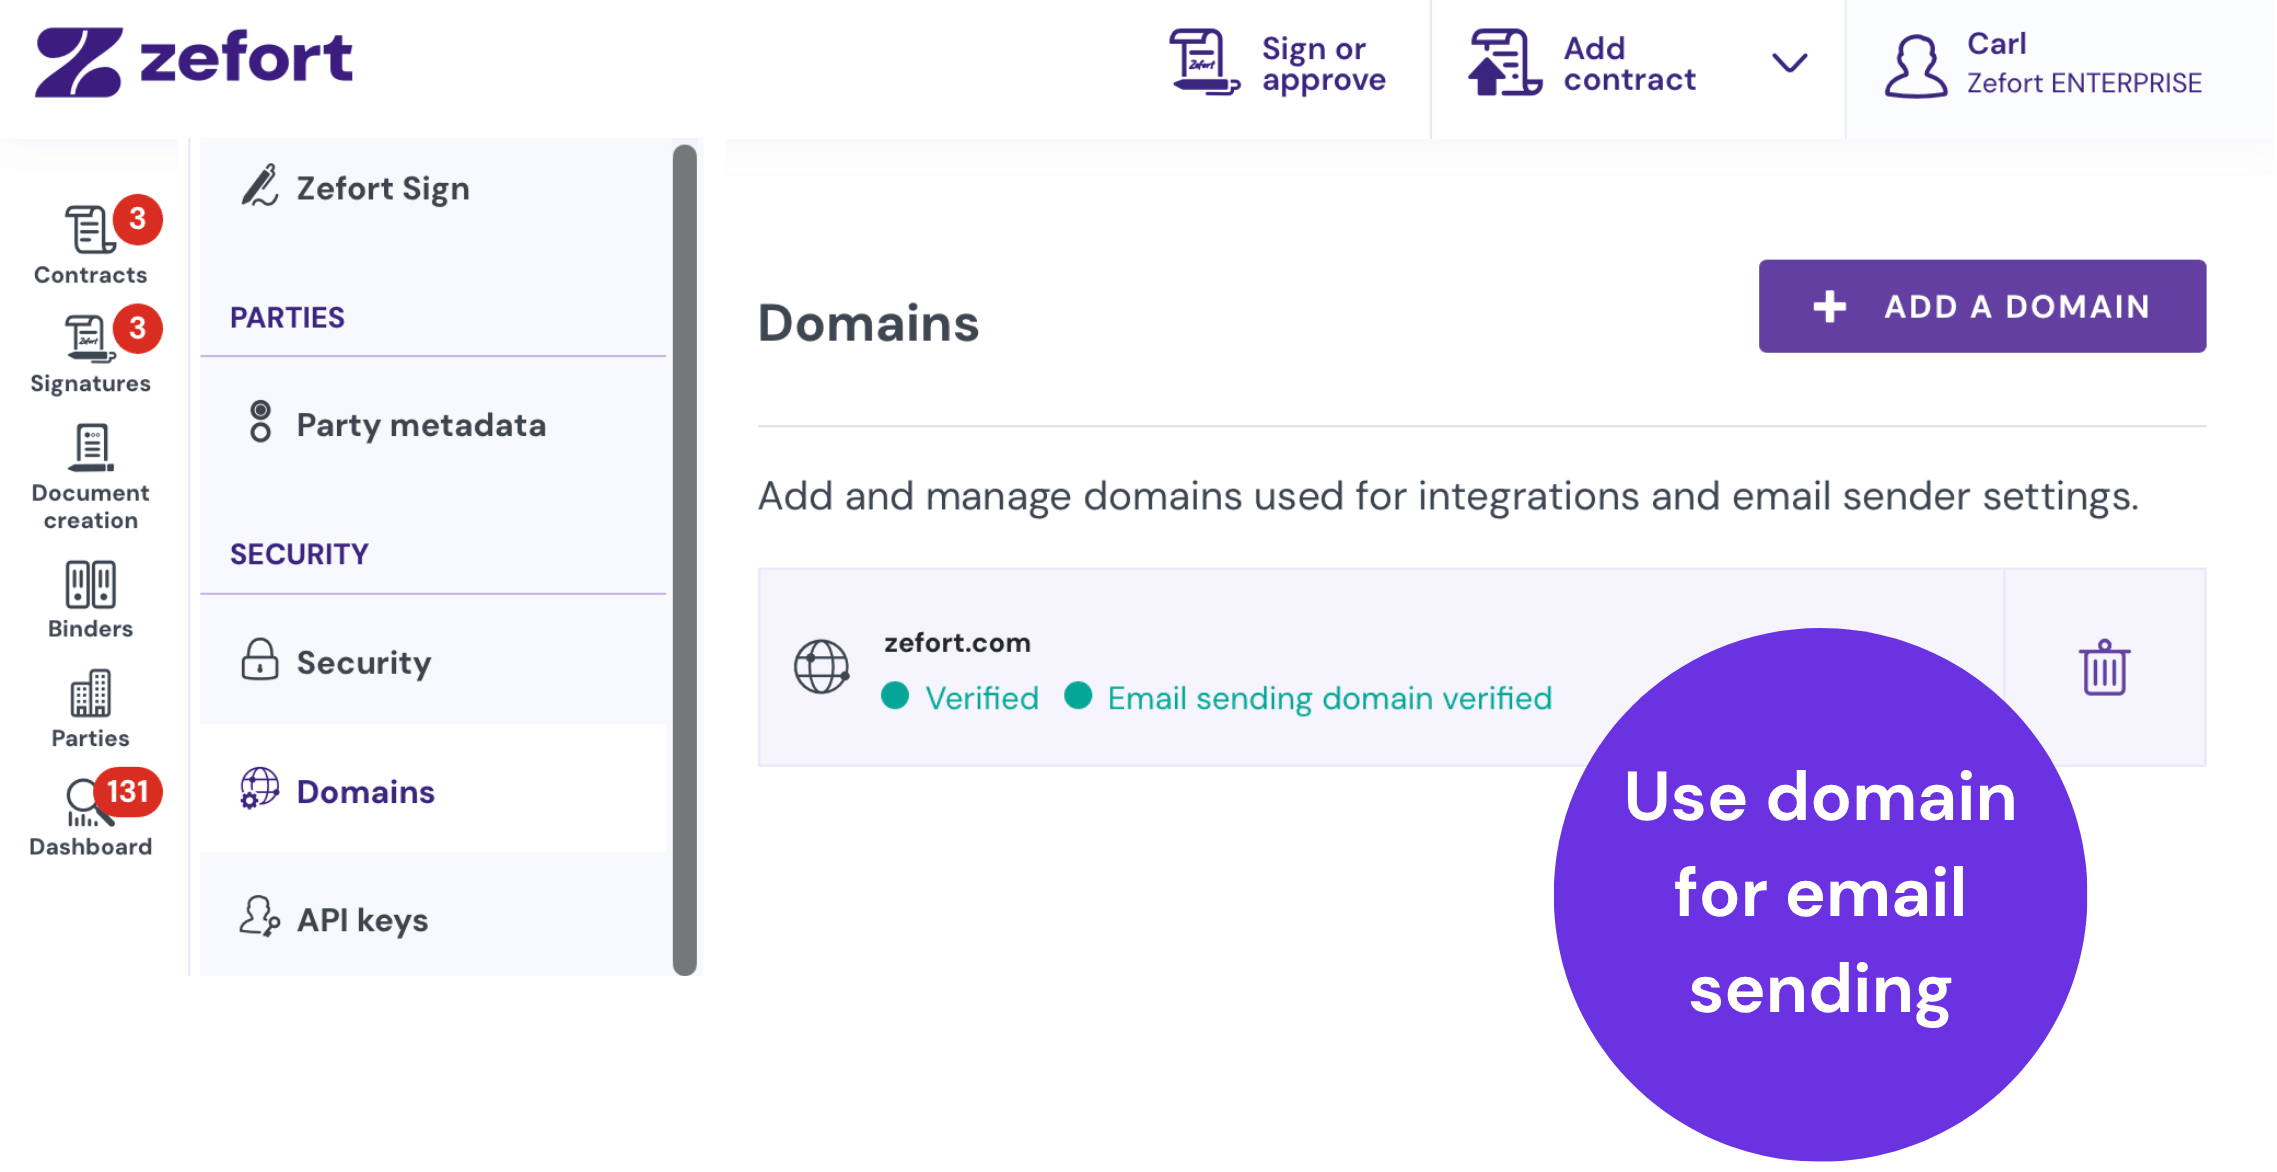
How to add and verify your domain
Before you can send emails from your domain, you need to create and verify it.
- Go to Account settings > Domains.
- Click “Add a domain”.
- Type your domain name.
- Click “Verify domain“
How to update your DNS records
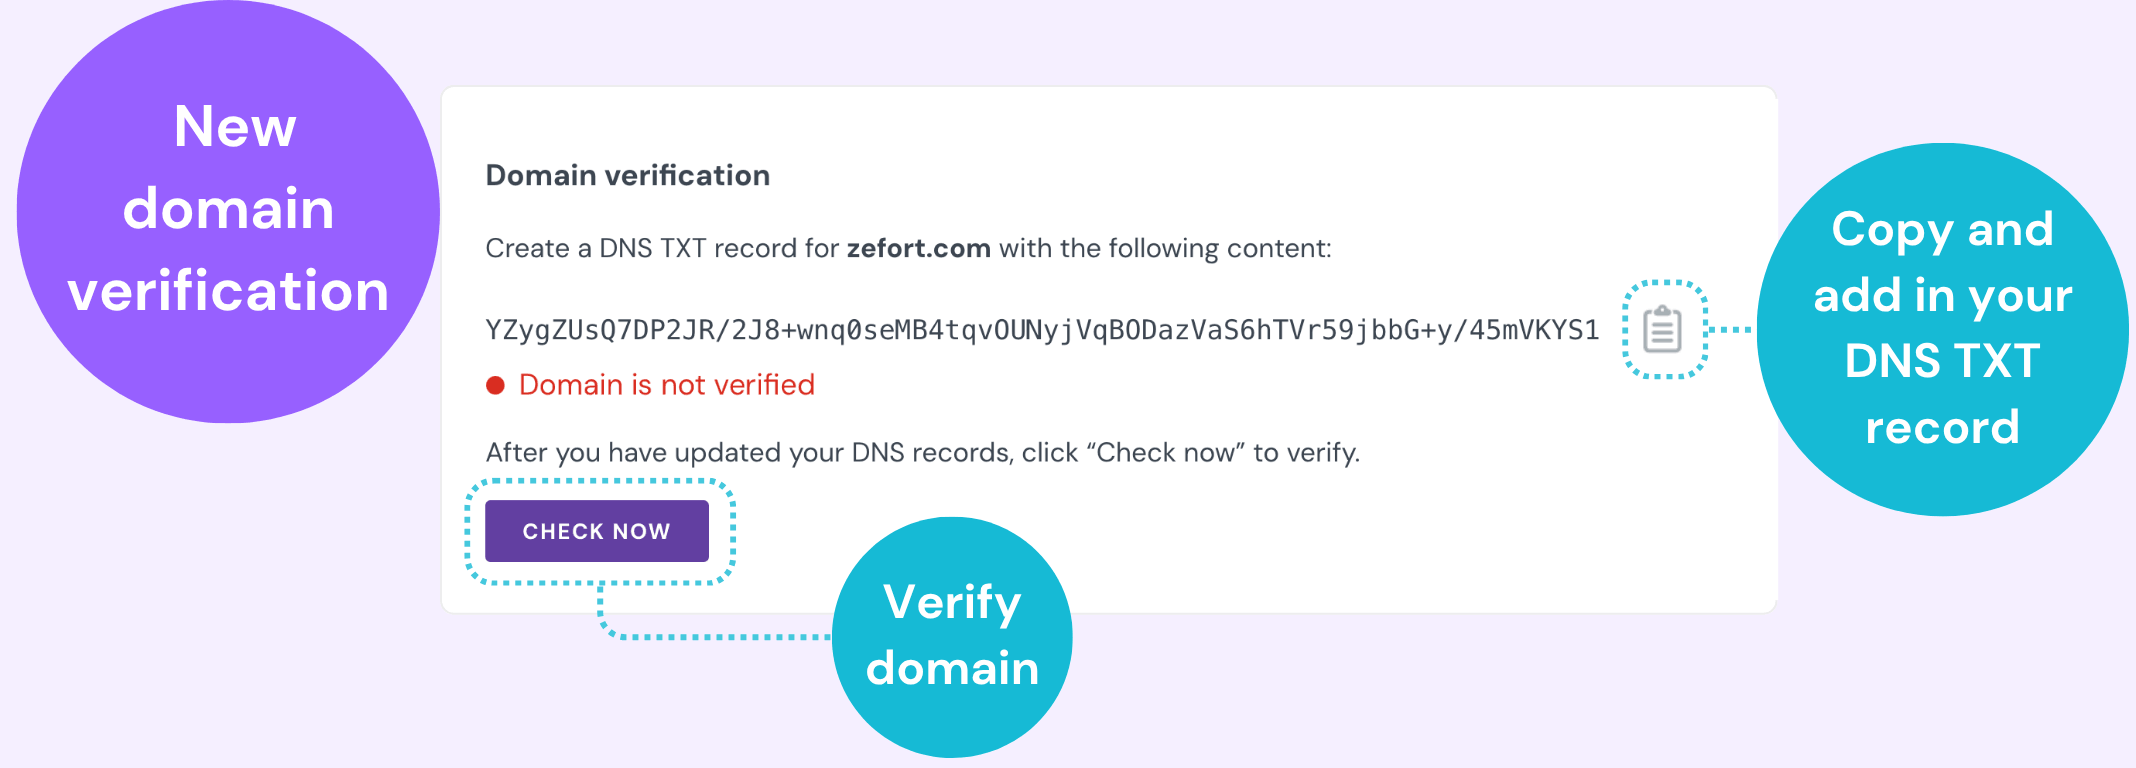
To complete the verification, you need to add a unique record to your domain’s Domain Name System (DNS) settings.
- Locate the newly added domain in your list.
- Click the note icon next to the domain to copy the verification code.
- Log in to your domain host provider and navigate to your DNS settings: create a new TXT record and paste the copied verification code into the value field.
- Return to your Zefort settings page and click “Check now” to verify the domain.
- DNS changes do not always go live instantly. If the verification fails, wait a few minutes and click the button again.
How to set up email sending for your domain
Once verified, you can configure your domain to send outbound signing emails.
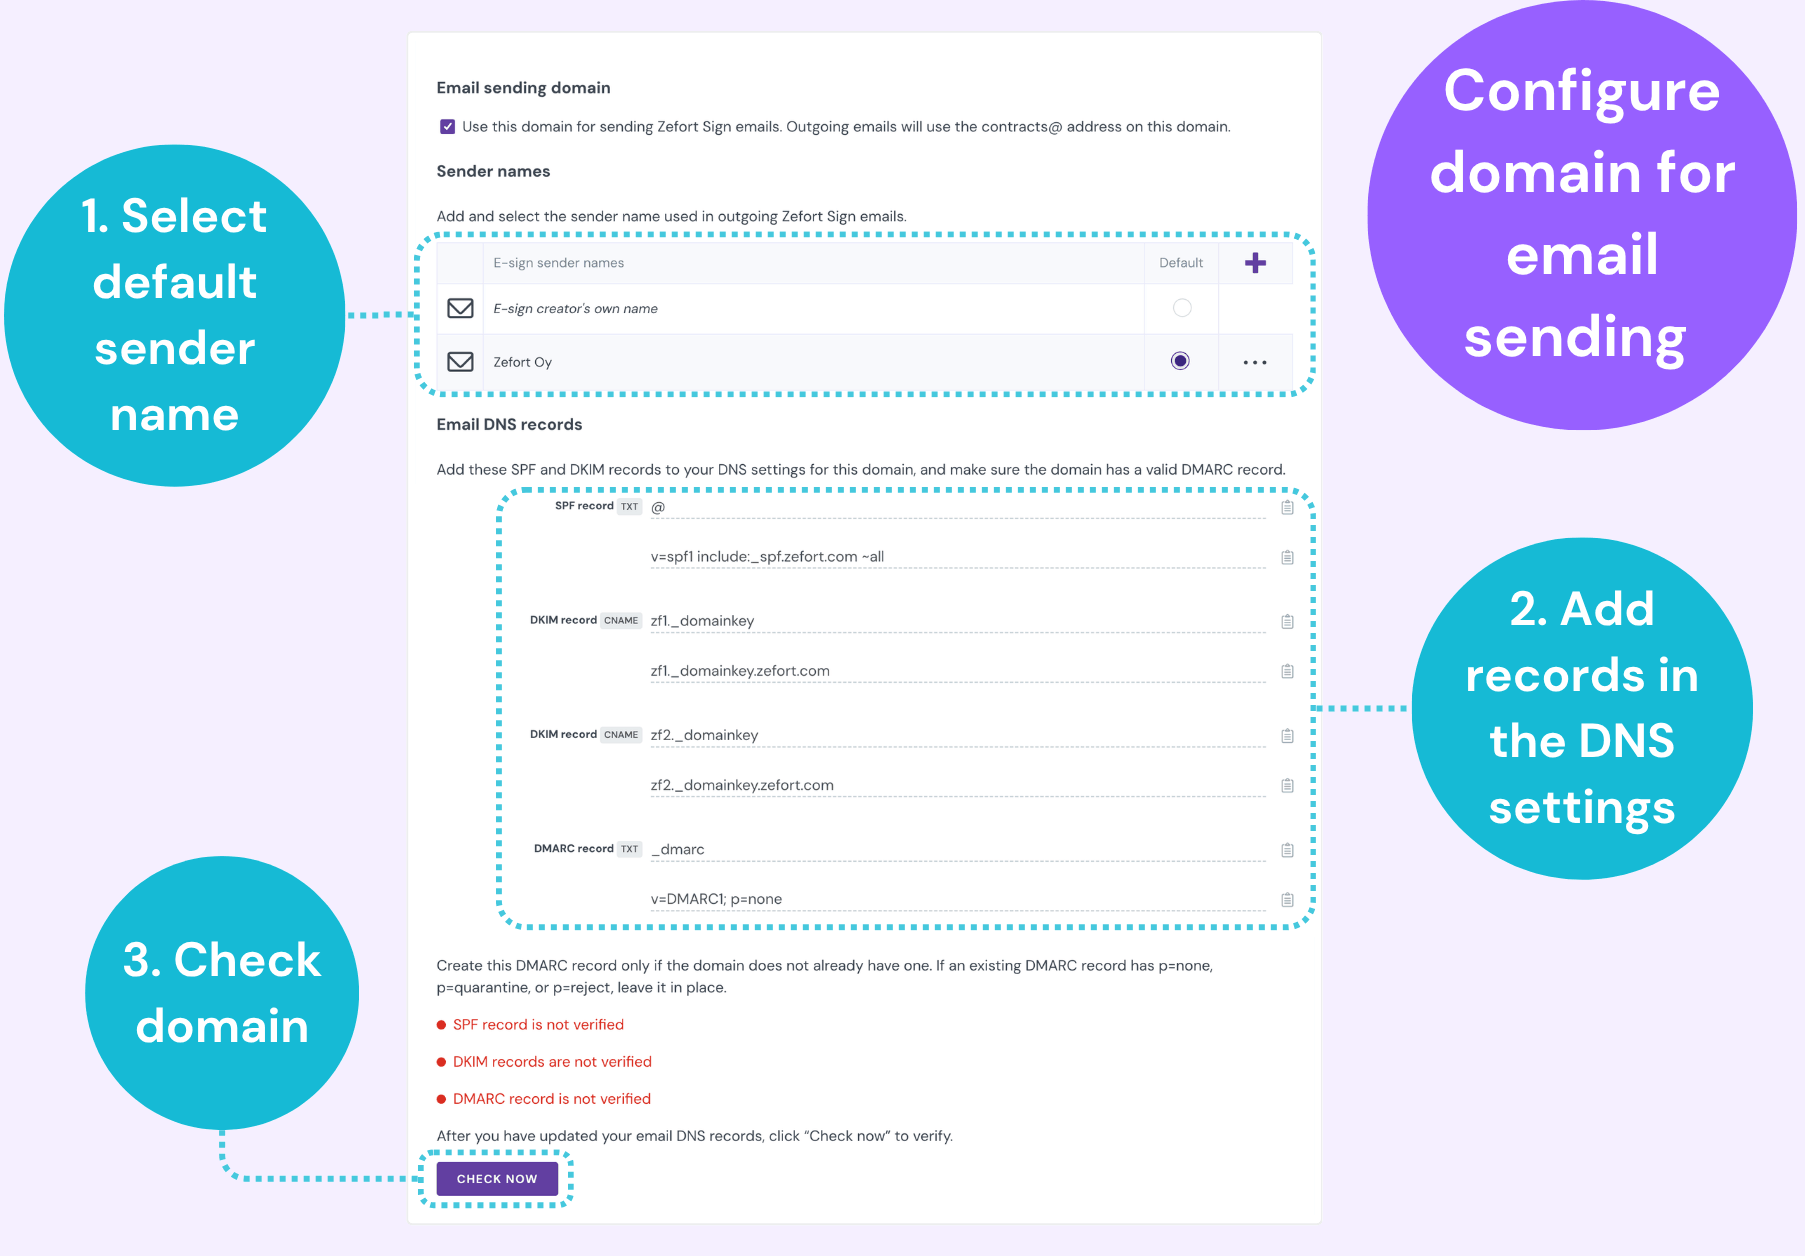
Select a default sender name
You can choose the default name your signers see in their inbox. You have two options for this default value:
- The sender’s own name: The individual name of the person who creates the signature request.
- A custom sender name: A shared name, like your company name (for example, “Acme Corp”), or a specific department.
If you have not created any custom sender names yet, the system defaults to the person’s name as the only option. To add a custom name, click the plus (+) button in the top right corner of the sender name table. Read more about the sender names in support article Selecting signature request sender
Add email DNS records
To make sure your custom emails arrive safely in signers’ inboxes, you need to add a few more security records to your DNS settings. Think of these as digital handshakes that prove your emails are safe and authentic.
Follow the same process from the previous section to copy and add these four records to your domain host settings:
- SPF record
- DKIM records (two separate records)
- DMARC record (add this if your domain does not have one yet)
After you have added these records in your domain host settings, return to your account settings and click “Check now” to verify the email configuration. Once verified, all your signature requests go out under your own domain.