Do you need to send the same standard document to dozens of people? Use the bulk sending feature to save time and manage everything at once, instead of starting 50 separate signature processes.
When to use bulk sending
When you use this feature, you send one template document to a spreadsheet list of recipients. Every person on your list receives their own separate copy to sign. As a result, you get multiple independently signed documents back.
This feature is perfect for standard agreements where everyone signs the exact same text. Examples include standard NDAs, annual company policy updates, or employee handbooks.
Do not use this feature if you need multiple people to sign the exact same document together. Do not use this if every person needs a uniquely customized contract.
Prerequisites
- Zefort Sign needs to be enabled on your account.
- To bulk send signature requests, you need any license with user permission “Can start a signature process“.
Step 1: Create your recipient list
You need a spreadsheet with your signers’ details. You can generate a template file directly in the application to make this easy.
Create the spreadsheet
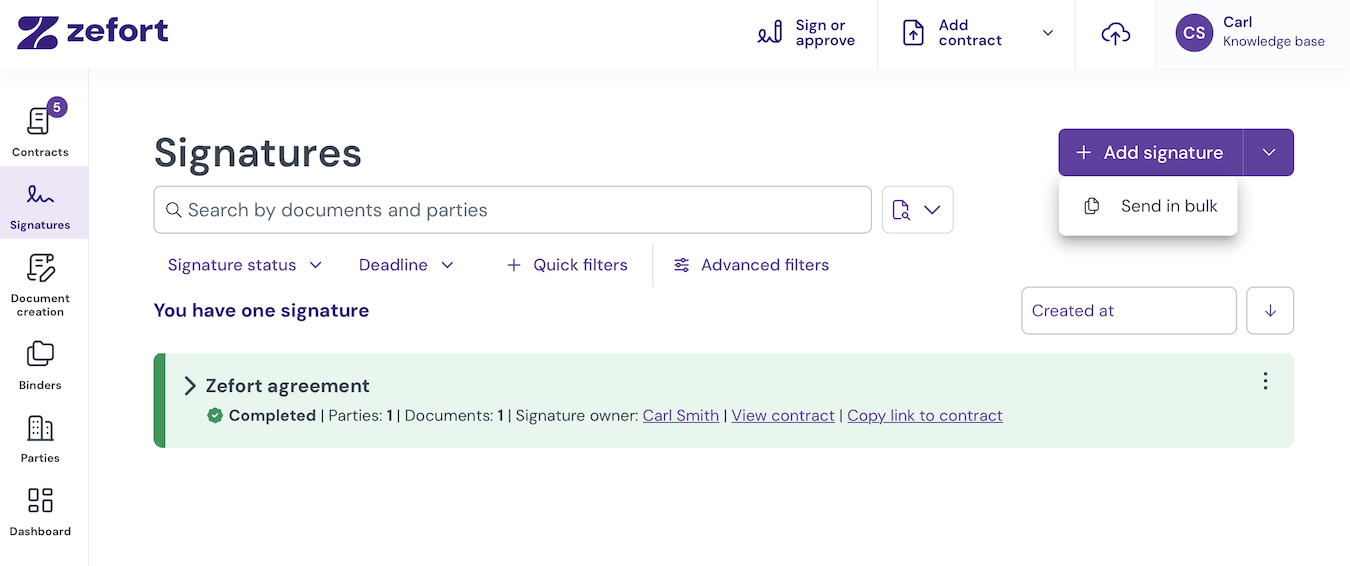
- Go to Signatures and click the arrow in the Add signature button and select Send in bulk.
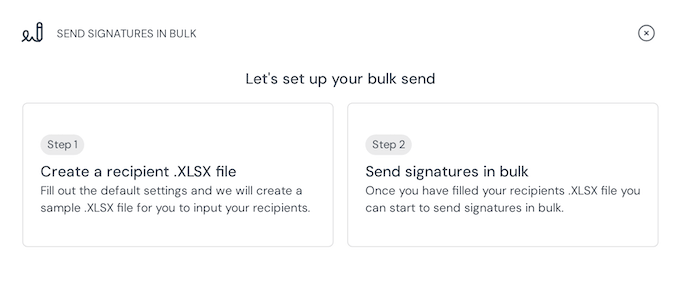
- Choose Create a recipient .XLSX file. Review the instructions on the screen and click Continue.
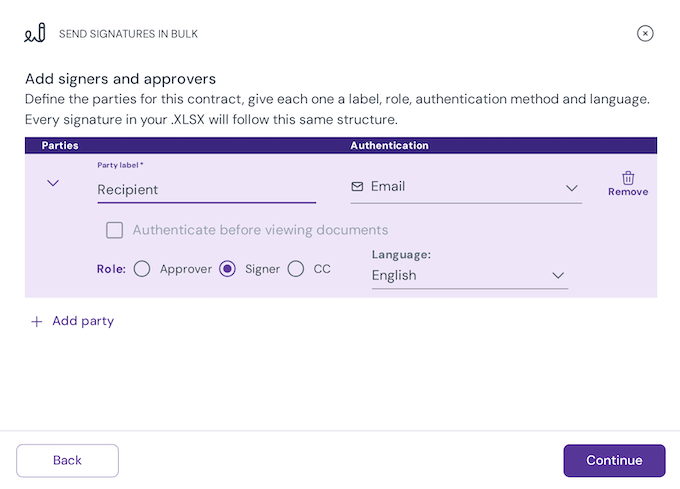
- Define the parties who will sign or approve their copy of the contract:
- Add a clear party label, like “Employee” or “Contractor”.
- Select the role, authentication method, and invitation language. (These details can be later edited individually in the spreadsheet.)
- Click Add party if you need more than one person to approve or sign each document. Click Continue when you have added all parties.
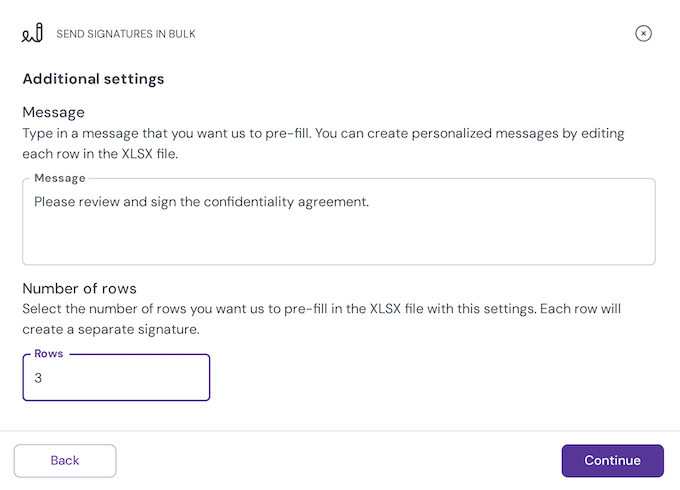
- Adjust additional settings:
- Type the message you want to include in the email invitations. (The message can be later edited individually for each signature process in the spreadsheet.)
- Enter the total number of rows you need. Each row creates one separate signature request.
- Click Continue.
Fill in the spreadsheet
Fill out the downloaded file with your recipients’ actual information.
- Open your downloaded file in Excel or another spreadsheet application. Do not change the column headings.
- Add the details for your approvers and signers. Remember that one row equals one separate signature process.
- Enter the name and email address for every person.
- Add a phone number if your chose SMS for authentication method.
- Update the Message column on specific rows if you want to personalize individual invitations.
- Save your completed file in the XLSX format.
Step 2: Send the signature requests
You are now ready to upload your list and send the documents out for signatures.
- Return to the Signatures view, click the arrow next to Add signature, and select Send in bulk.
- Choose Send signatures in bulk.
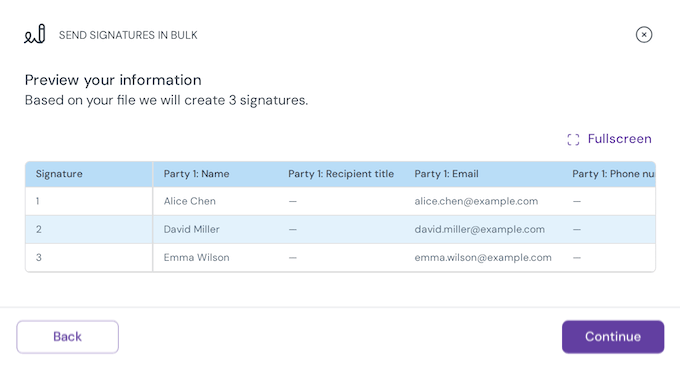
- Add the signer list: click Select file or drag your completed XLSX file into the upload area.
- Review the recipient names and settings in the preview window. You can scroll horizontally or use Fullscreen mode to see all columns. Fix any errors in your spreadsheet, save it, and upload the new version if needed. Click Continue when the information is correct
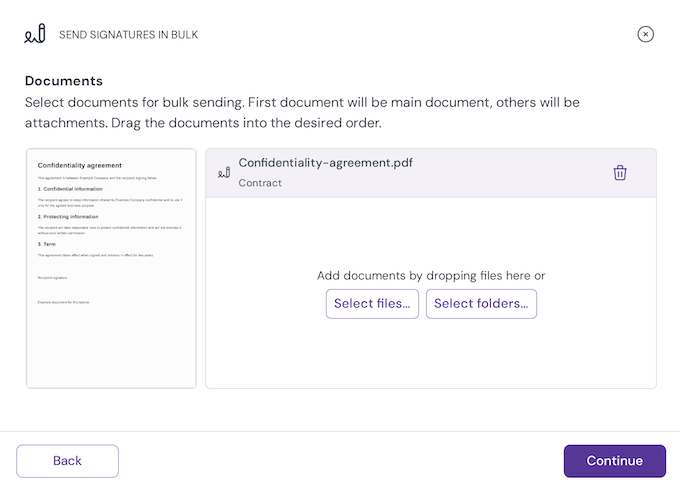
- Add document(s) to be signed: click Select documents or drag your contract into the upload area. This is the exact contract that every recipient will receive.
- Check the file order if you add multiple files. The first file acts as the main contract, and the others act as attachments.
- Click Continue.
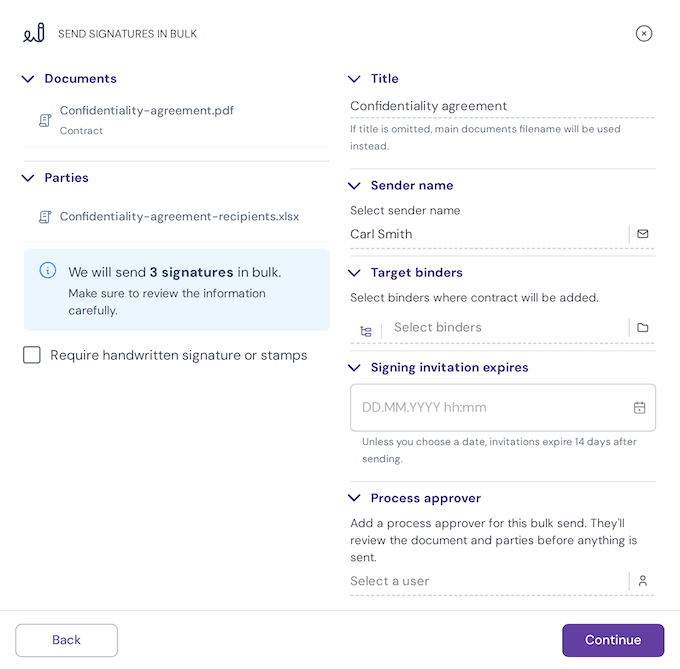
- Review your final sending settings. Check that the document, recipient list, and total number of requests match your expectations.
- Enter a title used for the requests.
- Choose the Sender name that your recipients will see in the signature request. (Learn more about the sender name.)
- Select Target binders to organize the signed contracts. (optional)
- Set an expiration date. If you leave this empty, the invitations expire in 14 days.
- Place signature fields on the document if you require handwritten signatures or stamps. (Optional)
- Select a Process approver if you want someone to review the batch before it goes out. (Optional)
- Click Send bulk signatures. The individual requests generate in the background.
The signature processes appear in the Signatures view when processing is complete. If you selected a process approver, the batch goes to that person for approval before the signature requests are created and invitations are sent.
Track your signature processes
You can monitor the progress of your entire batch directly in the signatures dashboard.
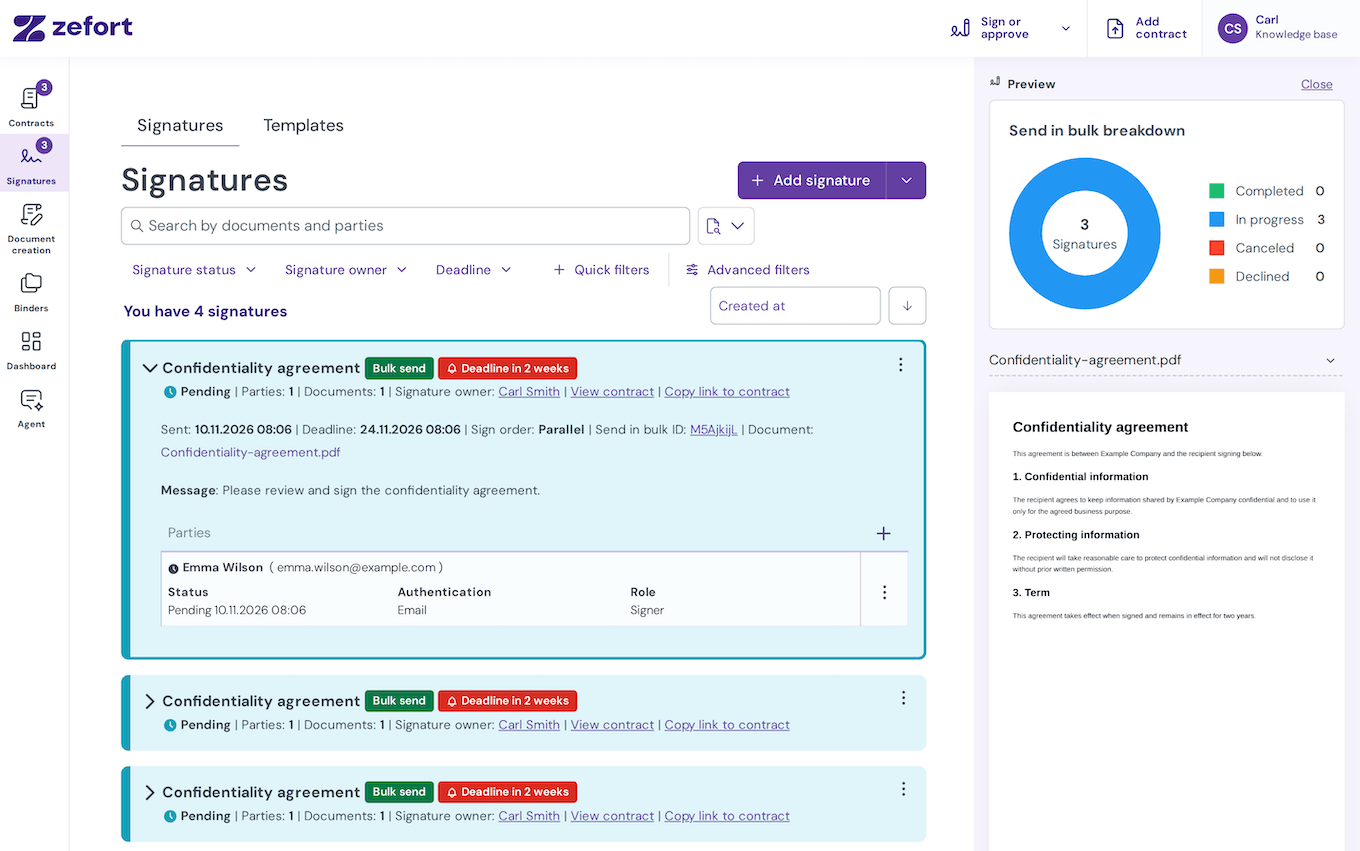
- Open the Signatures view. Your new requests feature a Bulk send label, and each request displays its own individual signing status.
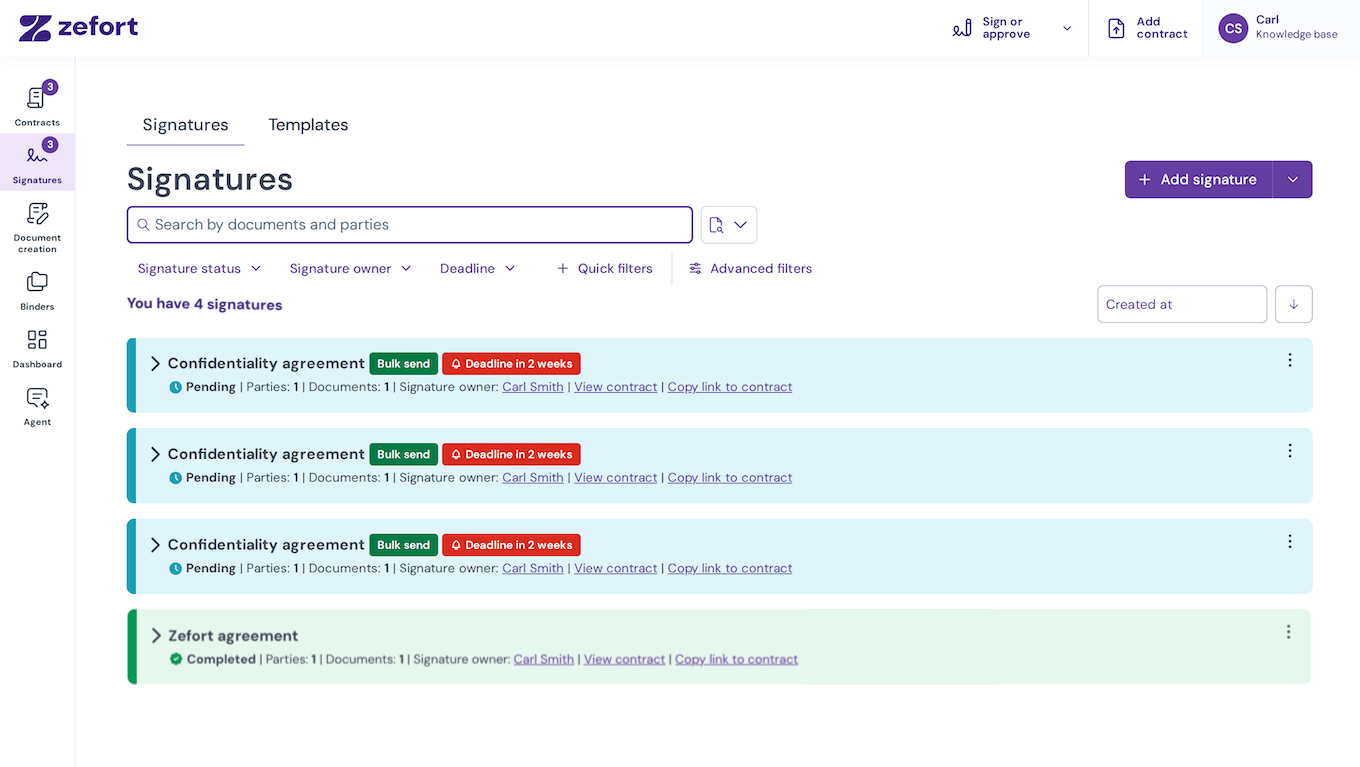
- Click on a specific request to see its details and open the Send in bulk breakdown to see how many requests you have completed, in progress, canceled, or declined.
- Click the Send in bulk ID on any request to filter the view and see only the documents from this specific batch.