Using handwritten signatures and signature stamps
You can place signature stamps in documents that are signed with Zefort Sign. Add placeholders for handwritten signature, initials and stamp if you wish to do so. When receiving the document, the signing party must fill in all the signature fields before they are able to sign the contract.
Adding signature field in Zefort Sign
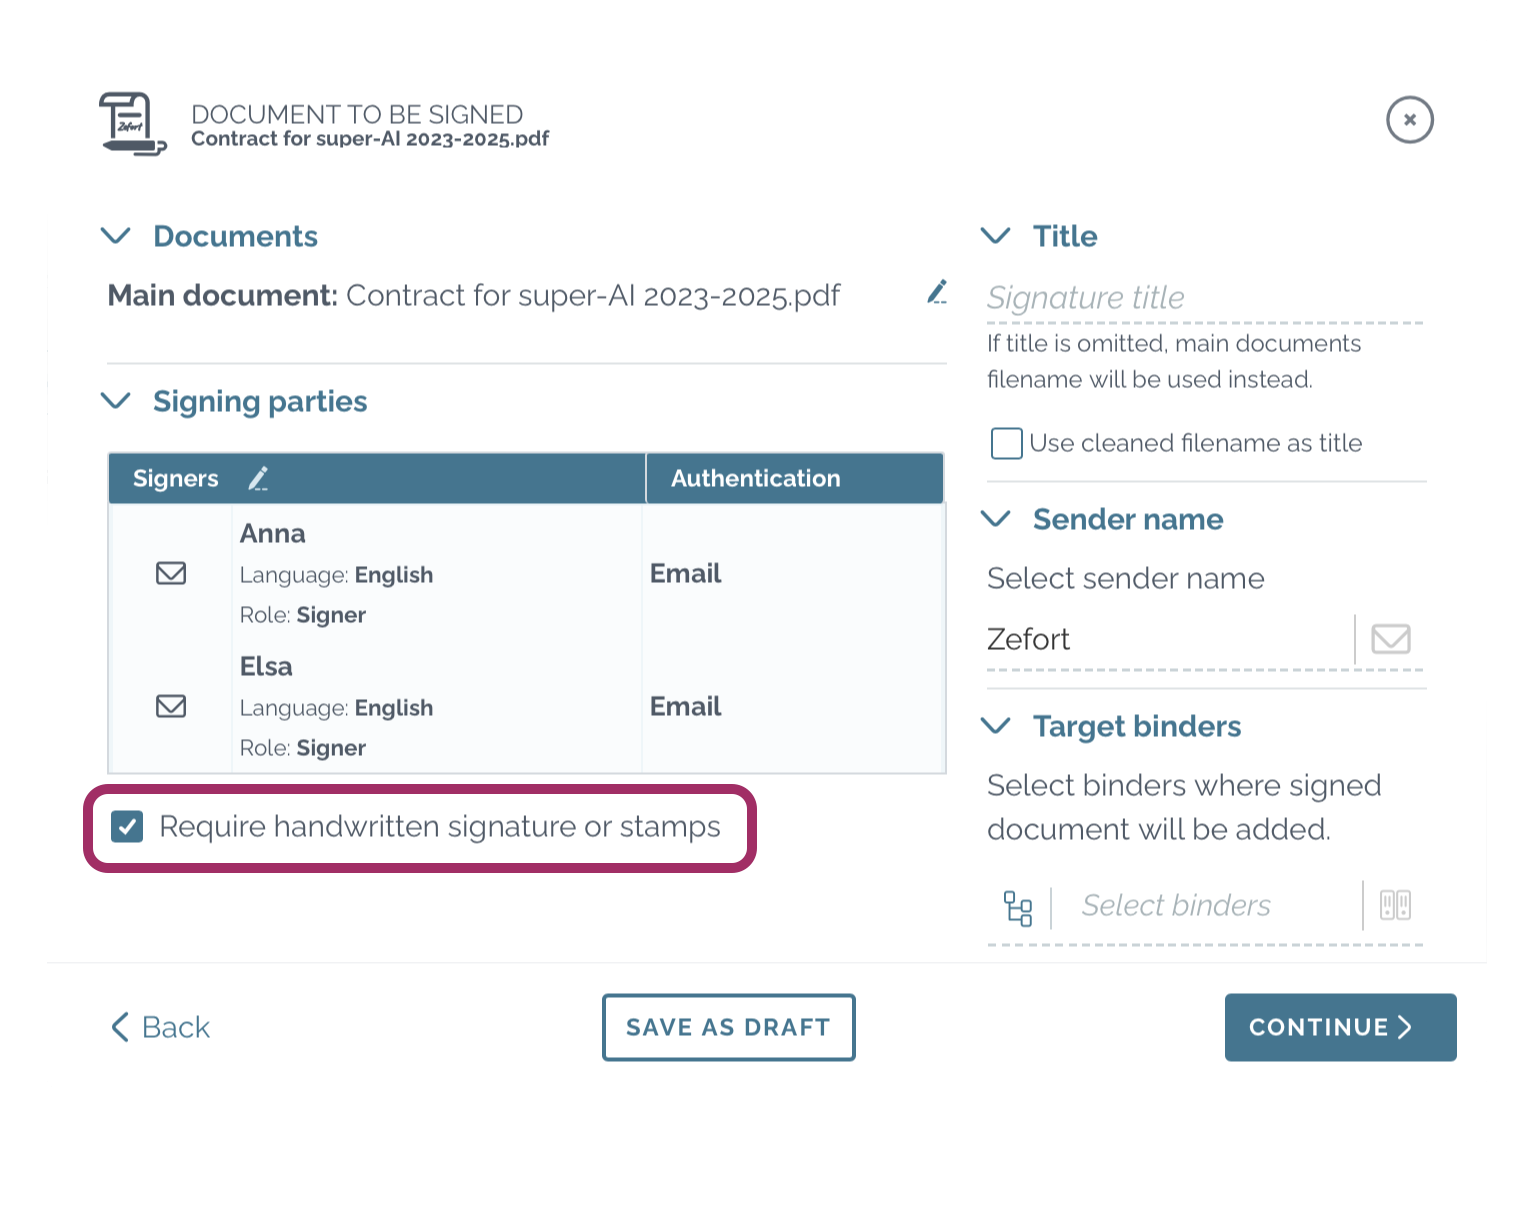
- Start the signature process as usual. In the last page, select option “Require handwritten signature or stamps”
- Click Continue
- Define signature fields

Select the document [1] in which the signature field is to be added 
Choose the signing party [2] 
Select signature type [3]: handwritten signature, initials, or stamp - Scroll through the document preview and click on the spot where you want to place the signature field
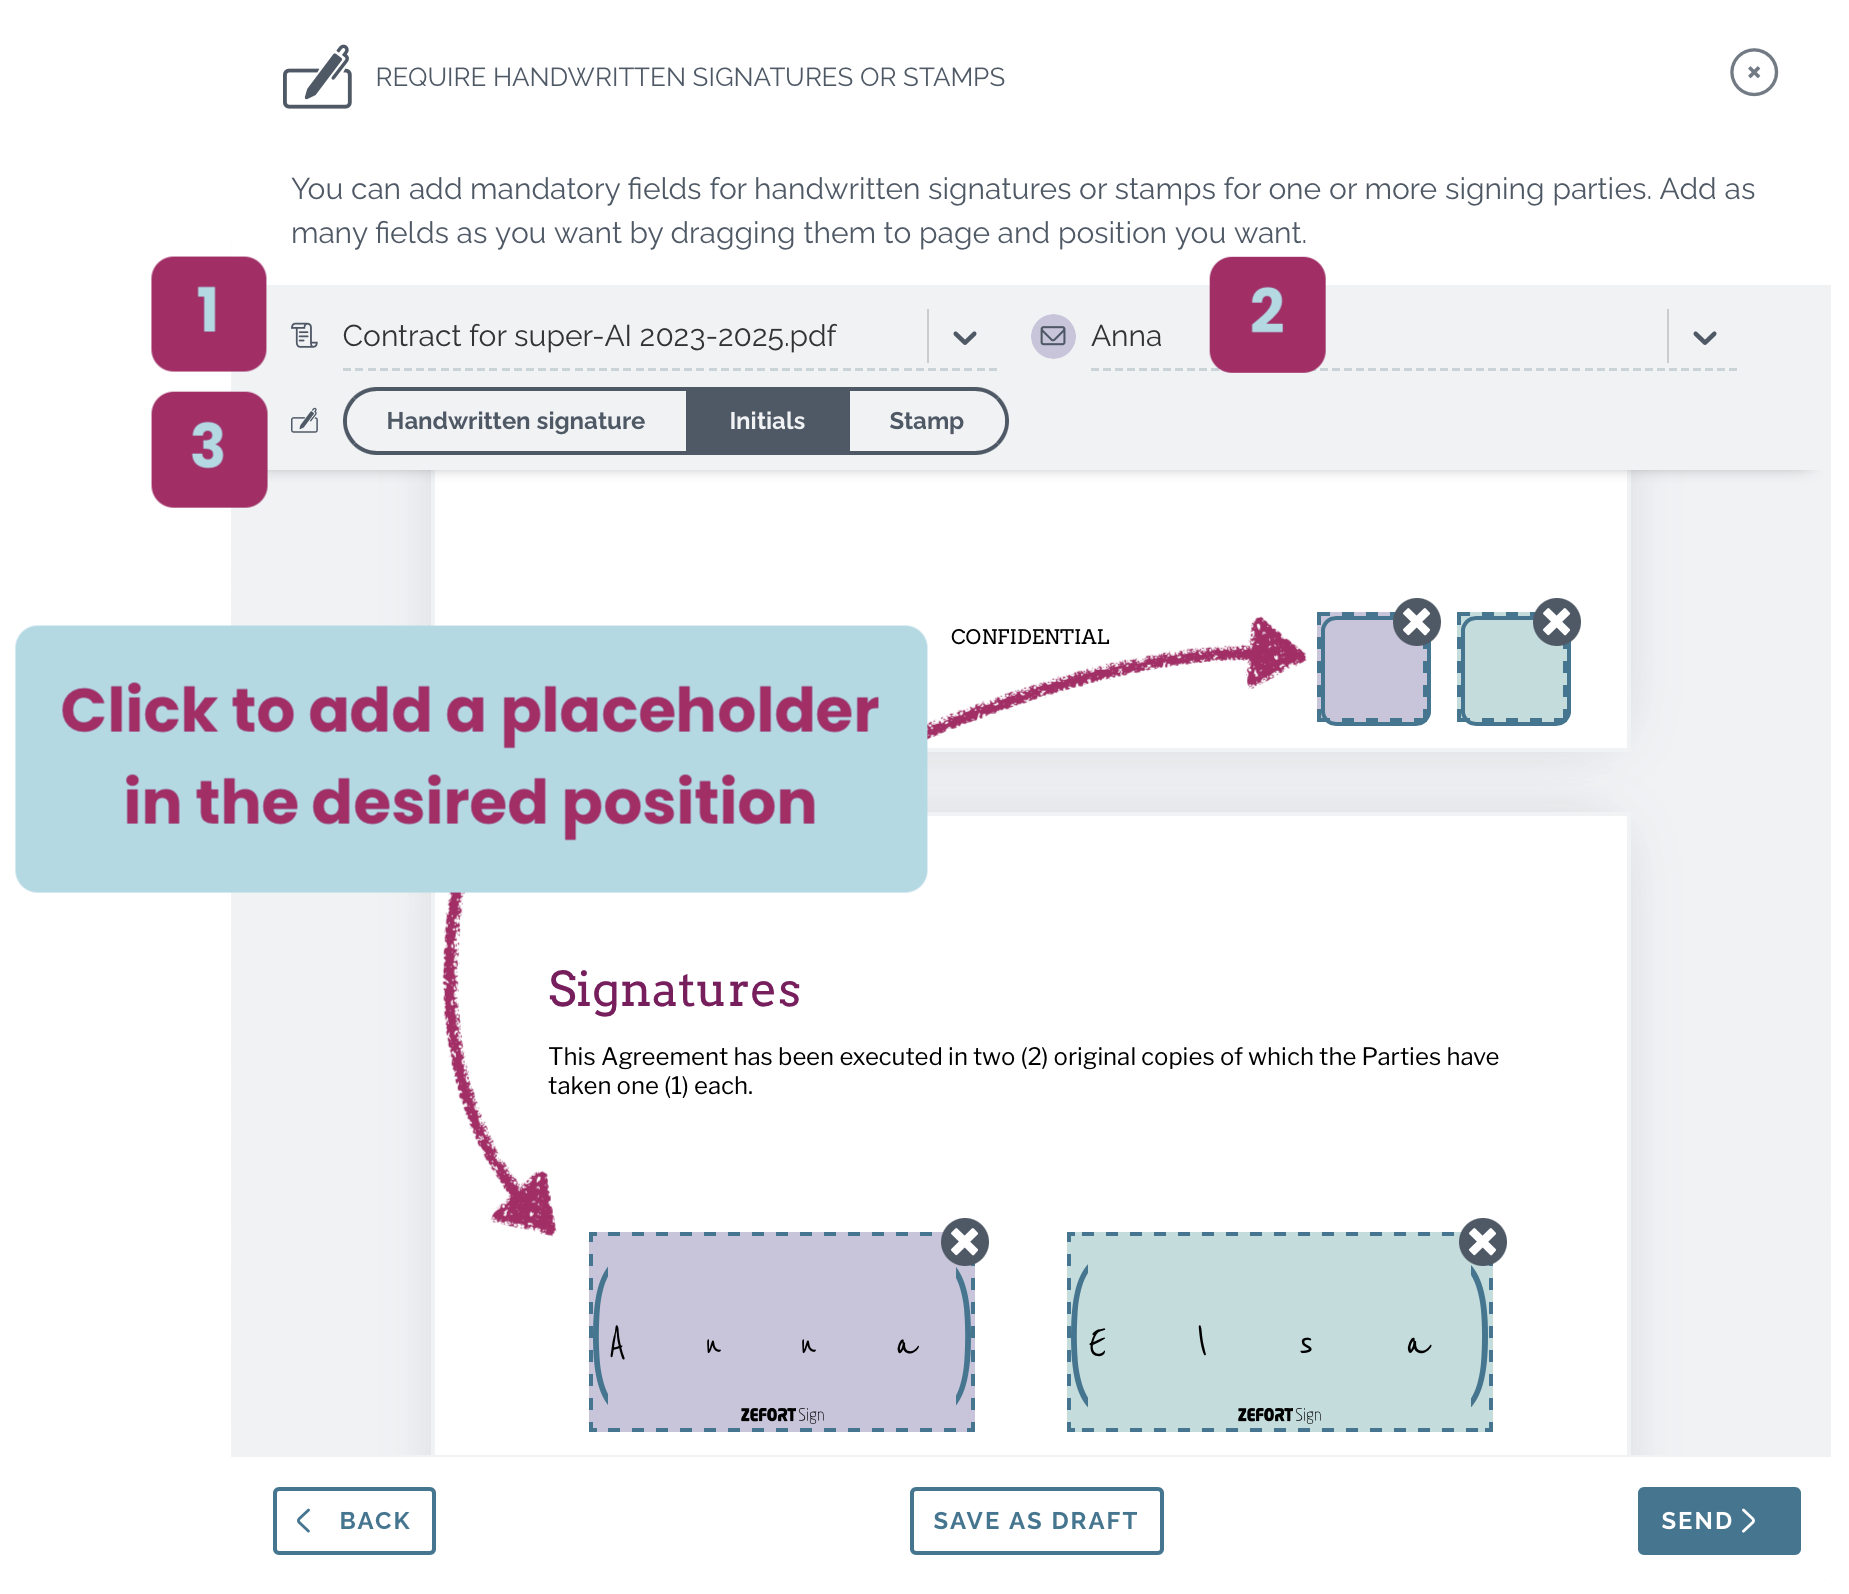
-
- You can add as many signature fields as you like (just repeat the previous step)
- Resize the field by dragging from its corner
- Relocate the field by dragging it
- Remove a field by clicking the cross in its upper right corner

-
- When you are done, click Send or Save as draft
Signing the contract with signature fields
Signer get’s the signature request by email as usual. When they open the request, they’ll need to fill all signature fields before they are able to sign the document.

- Click on the field

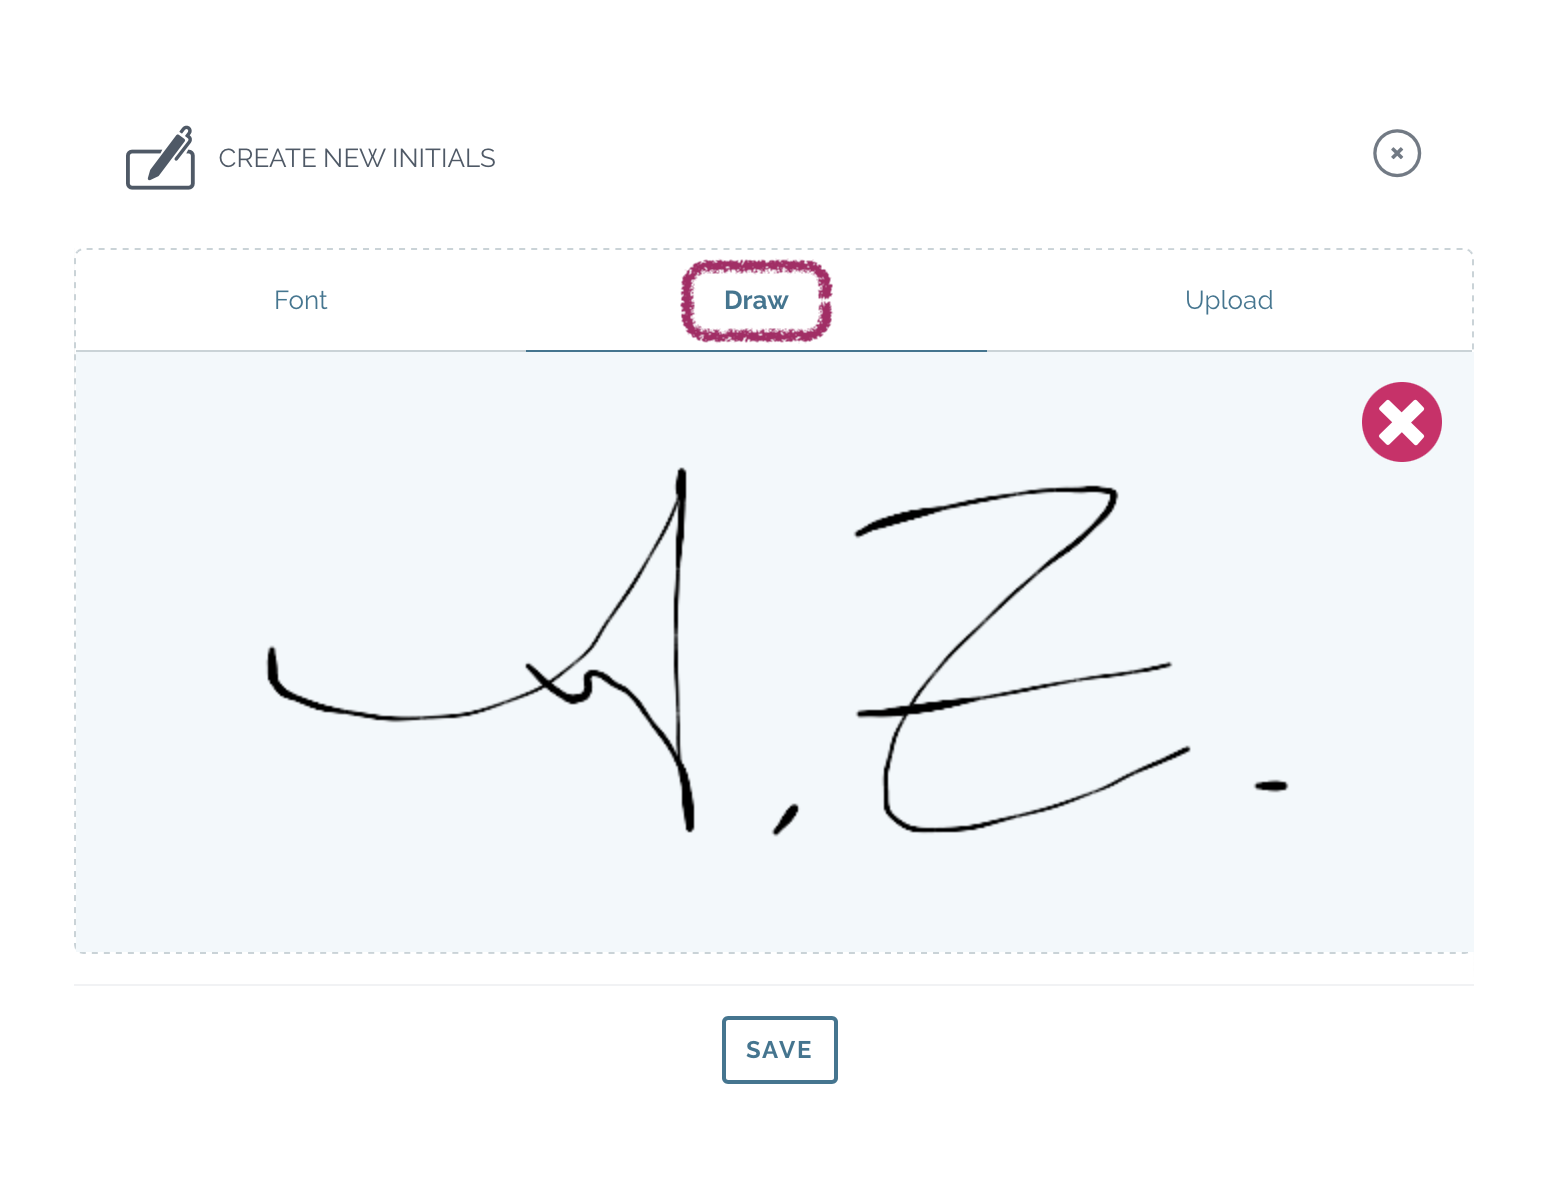
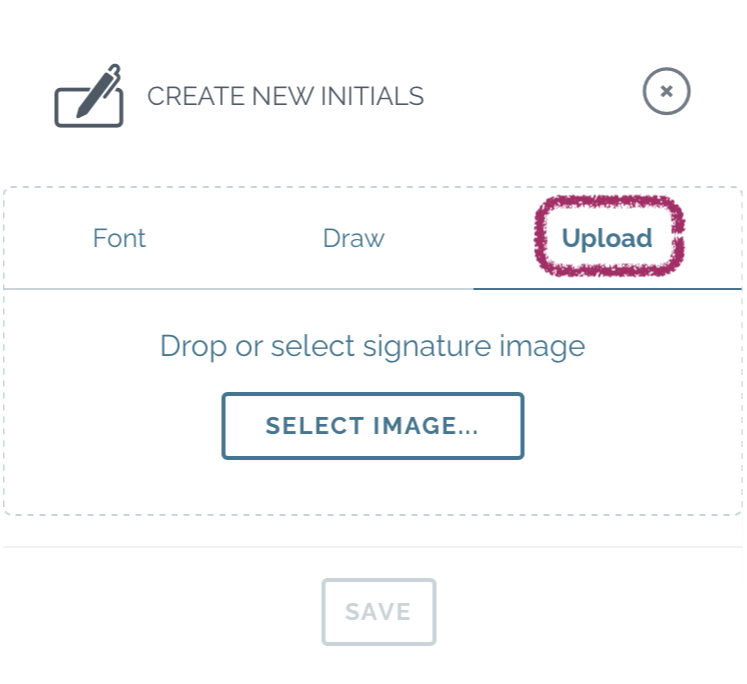
- Create your signature or initials
-
- Font – click on the icon to the left and select which font you want to use, type your initials (max 6 symbols)

- Draw – draw you signature on the canvas
- Upload – upload an image from your computer and use the toggle to switch the stamp from multicolor to black and white
(supported files: jpg, jpeg, png, webp, gif, swg+xml, in Safari heic and heif)
- Font – click on the icon to the left and select which font you want to use, type your initials (max 6 symbols)
-
- Click Save
- Go to next field and click to fill it in.
-
- You can jump to next field be clicking the scroll button

- Find the missing fields by scrolling down and clicking “Fill remaining placeholders”

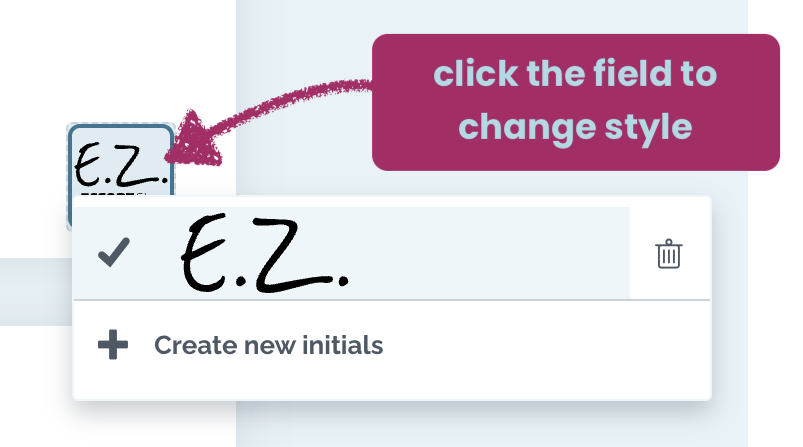
- If you want to change the style, simply click on the filled in placeholder and select another from the list or click
“Create new signature” / “Create new initials” / “Create new stamp”
- You can jump to next field be clicking the scroll button
-
- When all fields have been filled in, you can sign the document
Save signature styles (for Zefort users)
Zefort users can save their own signature styles in their account. Go to My settings > Your signature, initials and stamp images and create your signature, initial and stamp.

The saved signatures, initials and stamps are automatically available when you sign contracts, so you can just fill the placeholders by clicking them (unless you want to make changes, in which case you can just click again on the field and select “Create new signature” / “Create new initials” / “Create new stamp).