Zefort Sign settings
How to configure Zefort Sign settings
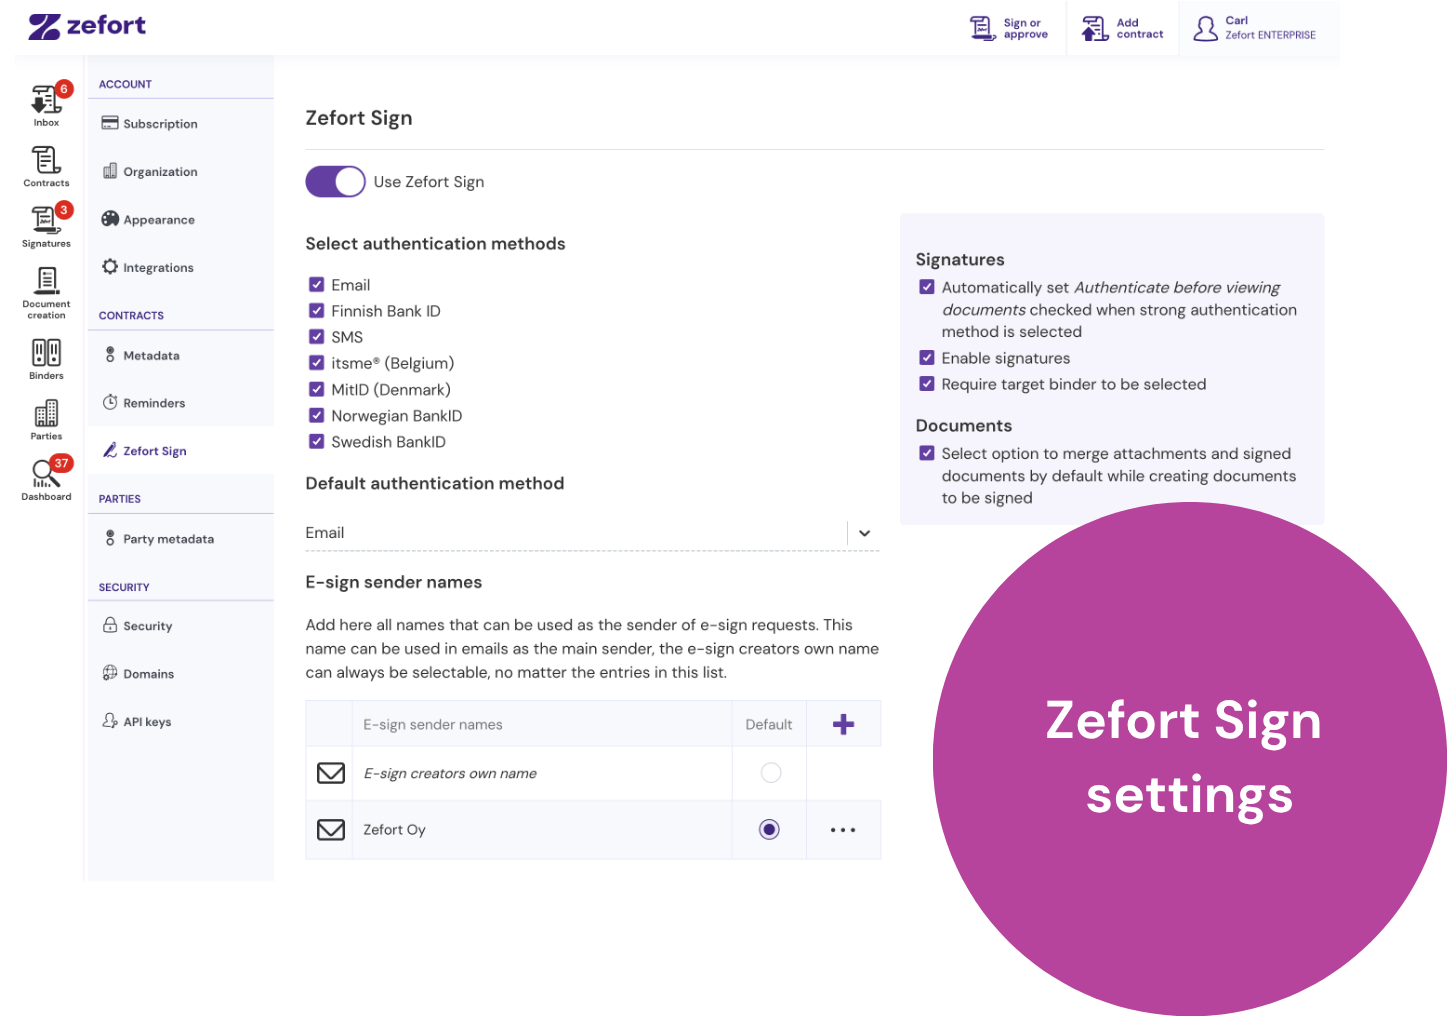
Only the admin with the “Can manage account settings” permission can change these settings for Zefort Sign. To get started, navigate to Account Settings > Zefort Sign.
- Allow use of Zefort Sign
- Authentication methods
- Add e-sign sender names
- Default settings
- Granting Zefort Sign user permissions
General settings
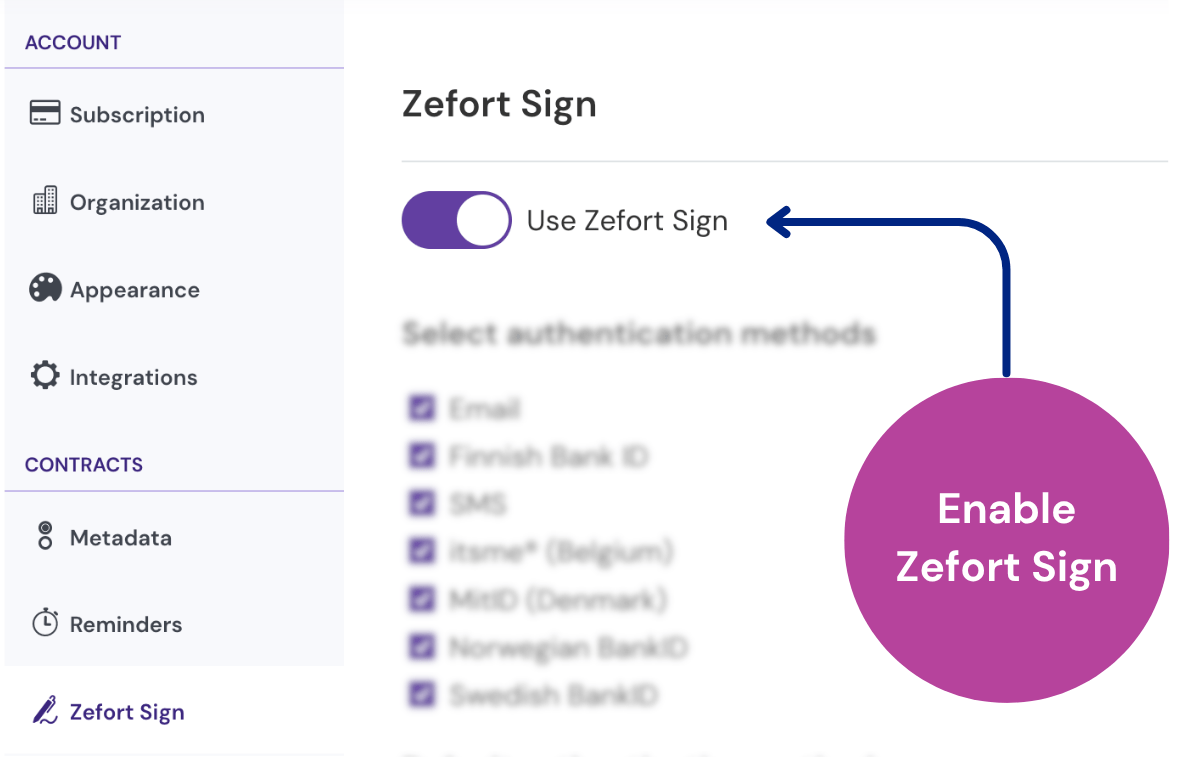
Enable Zefort Sign
To begin using Zefort Sign for e-signatures and approvals in your account, switch this toggle on.
Allowed authentication methods
Choose which methods your users can select to verify a signer’s identity.
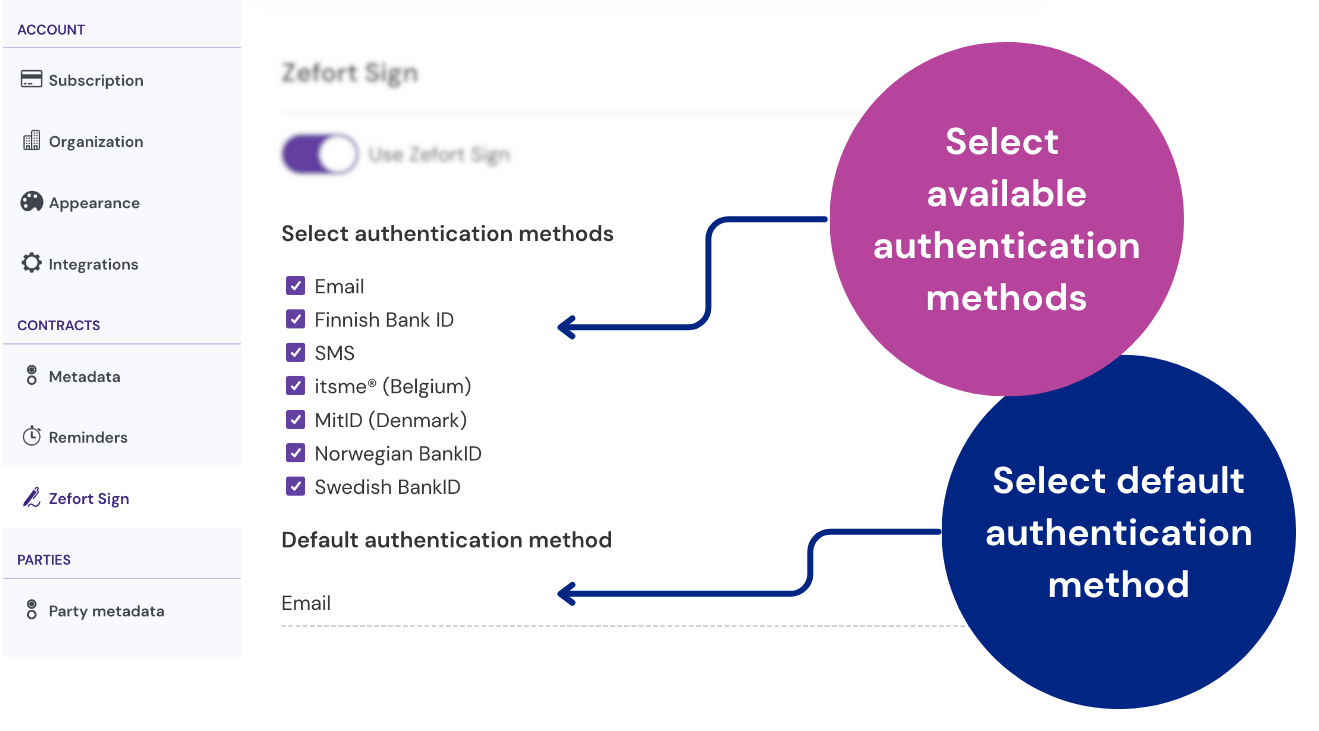
Available options:
- SMS *
- Finnish Bank ID
- itsme® (Belgium) **
- MitID (Denmark)
- Norwegian BankID
- Swedish BankID
* To allow using SMS as authentication method, please make sure that sending SMS is allowed in your account: go to Account settings > Organization > SMS and enable “Use SMS messages for phone number verification and authentication method for E-Sign“.
** The itsme® service is not enabled by default. Please contact our sales to add this feature.
Default authentication method
Select a default authentication method for all new signature requests [3]. Users can still change this for individual signers if other methods are allowed.
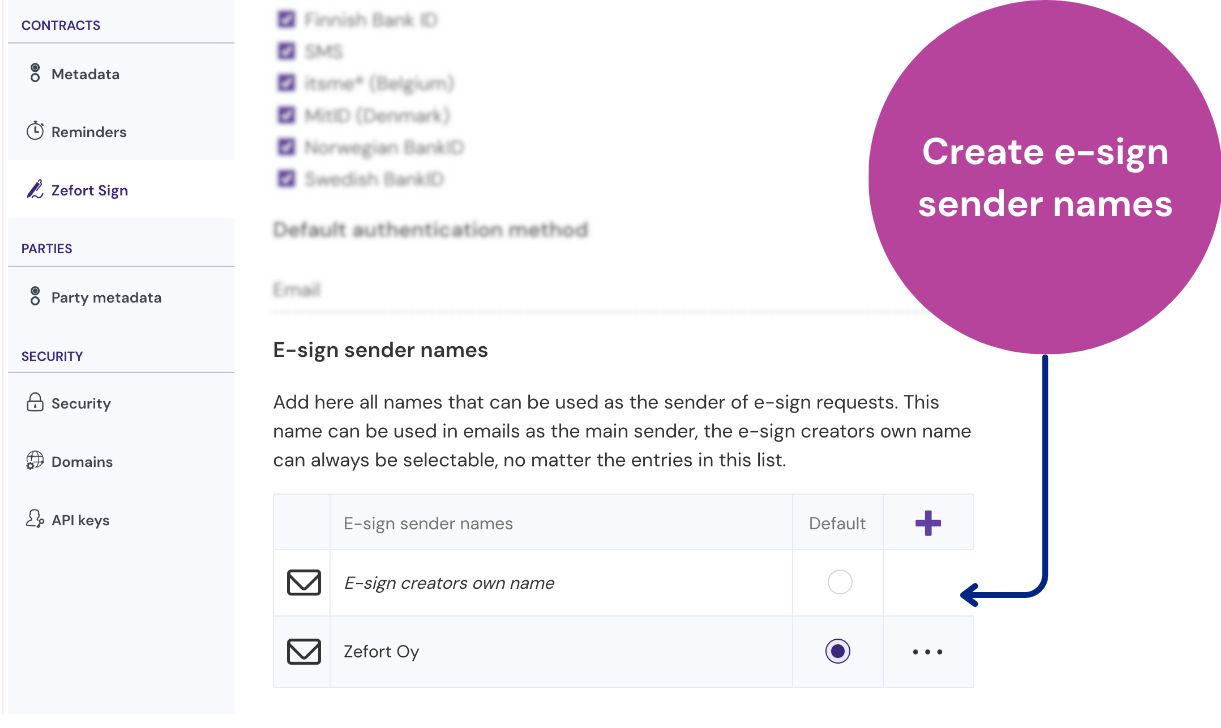
E-sign sender names
Instead of sending signing requests from an individual user, you can add shared sender names (like “Company A”) [5].
See our guide: Selecting signature request sender
Default settings for signatures and documents
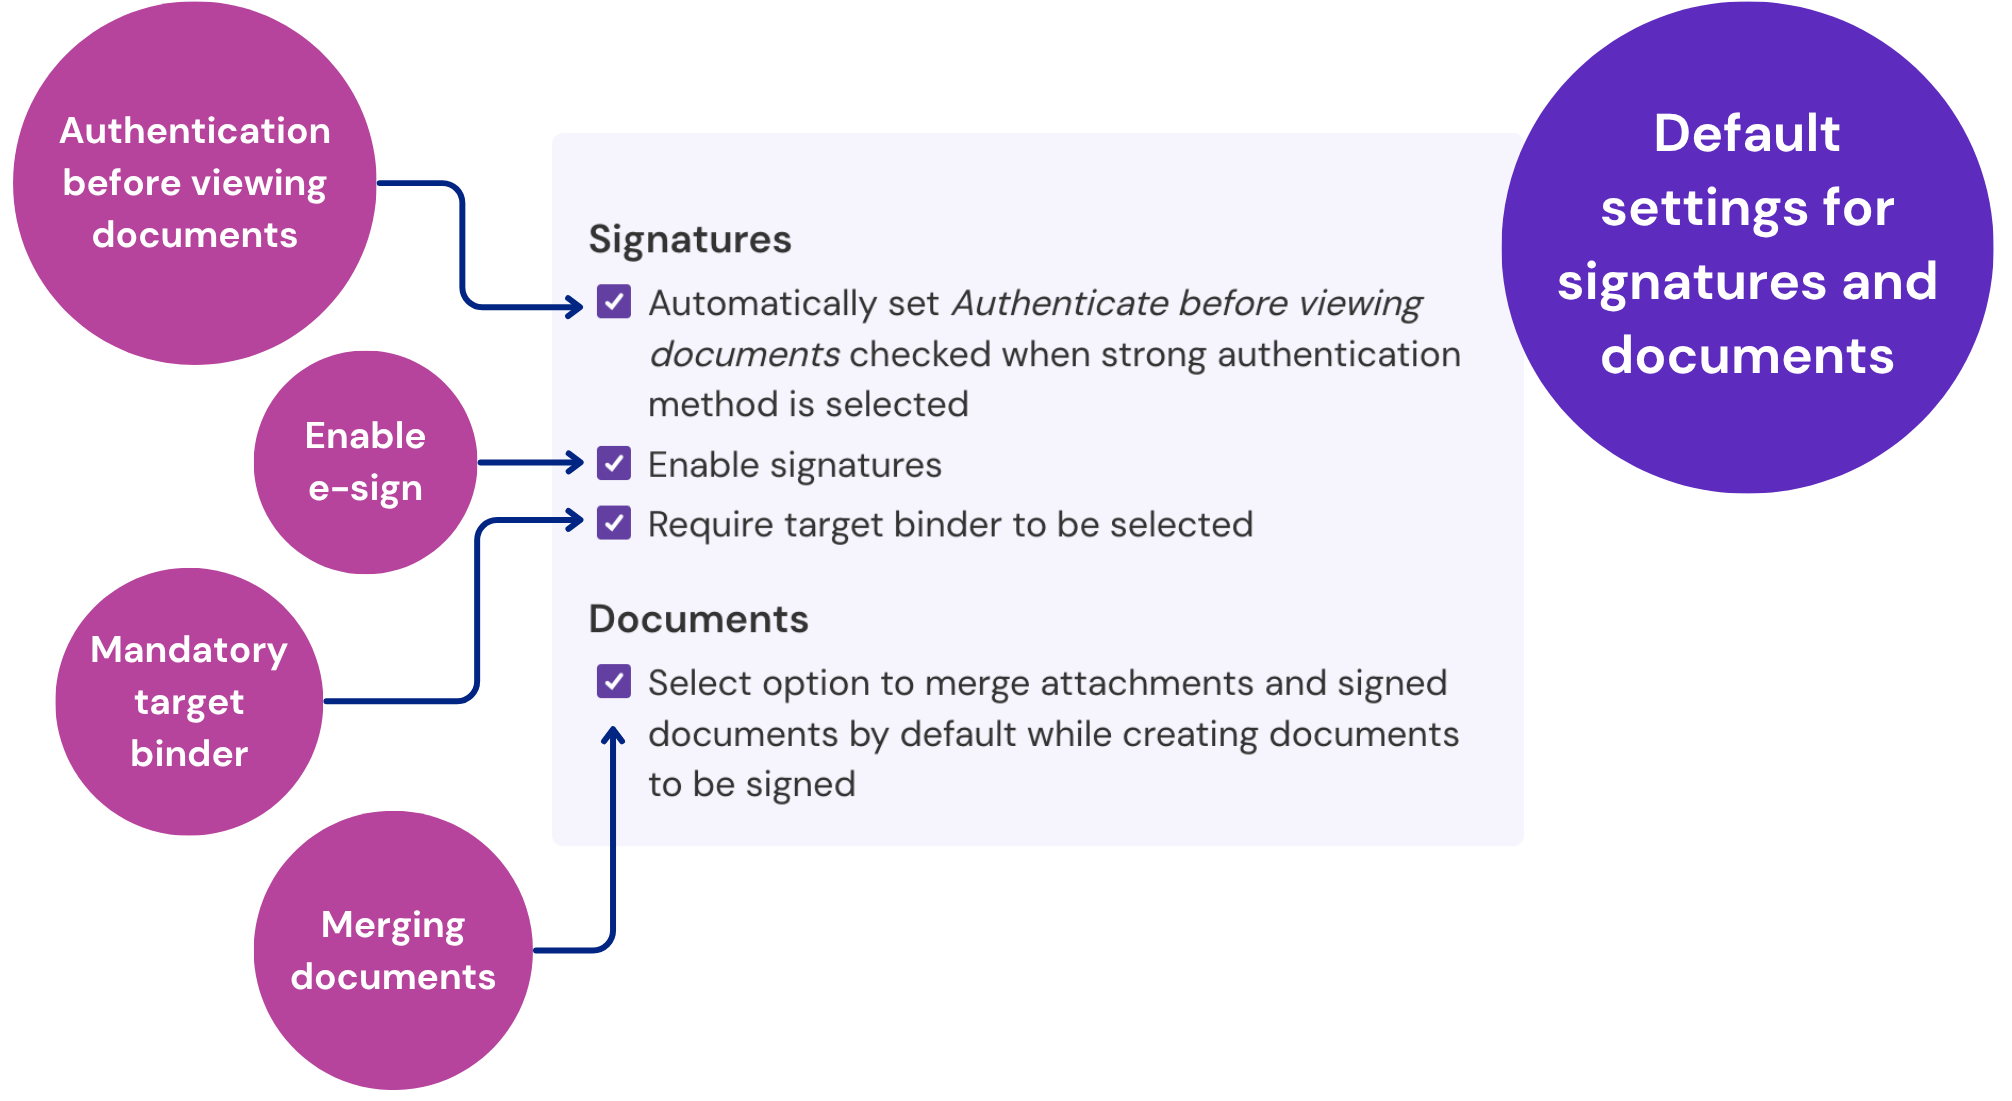
Authentication before viewing documents
When you enable the option “Automatically set Authenticate before viewing documents checked when strong authentication method is selected“, this setting will be turned on by default for any party that uses strong authentication method (like bank ID).
Please note: This is a default setting. The sender can still turn this off for individual signature requests.
Enable signatures
Allow Zefort Sign to be used for e-signatures by checking option “Enable signatures“. If you disable this, the tool can only be used for approving documents.
Require a target binder
Enable the option “Require target binder to be selected” to ensure users add a binder for the contract. When this is on, users must choose a destination binder for any document that is not already in one.
Note! If you make target binders mandatory, you must also designate specific binders as signature targets.
- Why? A user’s ability to add contracts to a binder might be restricted in two separate ways:
- By license: users with a Signer or Viewer license cannot add contracts to binders by default.
- By binder permission: any user who has only “View” permission for a specific binder is also unable to add contracts to it.
- Making a binder a “signature target” grants them the specific permission needed to save the final signed document there.
- Without at least one “signature target” binder available, users who fall into either of the above categories will be blocked from sending documents for signature.
Merge documents by default
By checking option “Select option to merge attachments and signed documents by default while creating documents to be signed“, the contract and its attachment are merged into one signed PDF. If turned off, only the main document is signed.
Pleaes note: This is a default setting. The sender can still change this when creating the signature request.
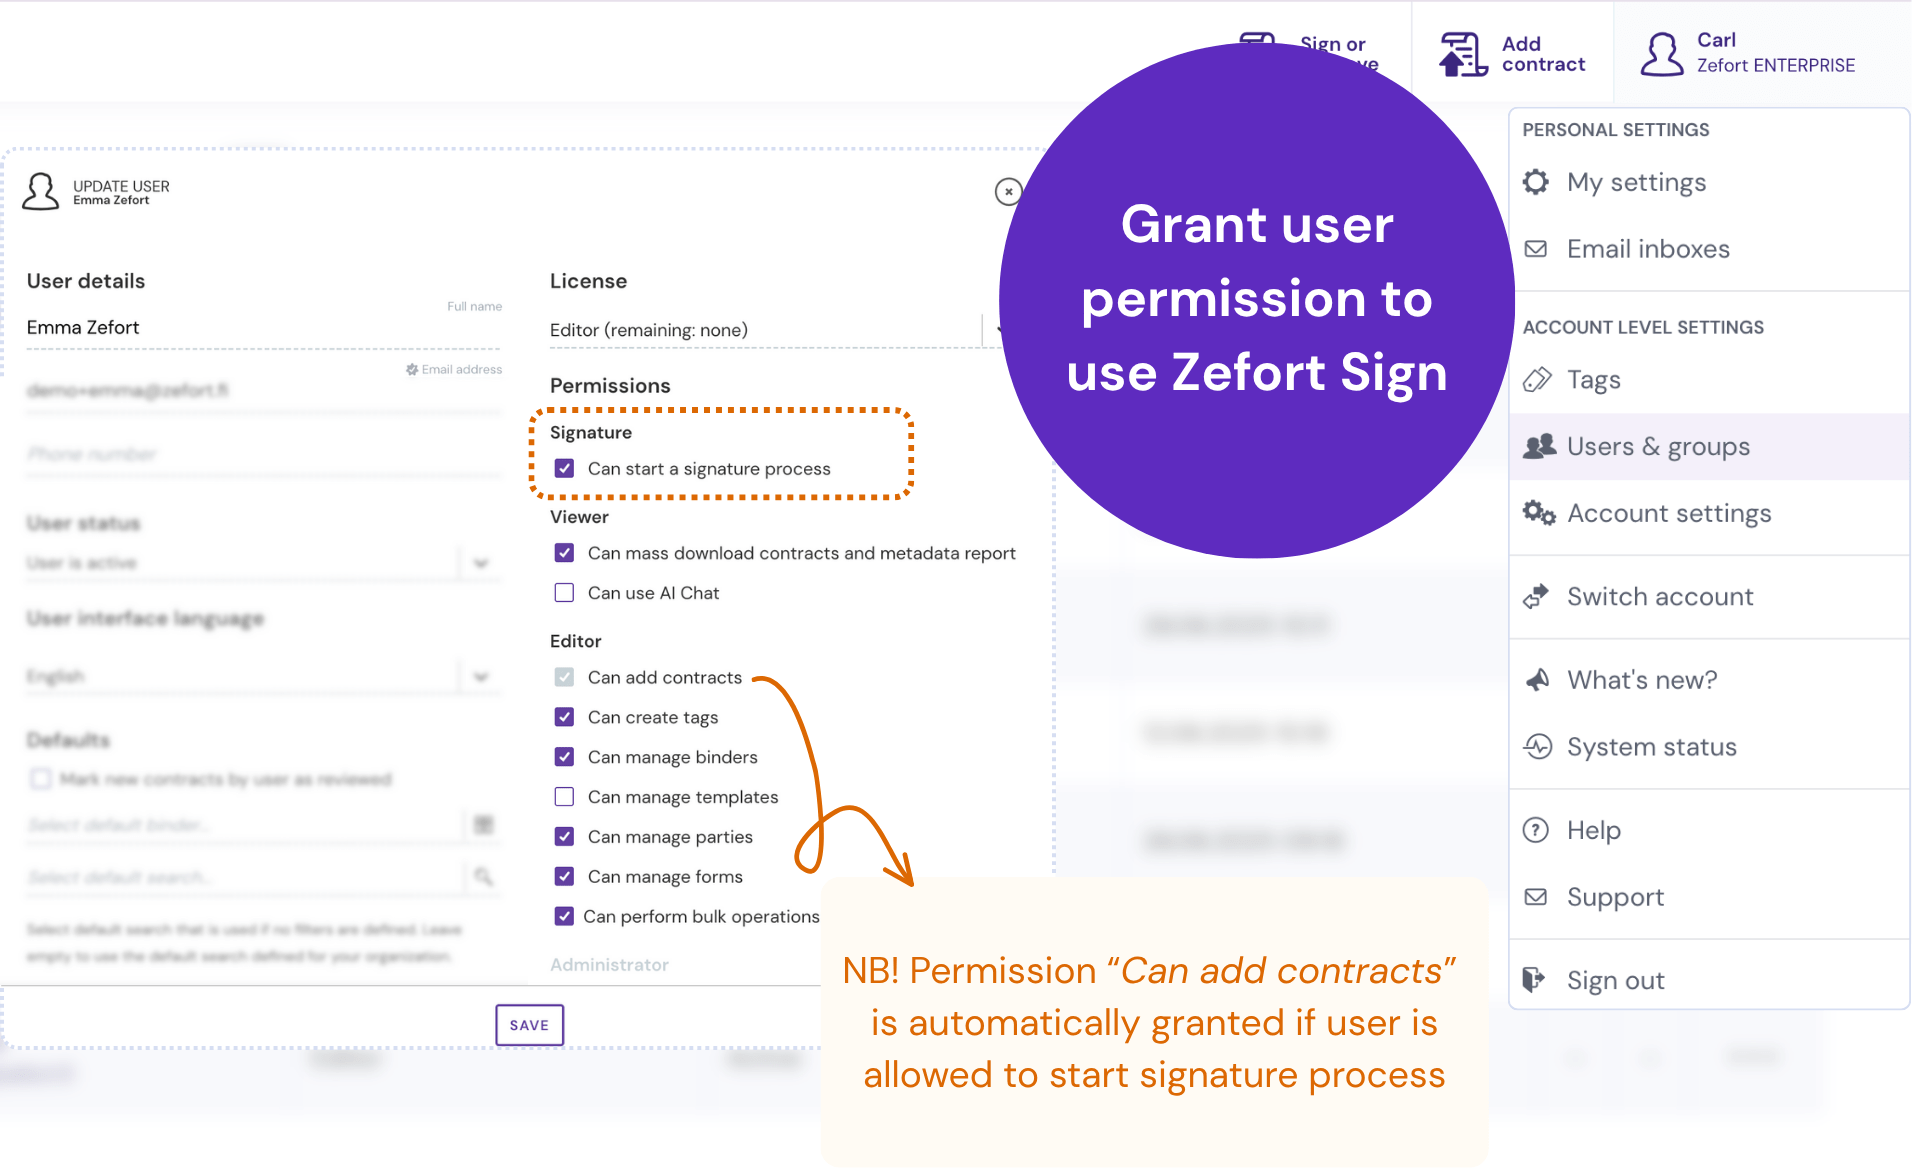
Granting Zefort Sign user permissions
To let a user send signature requests, edit their profile and enable the “Can start a signature process” permission. This can be added to any user role (Signer, Viewer, Editor, or Admin).
Remember: A person does not need a Zefort account just to sign or approve a document they have received.