Creating new form
Follow these steps to create a new form!
- Create a new form
- Content editor
- Form settings
- Attachments
- E-sign settings
- Preview & share
- Submissions
- Publish the form
Create a new form
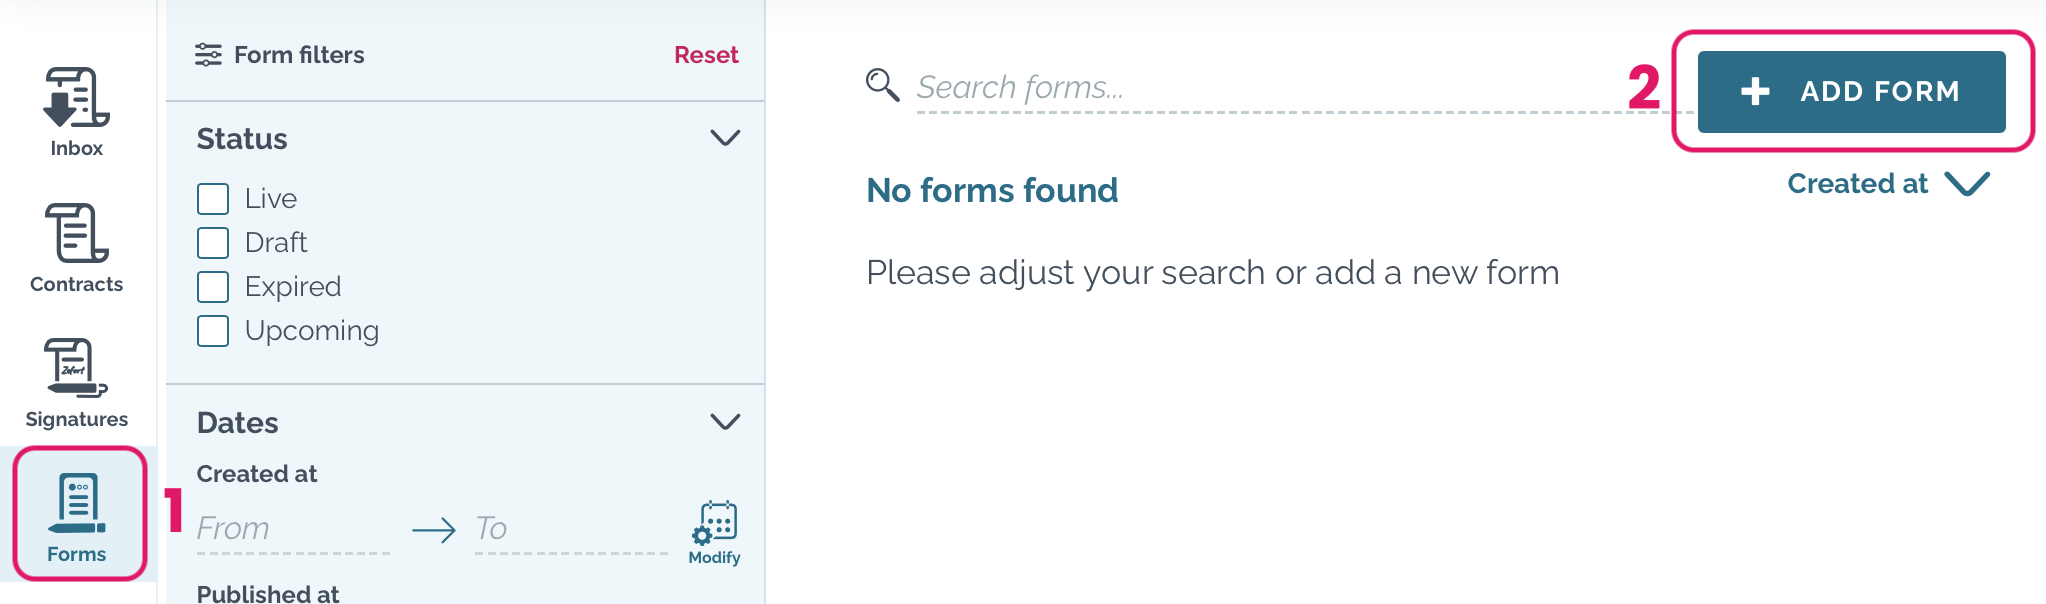
- Open Forms [1]
- Click + ADD FORM [2]
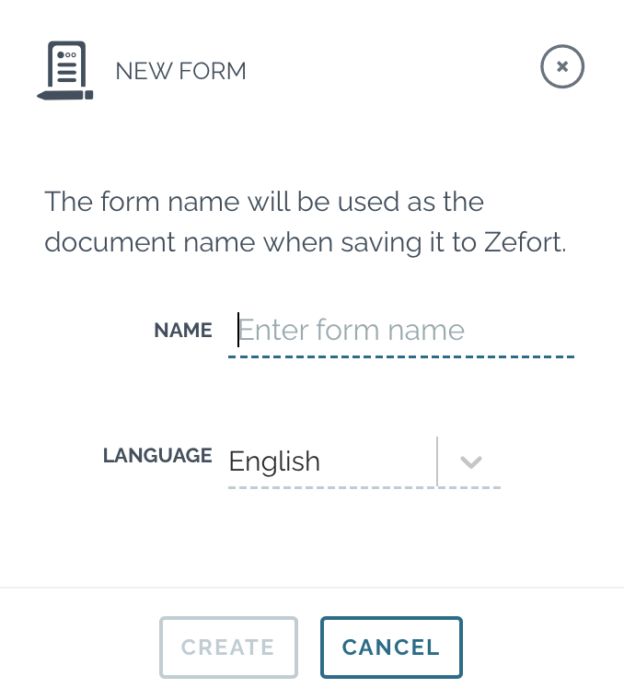
- Give the form a name and select the language (this can be changed later)
- Click CREATE
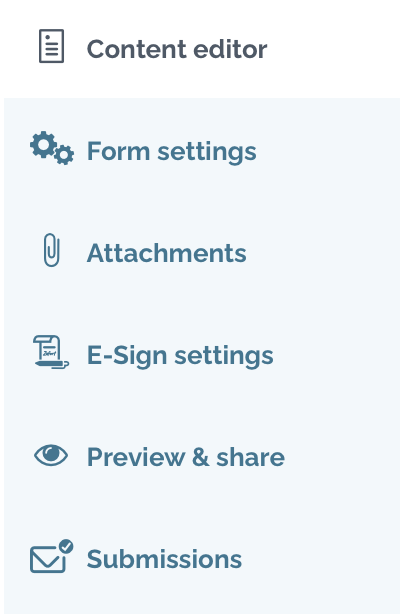
Now, a draft form is created. On the left side panel you see the various process steps for completing your form.
Let’s start by creating the form content.
Content editor
In the middle section you see the form, which you can modify by adding or removing various content blocks (e.g. free text fields, selection, quantity field, date fields, file upload).
- Either click the “Add block” button or drag a block to the content editor from the blocks panel on the right
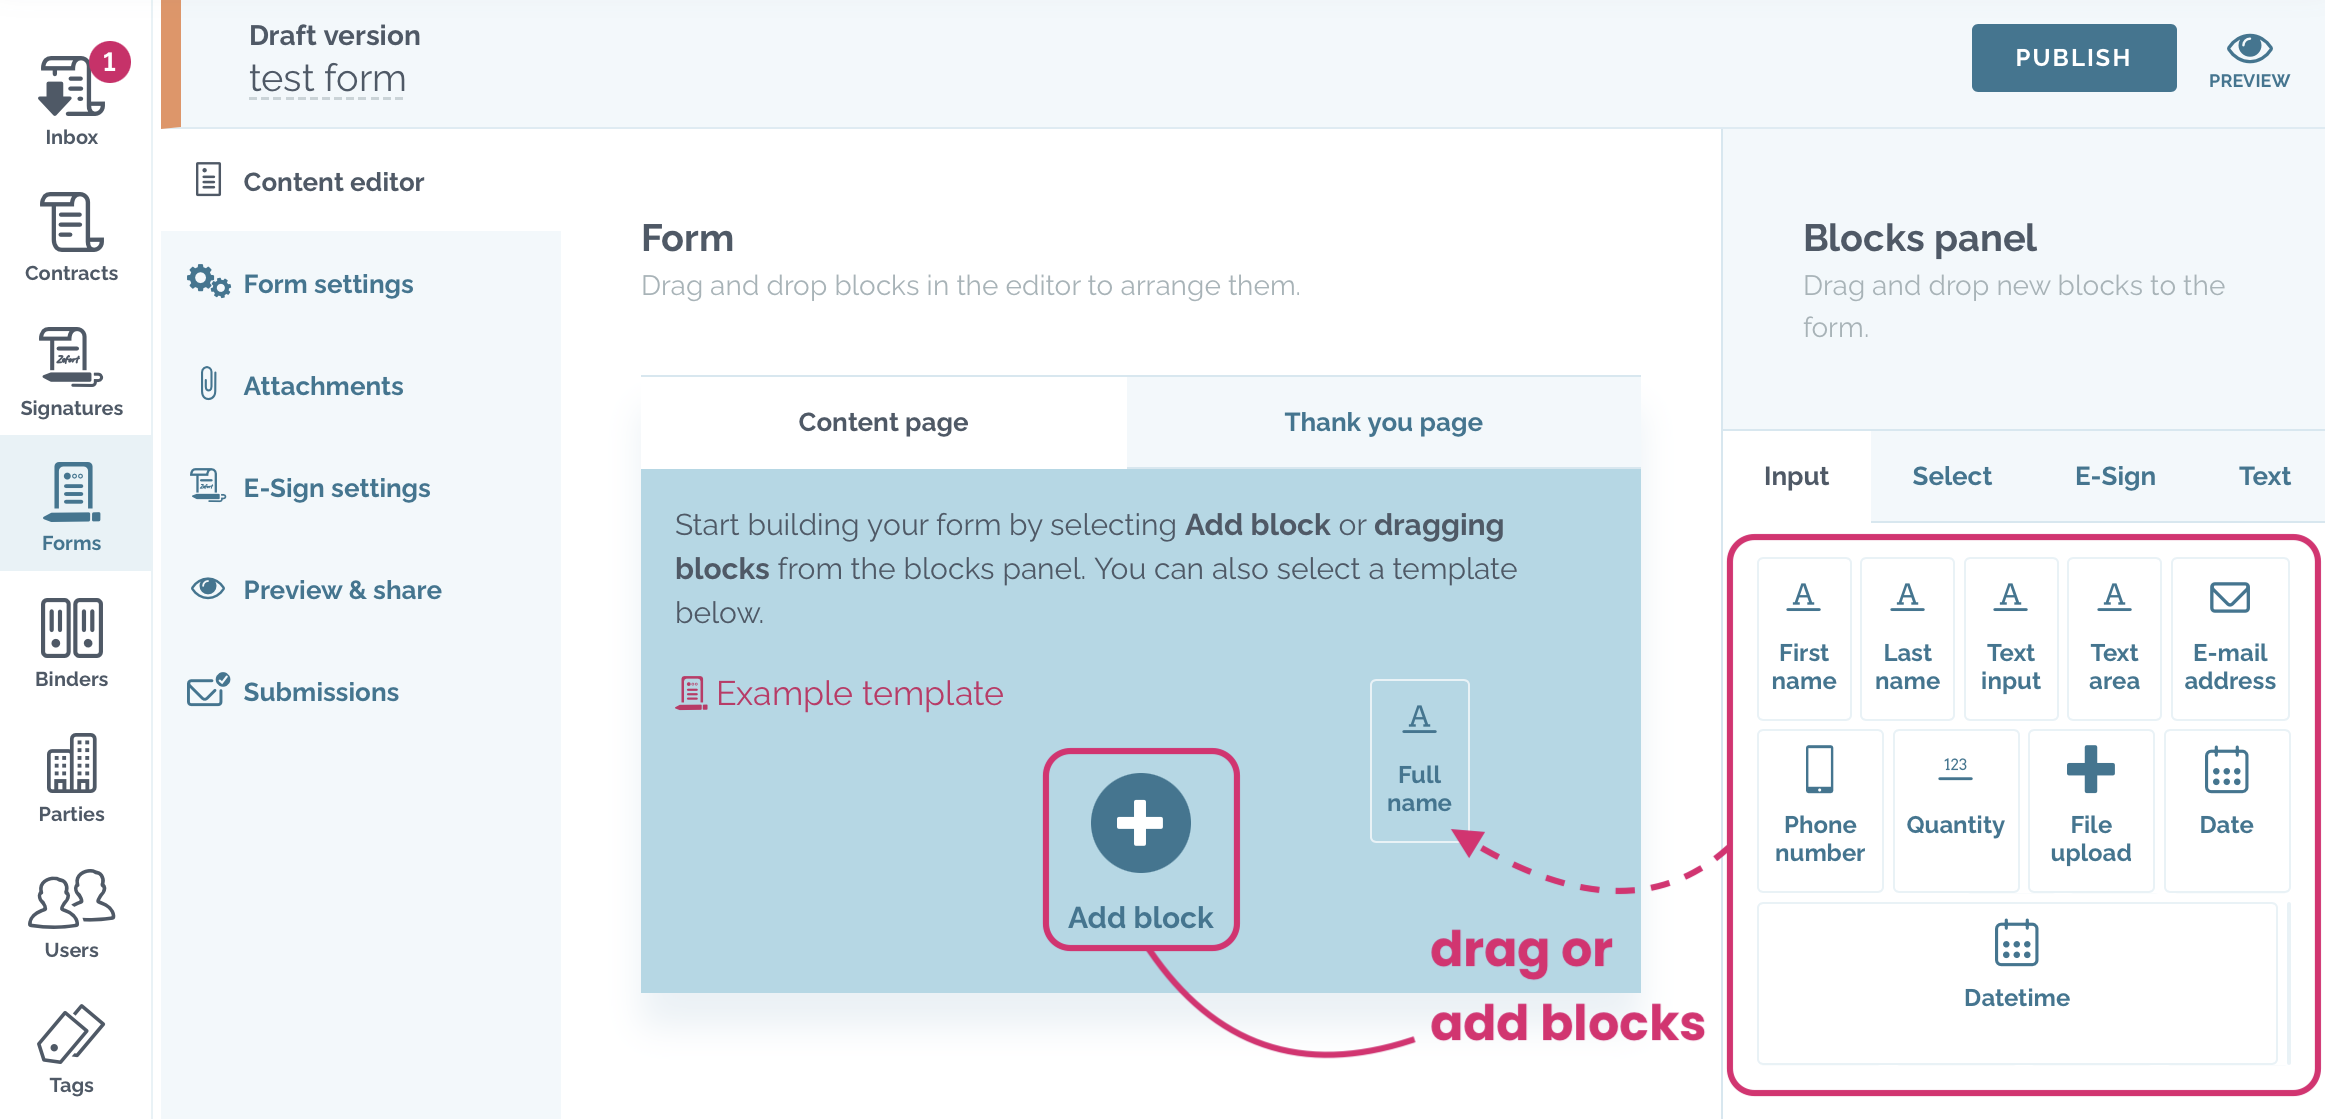
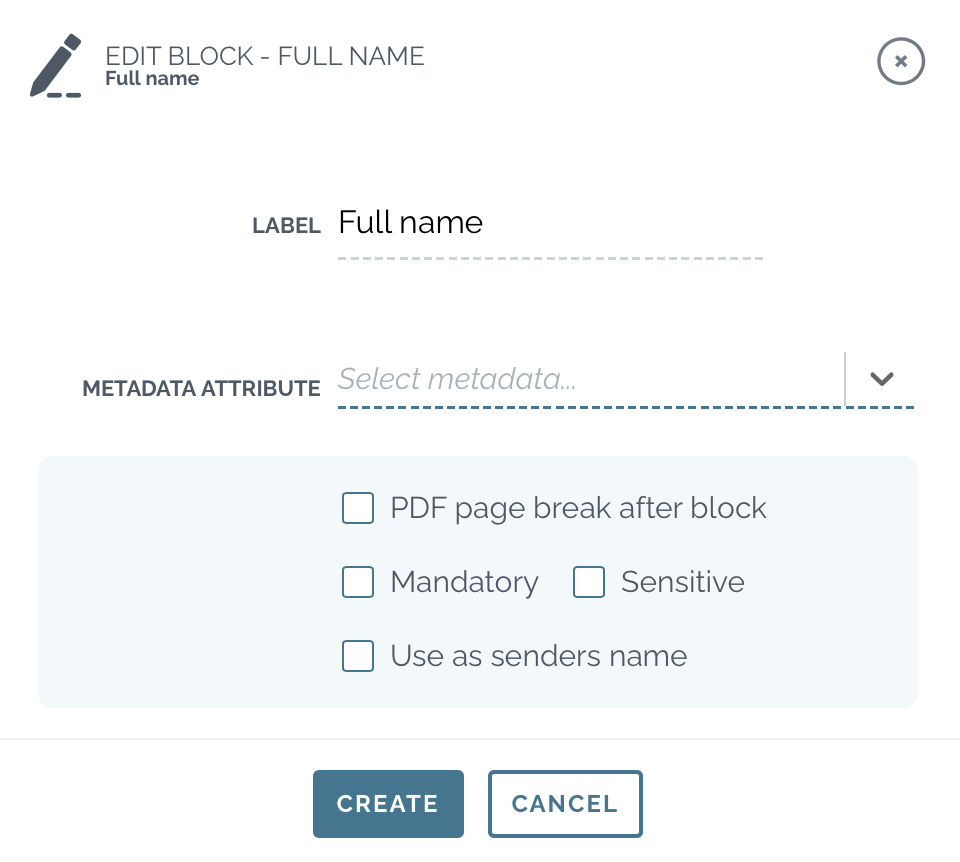
- Edit the properties for each block and click CREATE to add the block
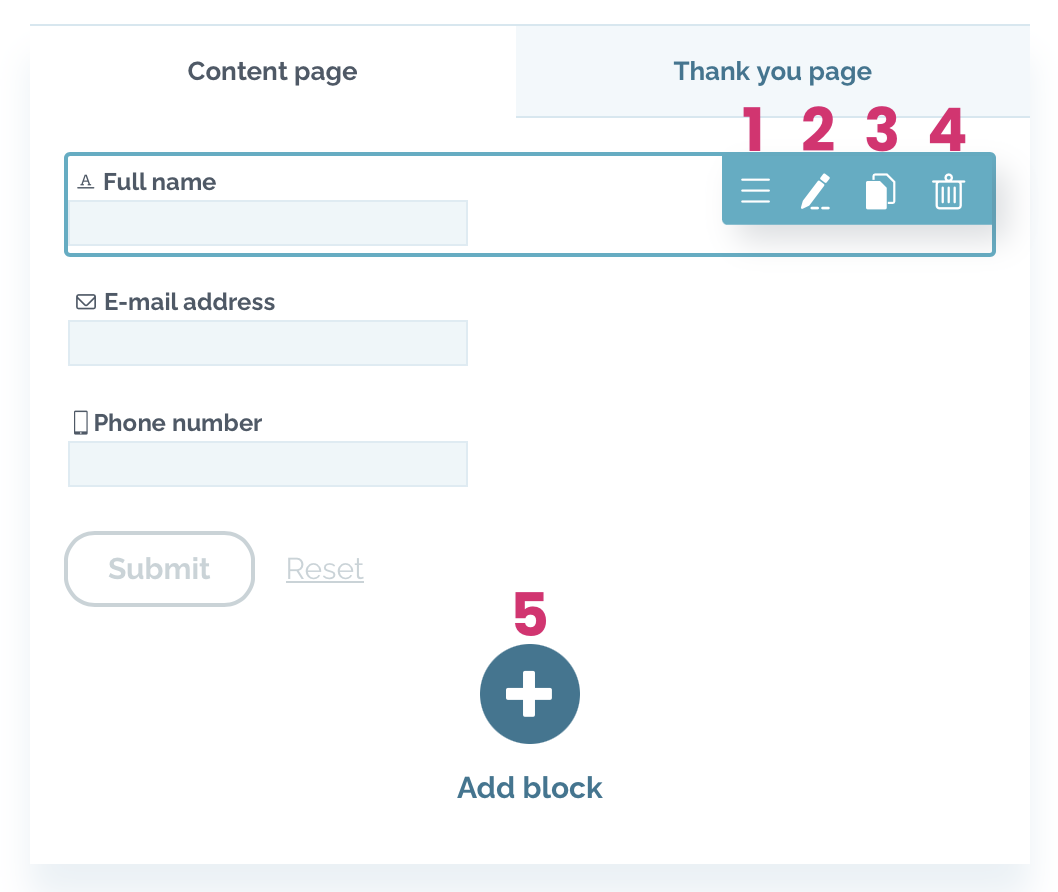
- Edit your form:
- organize the blocks by dragging and dropping [1]
- edit block [2]
- copy block [3]
- remove block [4]
- add new blocks [5]
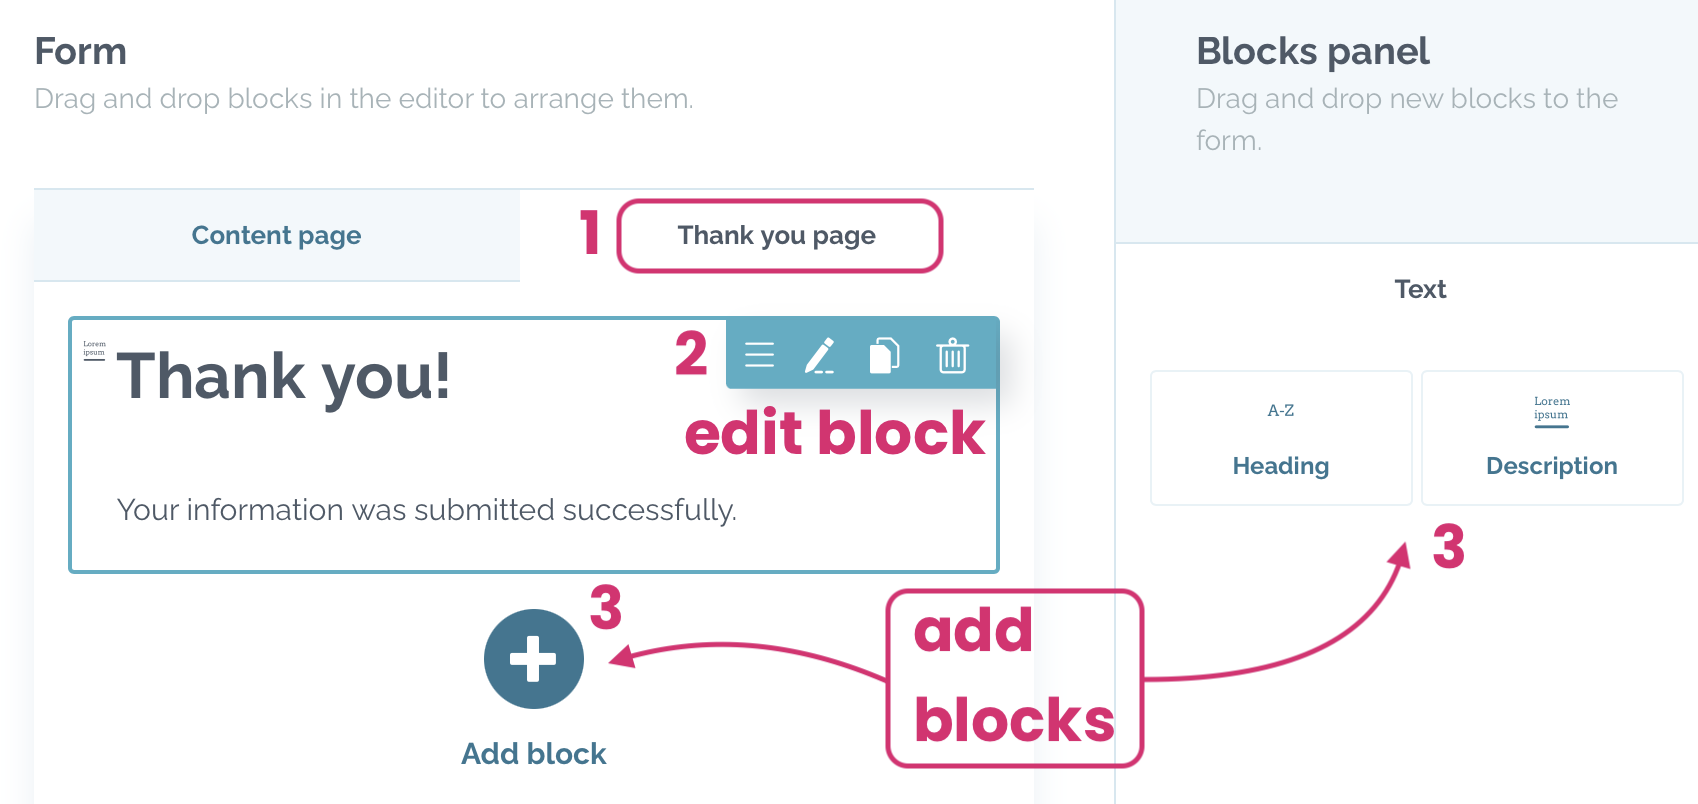
- Fill in “Thank you” page [1]: this is the message that is shown when the form has been filled, signed and submitted
- edit block [2]
- add heading and description blocks [3] by dragging or clicking “Add block“
Form settings
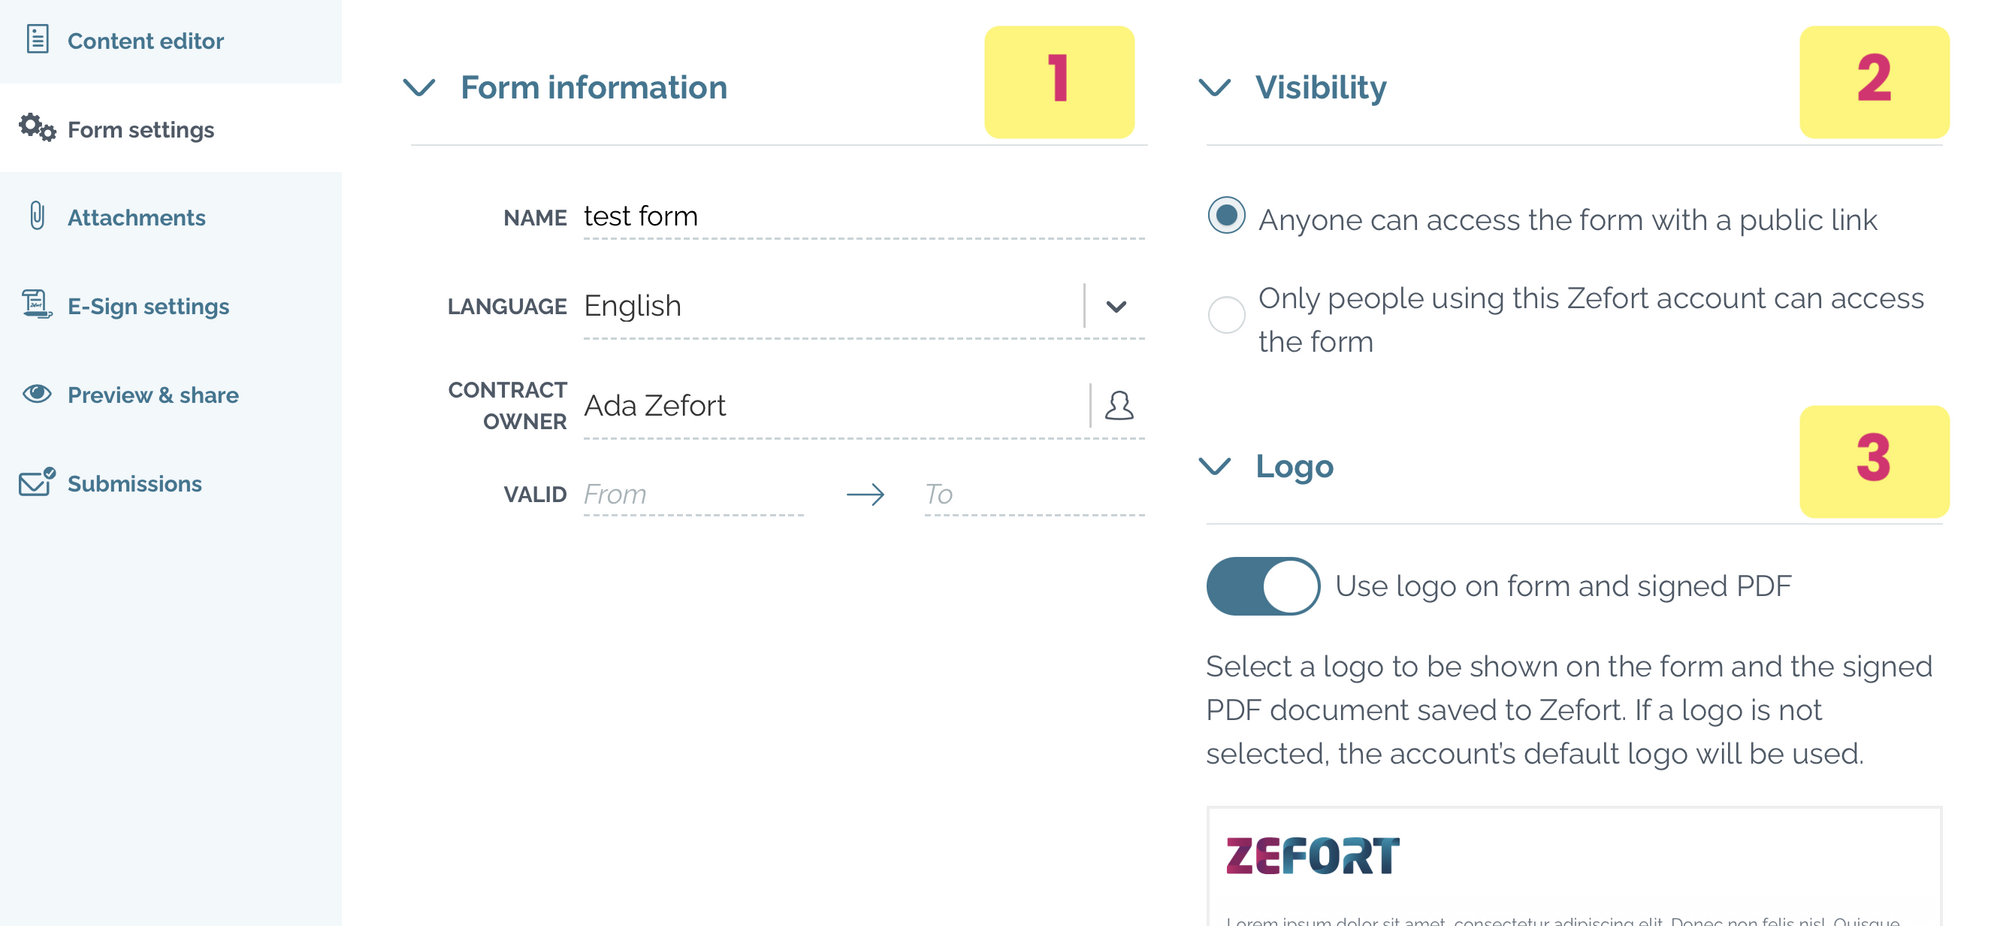
Form information [1]
- edit form name
- select language
(Note! if you change language at this point, the language of already added blocks is not changed automatically) - choose contract owner (by default, this is the user that created the form)
- select form validity
Visibility [2]
Select the visibility of the form:
- accessible to anyone with the link
- available only for Zefort users in your account
Logo [3]
- Toggle on this option if you wan to use a logo in your form header
- Use the default logo uploaded to your organization’s account or upload your own logo
- Select logo position (left, center, right)
Attachments

All attachments will be shown in the form, where the form filler can download them. Attachments are included in the signed document too.
Note: Only PDF files (without password protection) are supported.
E-Sign settings
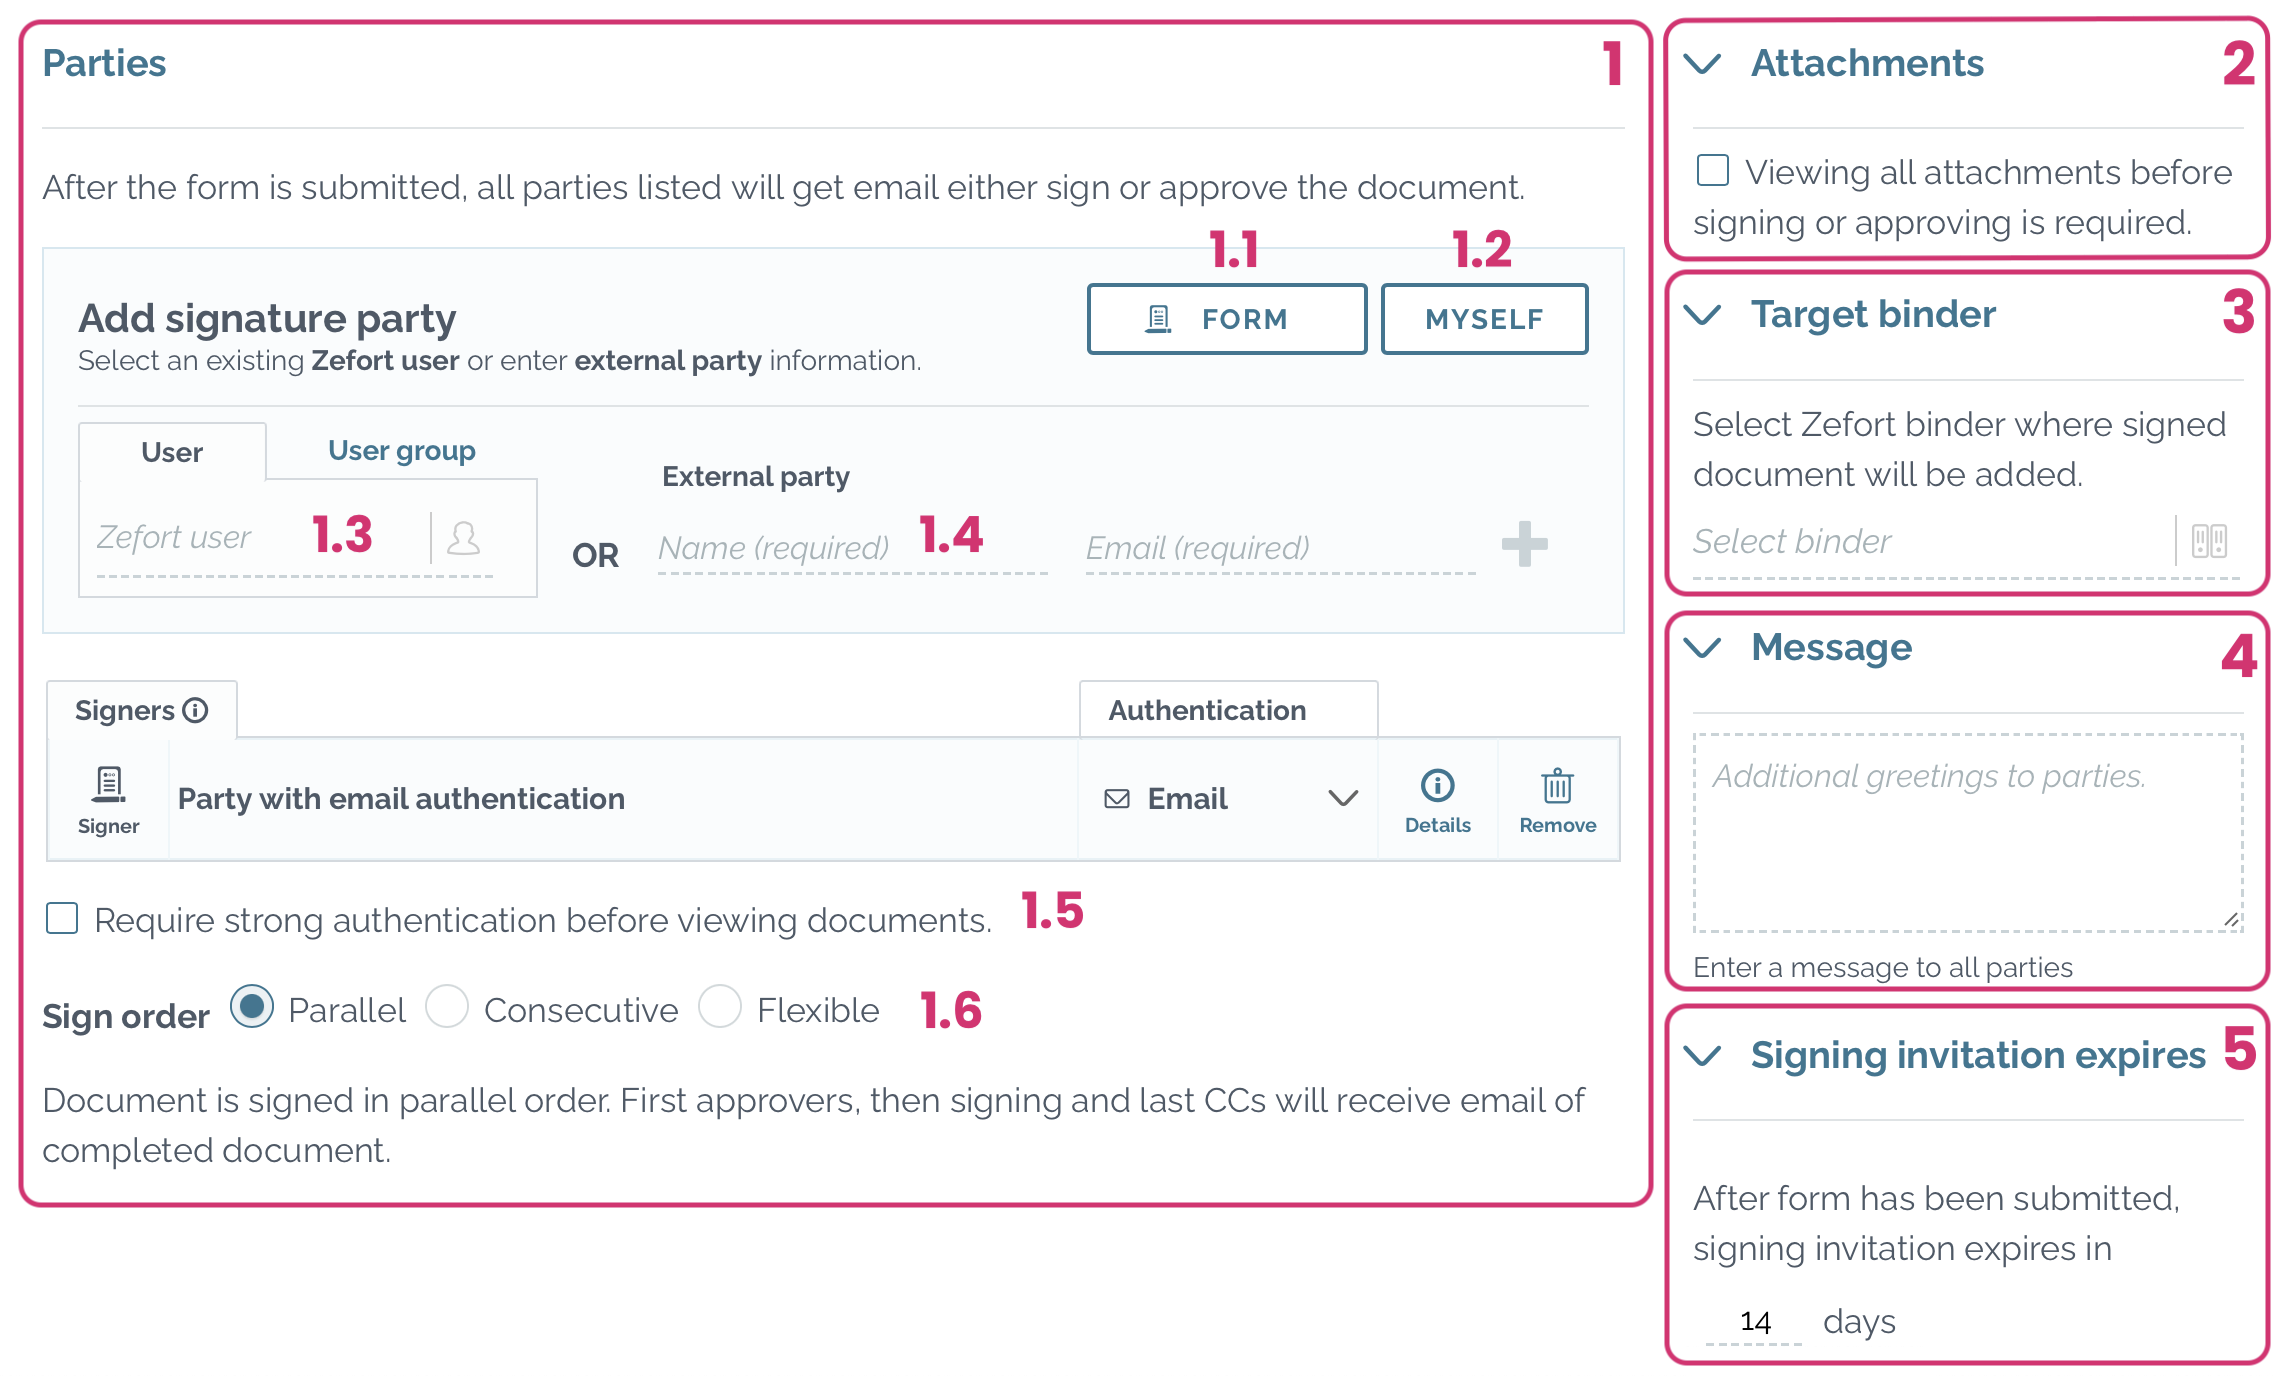
Parties [1]
Add signature parties:
- from form (this is set as default if you have added an e-sign block in the content editor) [1.1]
- myself [1.2]
- Zefort users / user groups in your account [1.3]
- external parties [1.4]
Select whether SMS or strong authentication is required before viewing documents [1.5]
Select the sign order (parallel, consecutive or flexible) and set the signing order by dragging parties [1.6]
Attachments [2]
Select whether viewing all attachments before signing or approving the document is required.
Target binder [3]
Optionally, you can select a Zefort binder where the signed documents will be added.
Note: If there are default binders in your account, the contract will be added there automatically.
Message [4]
Enter an additional message that is shown to all parties in the signature/approval invitation message (optional).
Signing invitation expires [5]
Set when the signing/approval invitation expires.
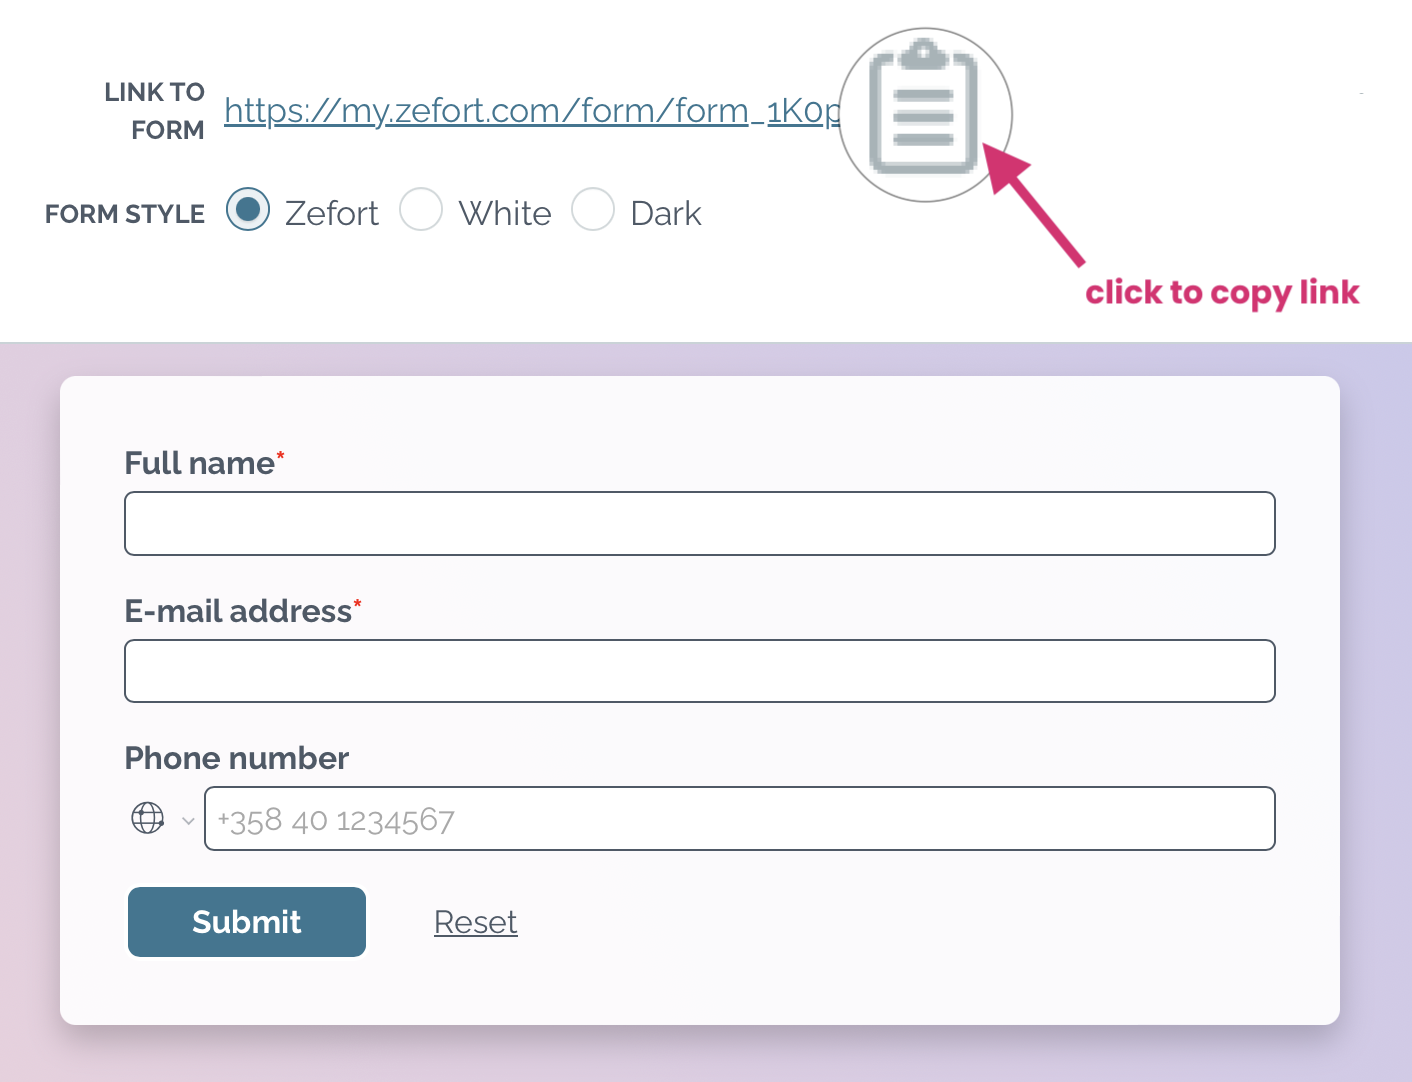
Preview & share
Open “Preview & share” from left side pane or click preview icon on the top right corner. Here you find the preview of your form and a link to the published form.
- Copy link form (the notepad icon after the URL)
- Select form style (Zefort, White, Dark)
- Preview and test your form


Submissions
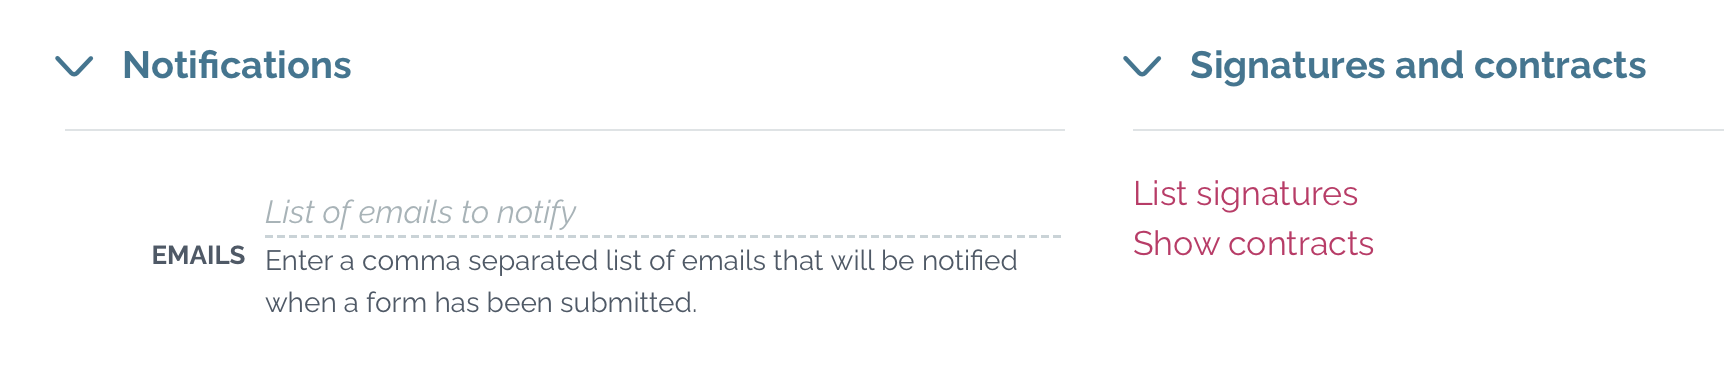
Notifications
You can send email notification every time when your form has been filled and submitted. Type the emails in this field.
Signatures and contracts
- List signatures: opens the Signatures view in Zefort and shows signature processes of this form
- Show contracts: opens the Contracts desktop in Zefort and shows contracts that have been created with this form
Publish the form
Once you are happy with your form, you can publish it. On the right upper corner you can find the “Publish” button.

Next to it is the “Preview” button, where you can check what your form looks like and copy the link to it. Before sharing the link, please check and test that the form works they way you intended to.