Signing documents with DocuSign Personal
How to Use DocuSign Personal integration with Zefort
If your account has DocuSign Personal integration enabled, you can easily send documents from Zefort for signature via DocuSign. The signing process is completed within DocuSign, and the signed document is automatically returned to Zefort.
To configure DocuSign Personal integration, you must have an admin license with permission to manage account settings. For configuration instructions, please refer to this guide
Key Features
With Docusign Personal, you can:
How to sign a single document with DocuSign
Follow these steps to sign a single document using DocuSign:
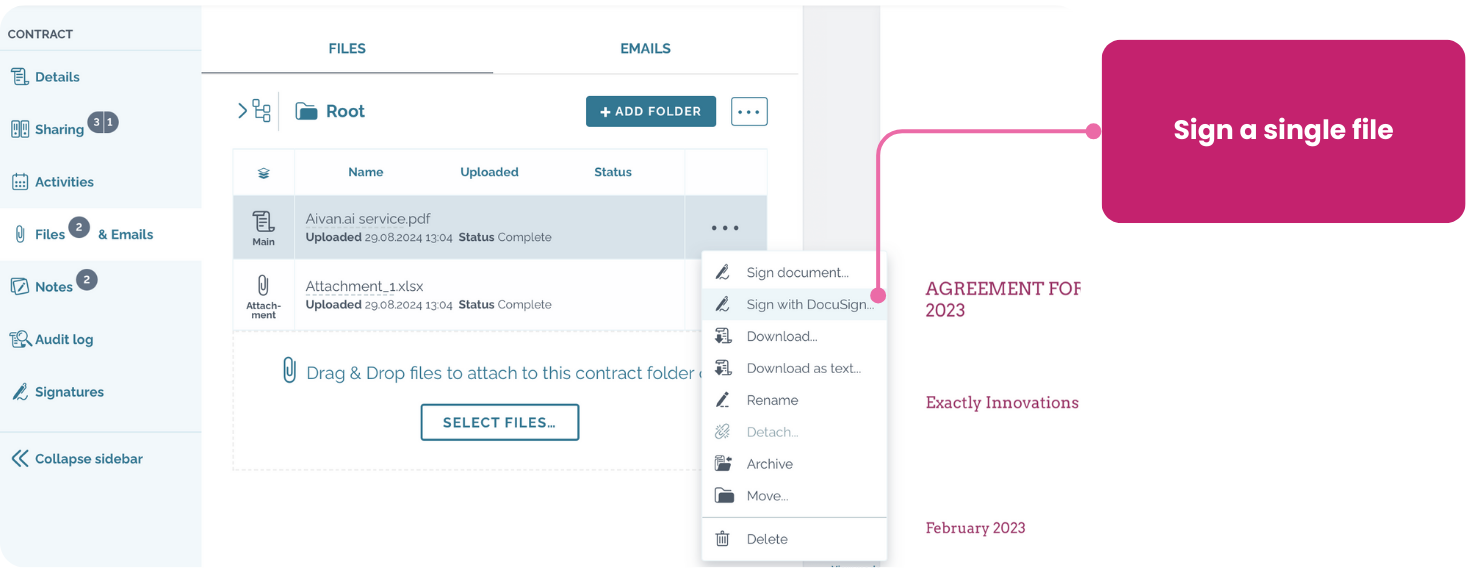
- Access the file to be signed: navigate to the document and open “Files & Emails” tab
- Start signature process: open the file menut and click “Sign with DocuSign…”
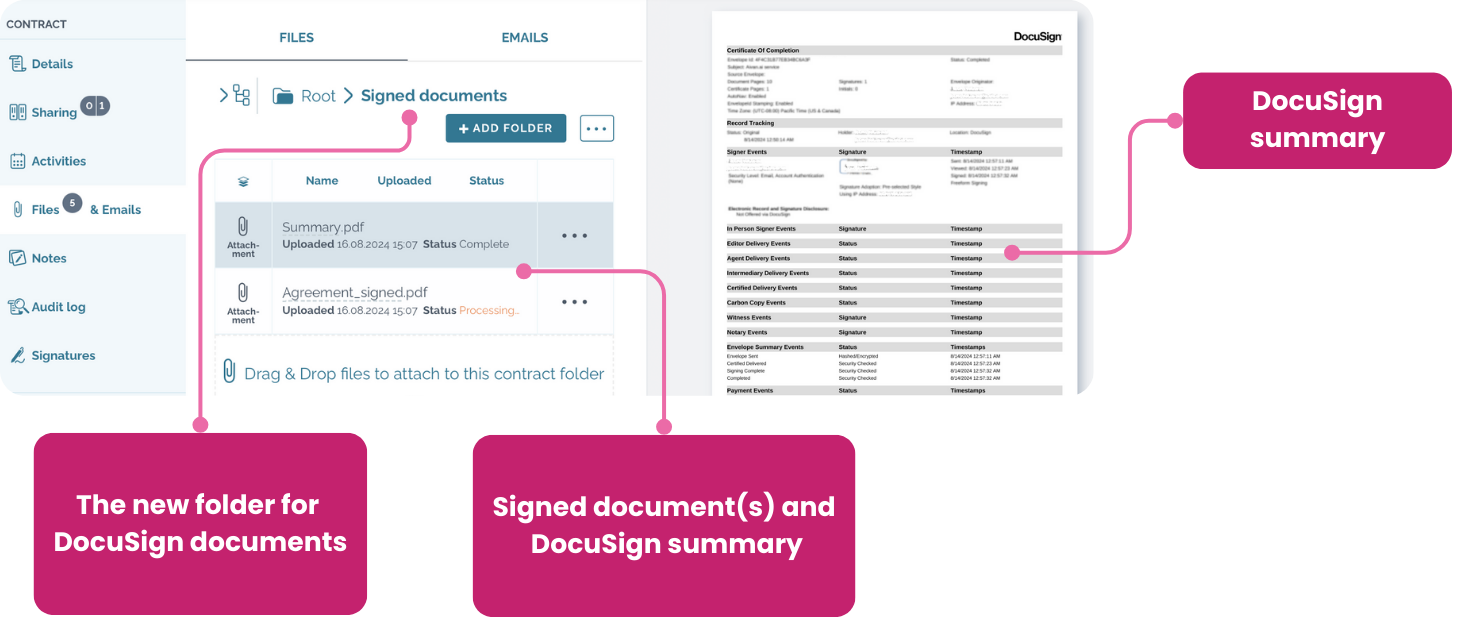
- Choose a destination folder: signed document will be returned to the selected folder
- Create a new folder and enter a name for it
OR - Select an existing folder within the document
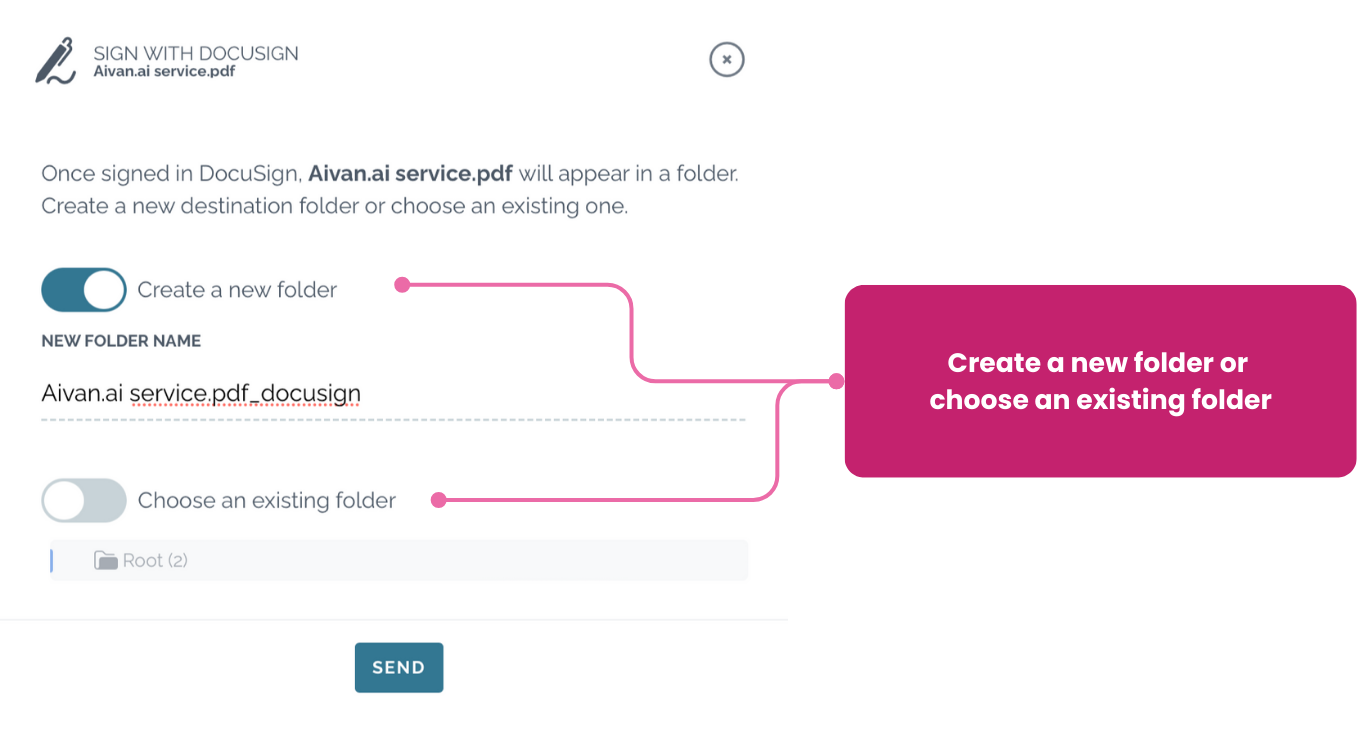
- Create a new folder and enter a name for it
- Send for signature: click Send
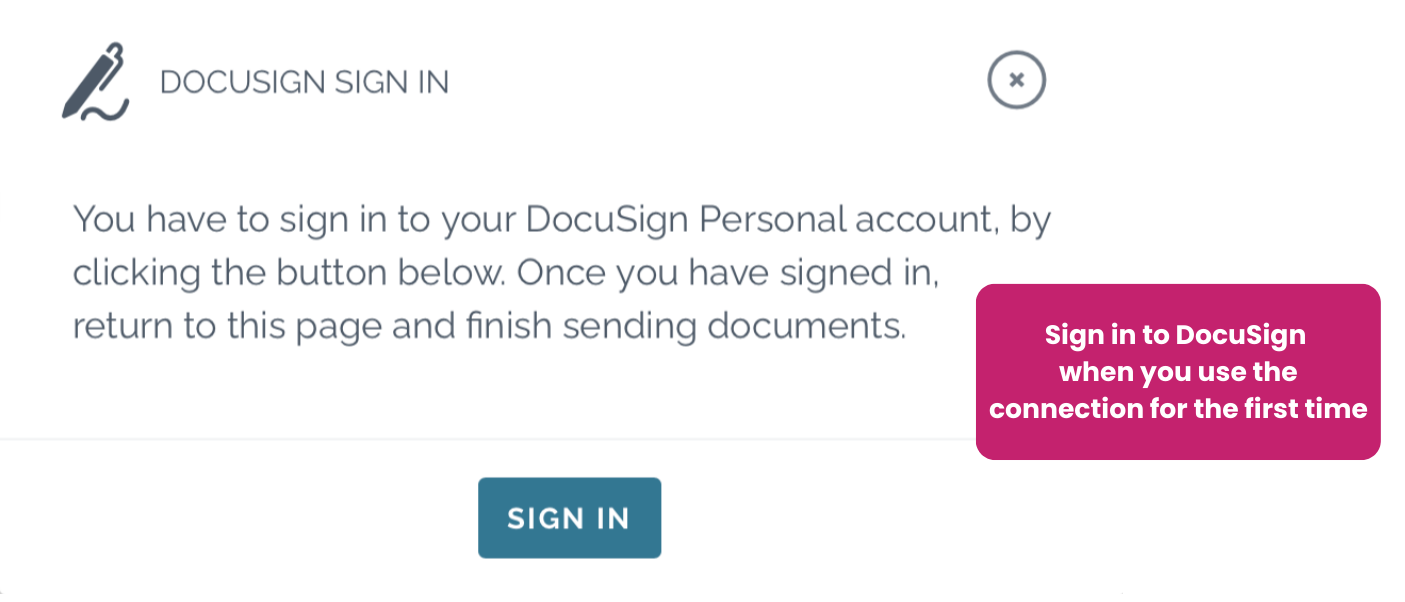
- Sign in to DocuSign and confirm sending: If this is your first time using DocuSign Personal, click SIGN IN to open a new browser window and log in with your DocuSign credentials. After connecting, close the browser window, return to Zefort, and click the SEND button again to confirm sending the document for signature.
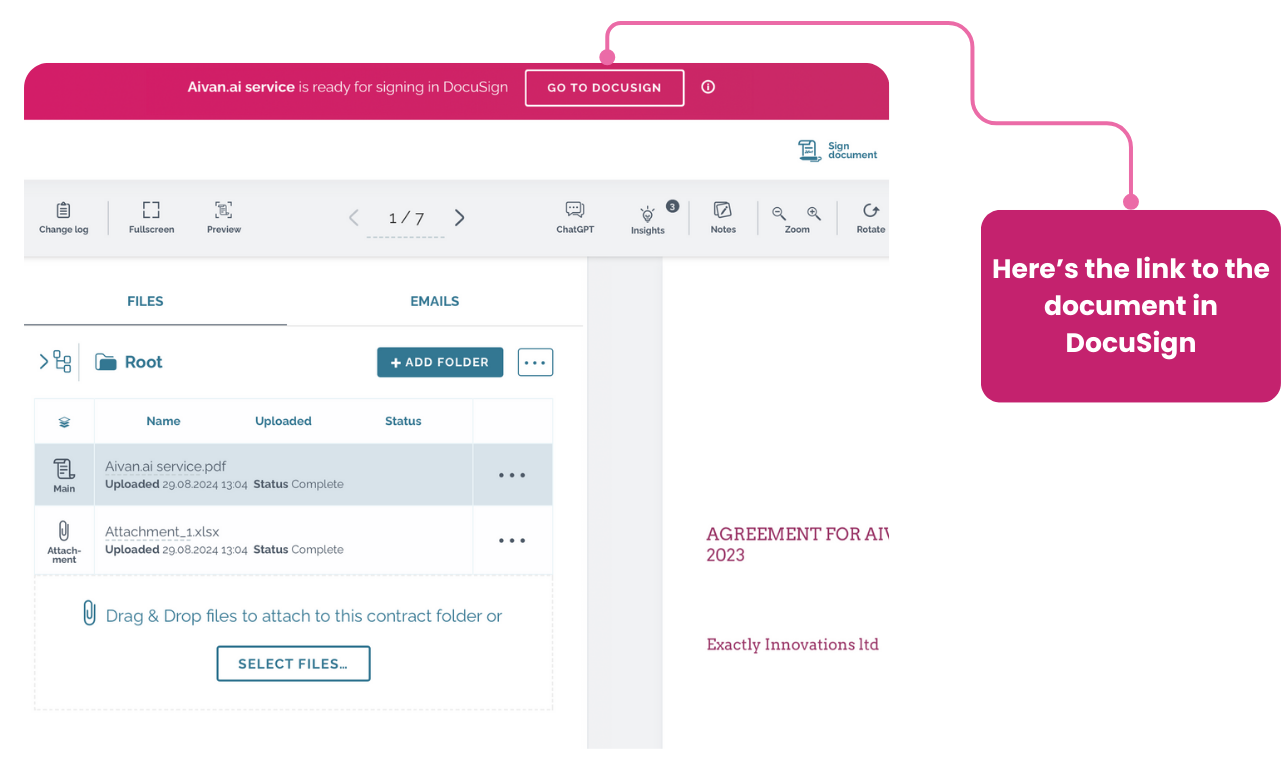
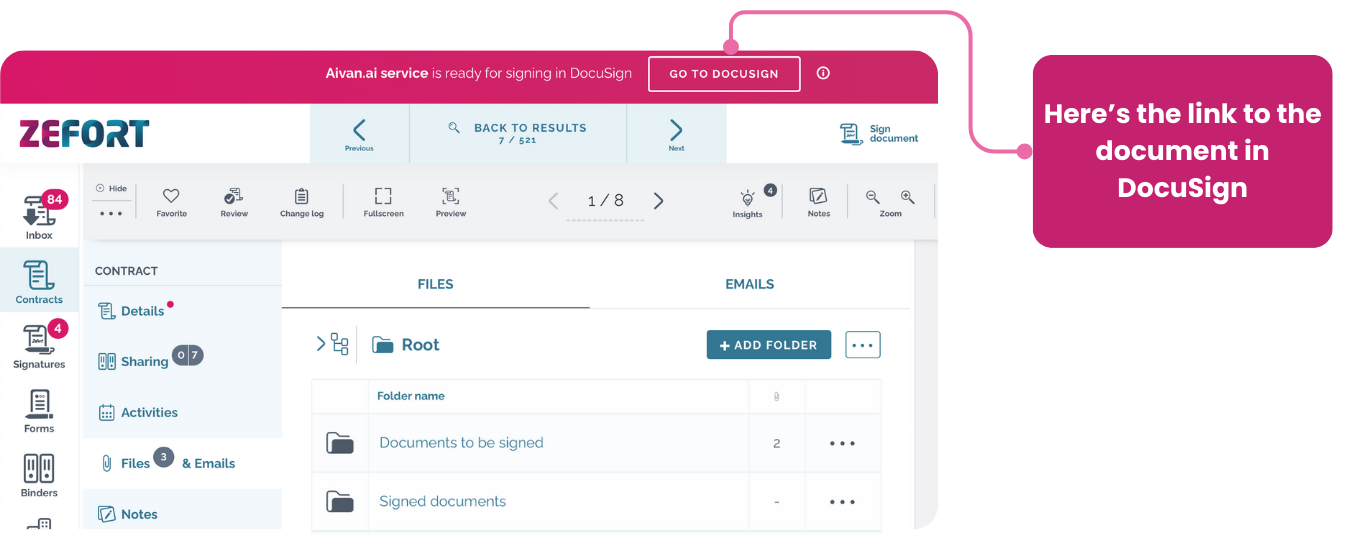
- Complete the signature process: click Go to docusign button to open DocuSign and complete the signature process as usual
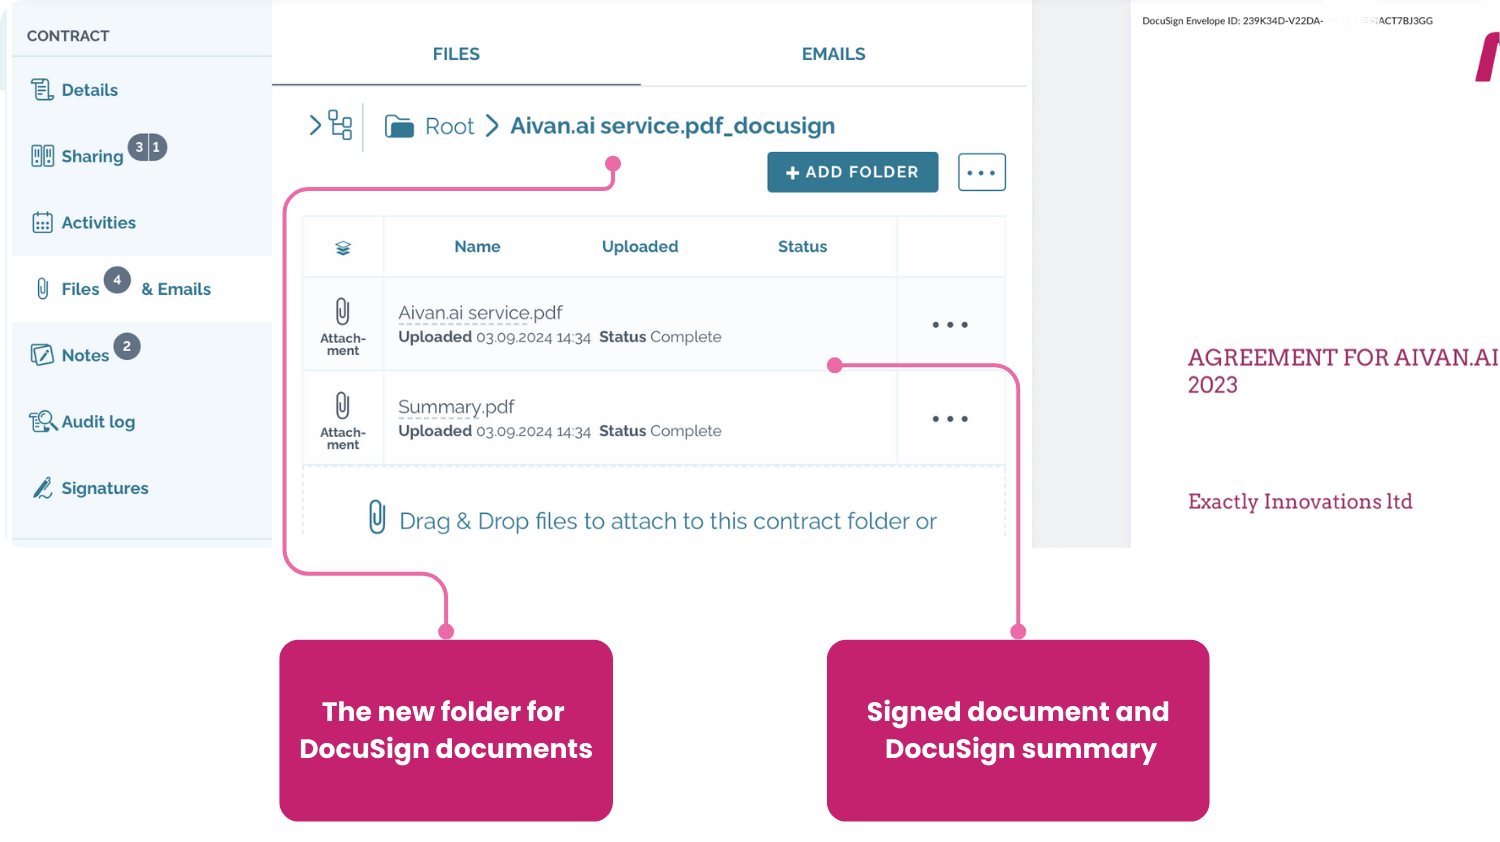
Once the document is signed in DocuSign, the signed document and a signature summary will automatically be returned to the selected folder in Zefort.
How to sign multiple documents with Docusign
You can also send all files within a document folder for signature via DocuSign. These can be signed as individual documents or merged into a single document.
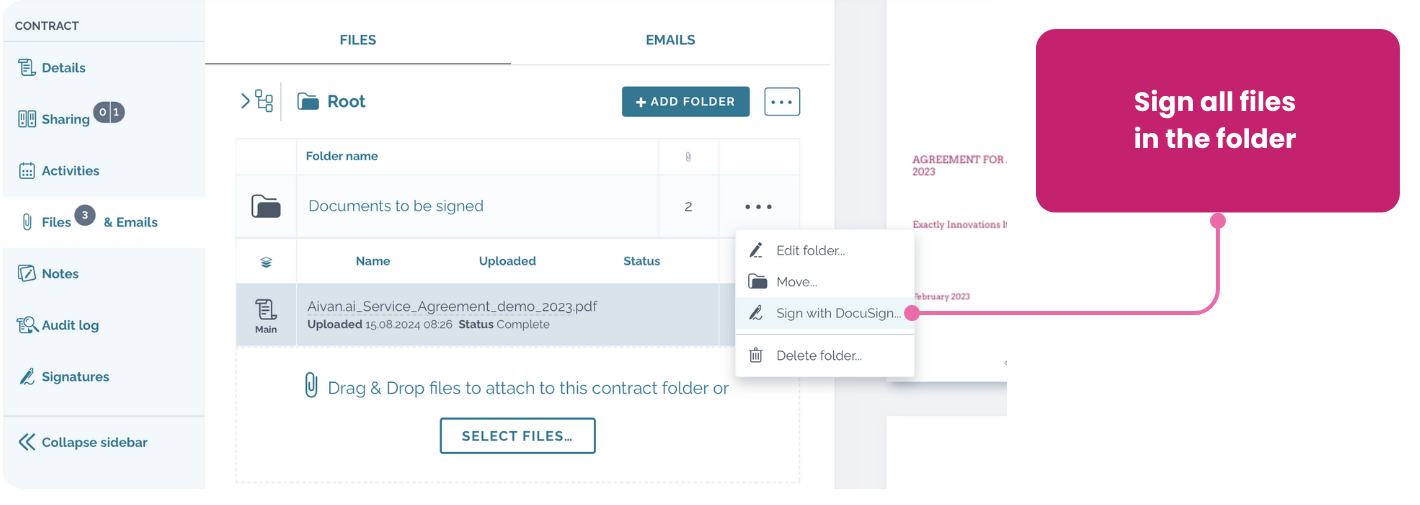
- Access the file to be signed: open the document and go to “Files & Emails” tab
- Start signature process: open the folder menu (…) and select “Sign with DocuSign…”
- Select settings:
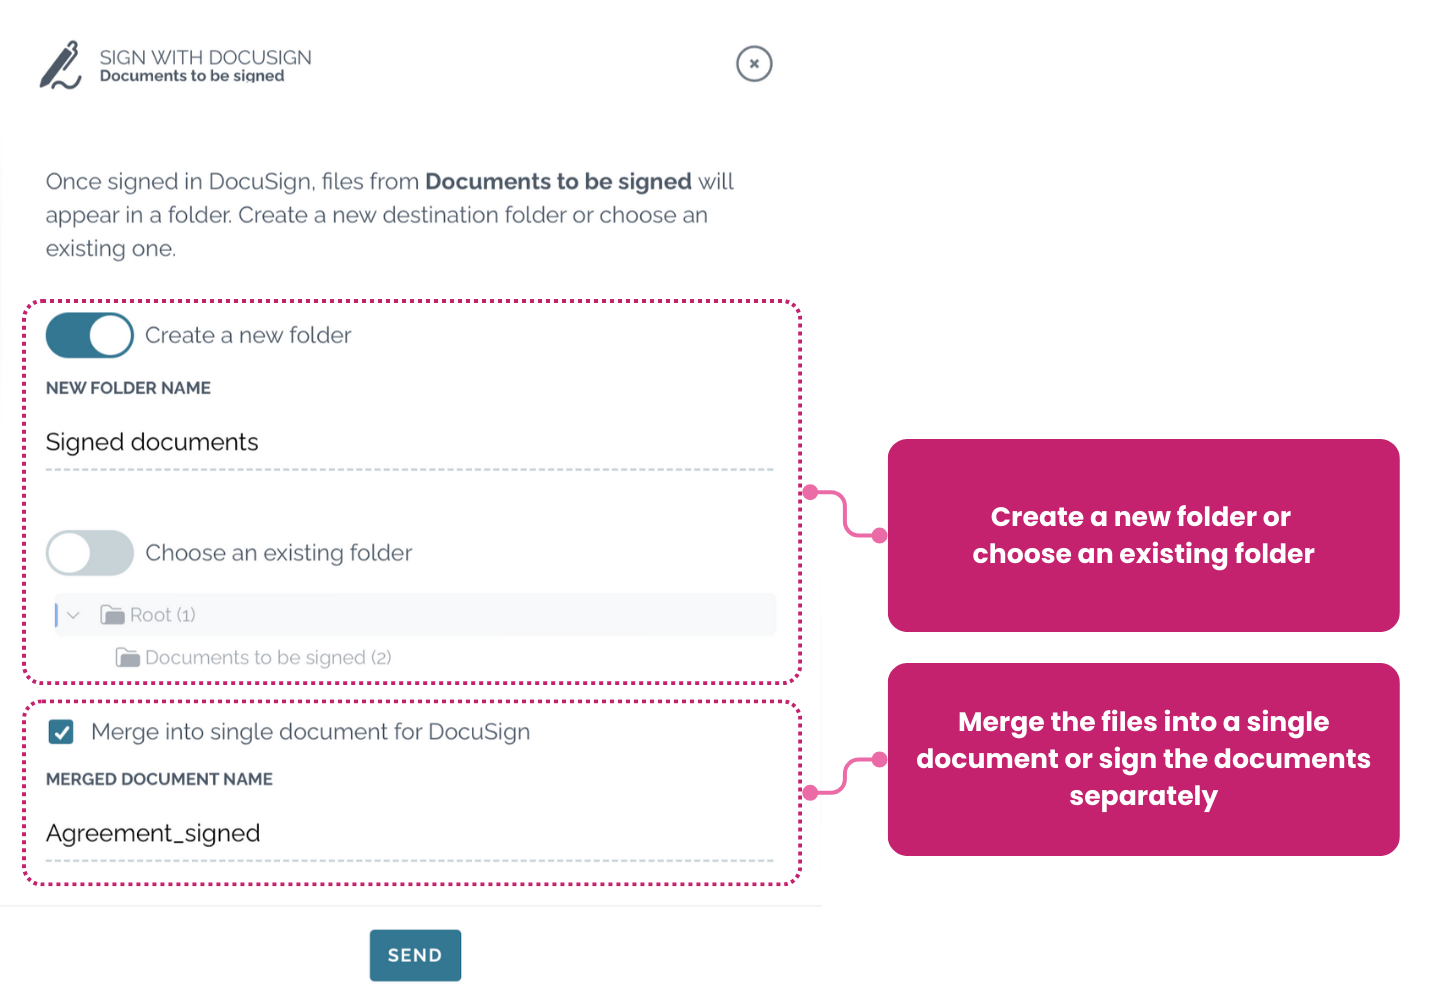
- Choose a destination folder: signed document will be returned to the selected folder
- Create a new folder and enter a name for it
OR - Select an existing folder within the document
- Create a new folder and enter a name for it
- Choose how to sign:
- Merge documents: Select “Merge into single document for DocuSign” to create one PDF for signing and name the new merged document
OR - Sign separately: If not merged, each file will be sent as a separate document in one DocuSign envelope.
- Merge documents: Select “Merge into single document for DocuSign” to create one PDF for signing and name the new merged document
- Choose a destination folder: signed document will be returned to the selected folder
- Send for signature: click Send
- Sign in to DocuSign and confirm sending: If this is your first time using DocuSign Personal, click SIGN IN to open a new browser window and log in with your DocuSign credentials. After connecting, close the browser window, return to Zefort, and click the SEND button again to confirm sending the document for signature.
- Complete the signature process: click Go to docusign button to open DocuSign and complete the signature process as usual
Once the documents are signed in DocuSign, the signed document(s) and a signature summary will automatically be returned to the selected folder in Zefort.