Configuring e-sign integrations
Zefort provides ready-made integrations with a number of digital signing services, enabling easy interoperability with existing e-sign workflows.
Follow these steps to integrate your e-signing service with Zefort:
- Go to Account settings [1]
- Open Integrations [2]
- Select your preferred e-sign tool and select connect [3]
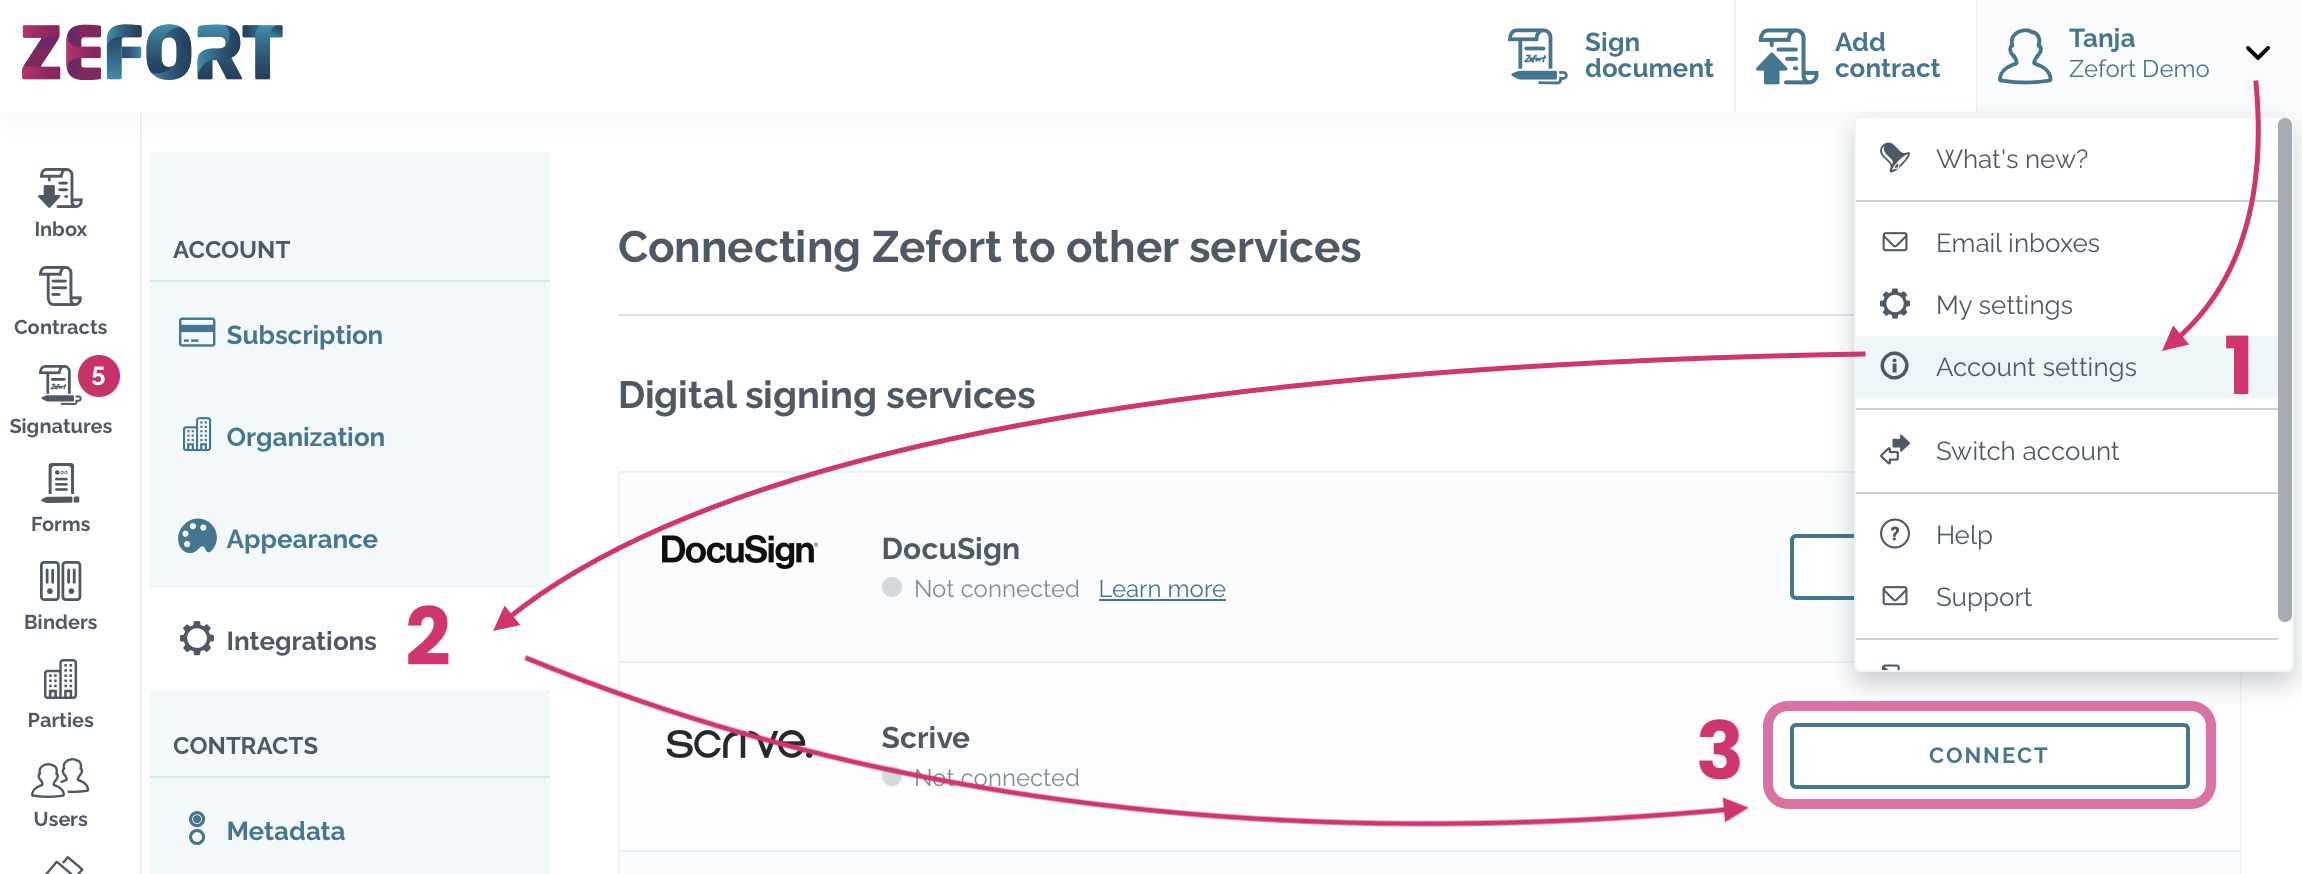
See below for details on how to set up the integration for each service.
DocuSign
Before integrating DocuSign with Zefort, ensure that DocuSign Connect is enabled in your DocuSign account. Additionally, it is recommended to create a dedicated user account specifically for the integration, rather than using a personal DocuSign account.
- Select environment (Sandbox or Production) and click connect with docusign
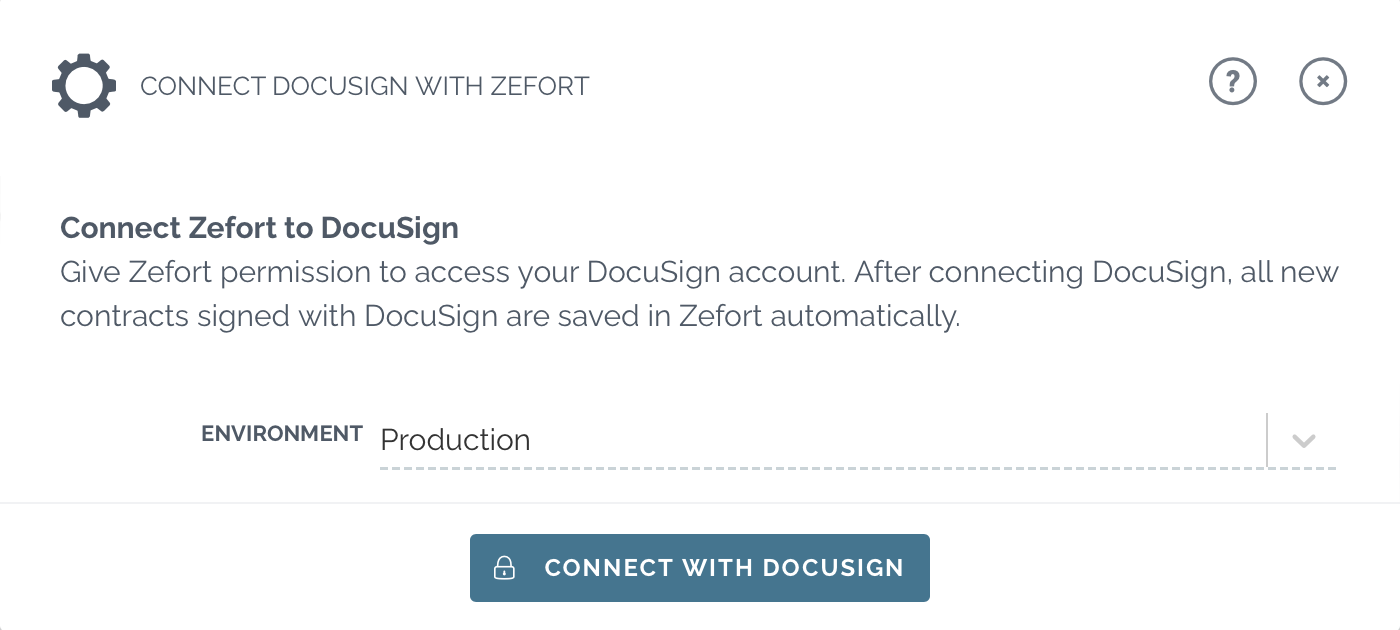
- Log in to DocuSign and grant access to Zefort
- Define settings in Zefort:
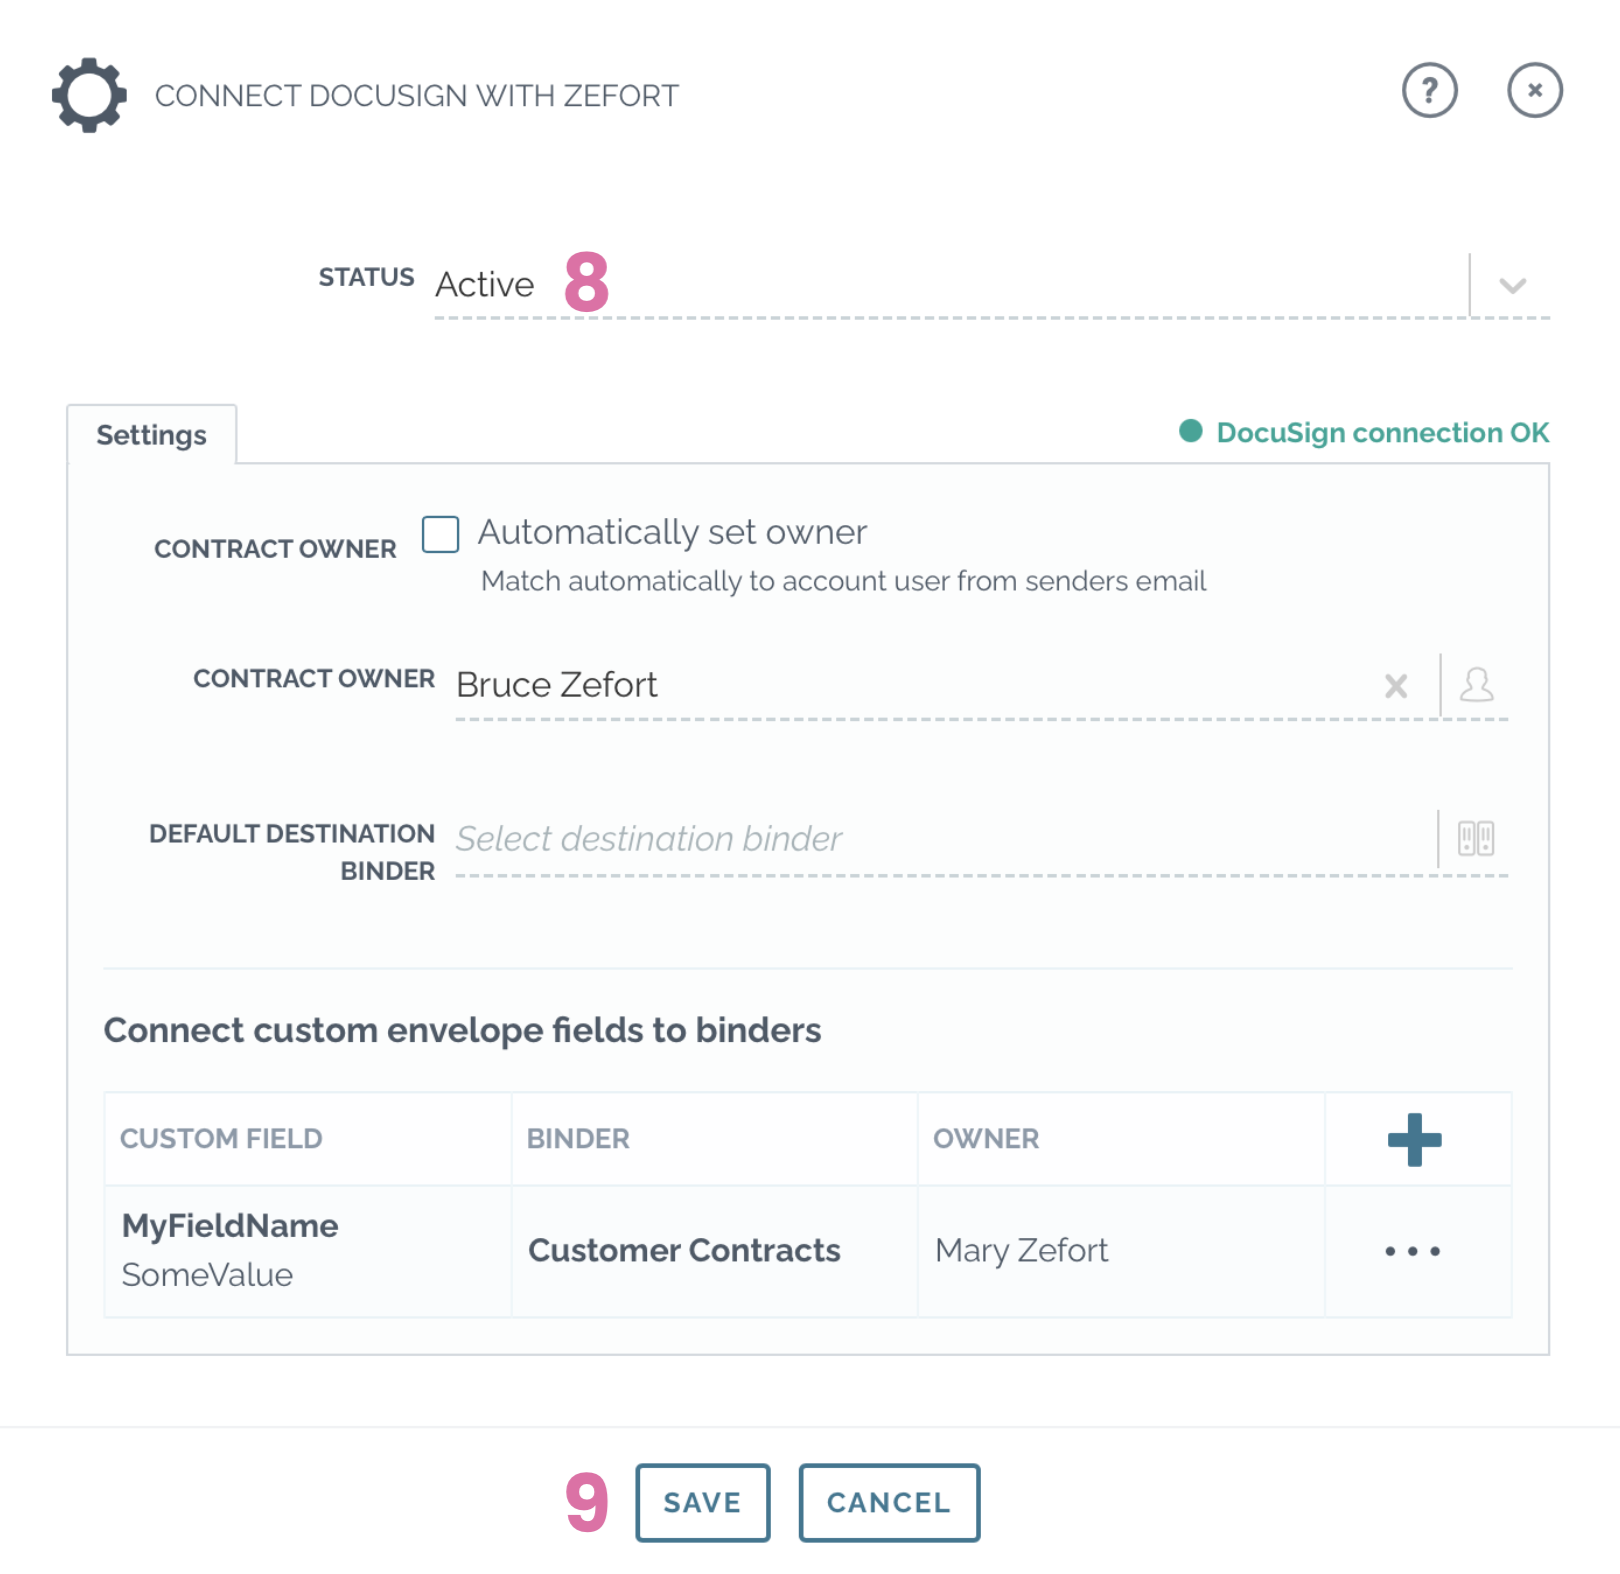
- Set owner for the DocuSign envelope automatically [1]
(if the person is user in Zefort) - Select fall-back contract owner [2]
(if the owner of the DocuSign envelope is not a Zefort user) - Select default destination binder for contracts [3]
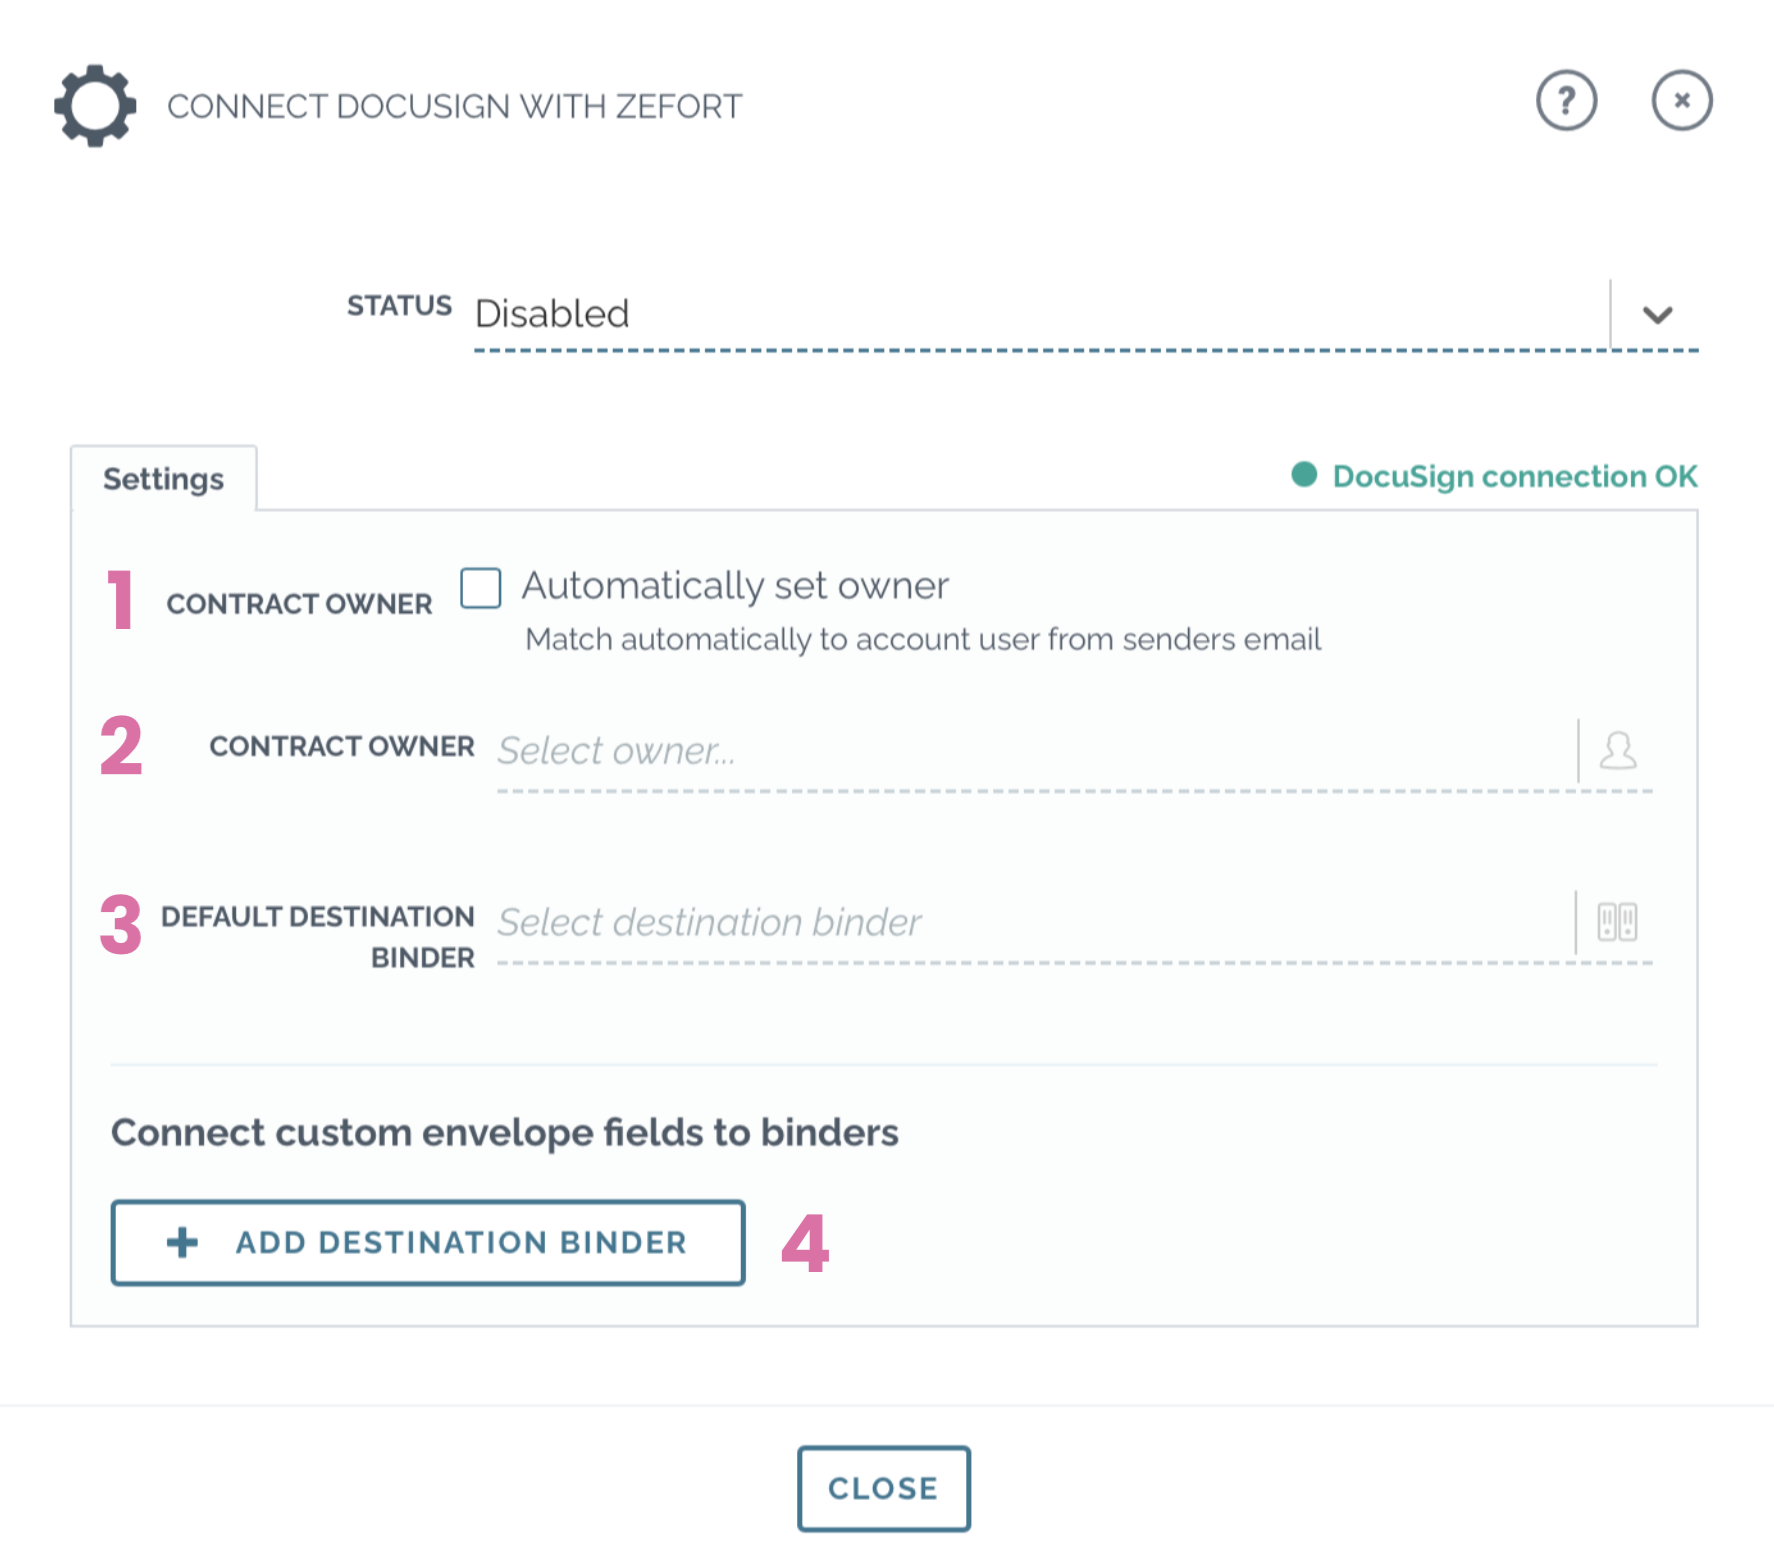
- Set owner for the DocuSign envelope automatically [1]
- Connect Docusign envelope fields with Zefort binders, click +Add destination binder [4]
- Fill in DocuSign envelope data (field name and value) [5]
- Determine to which Zefort binder the imported contracts will be added [6]
- Select the contract owner in Zefort [7]
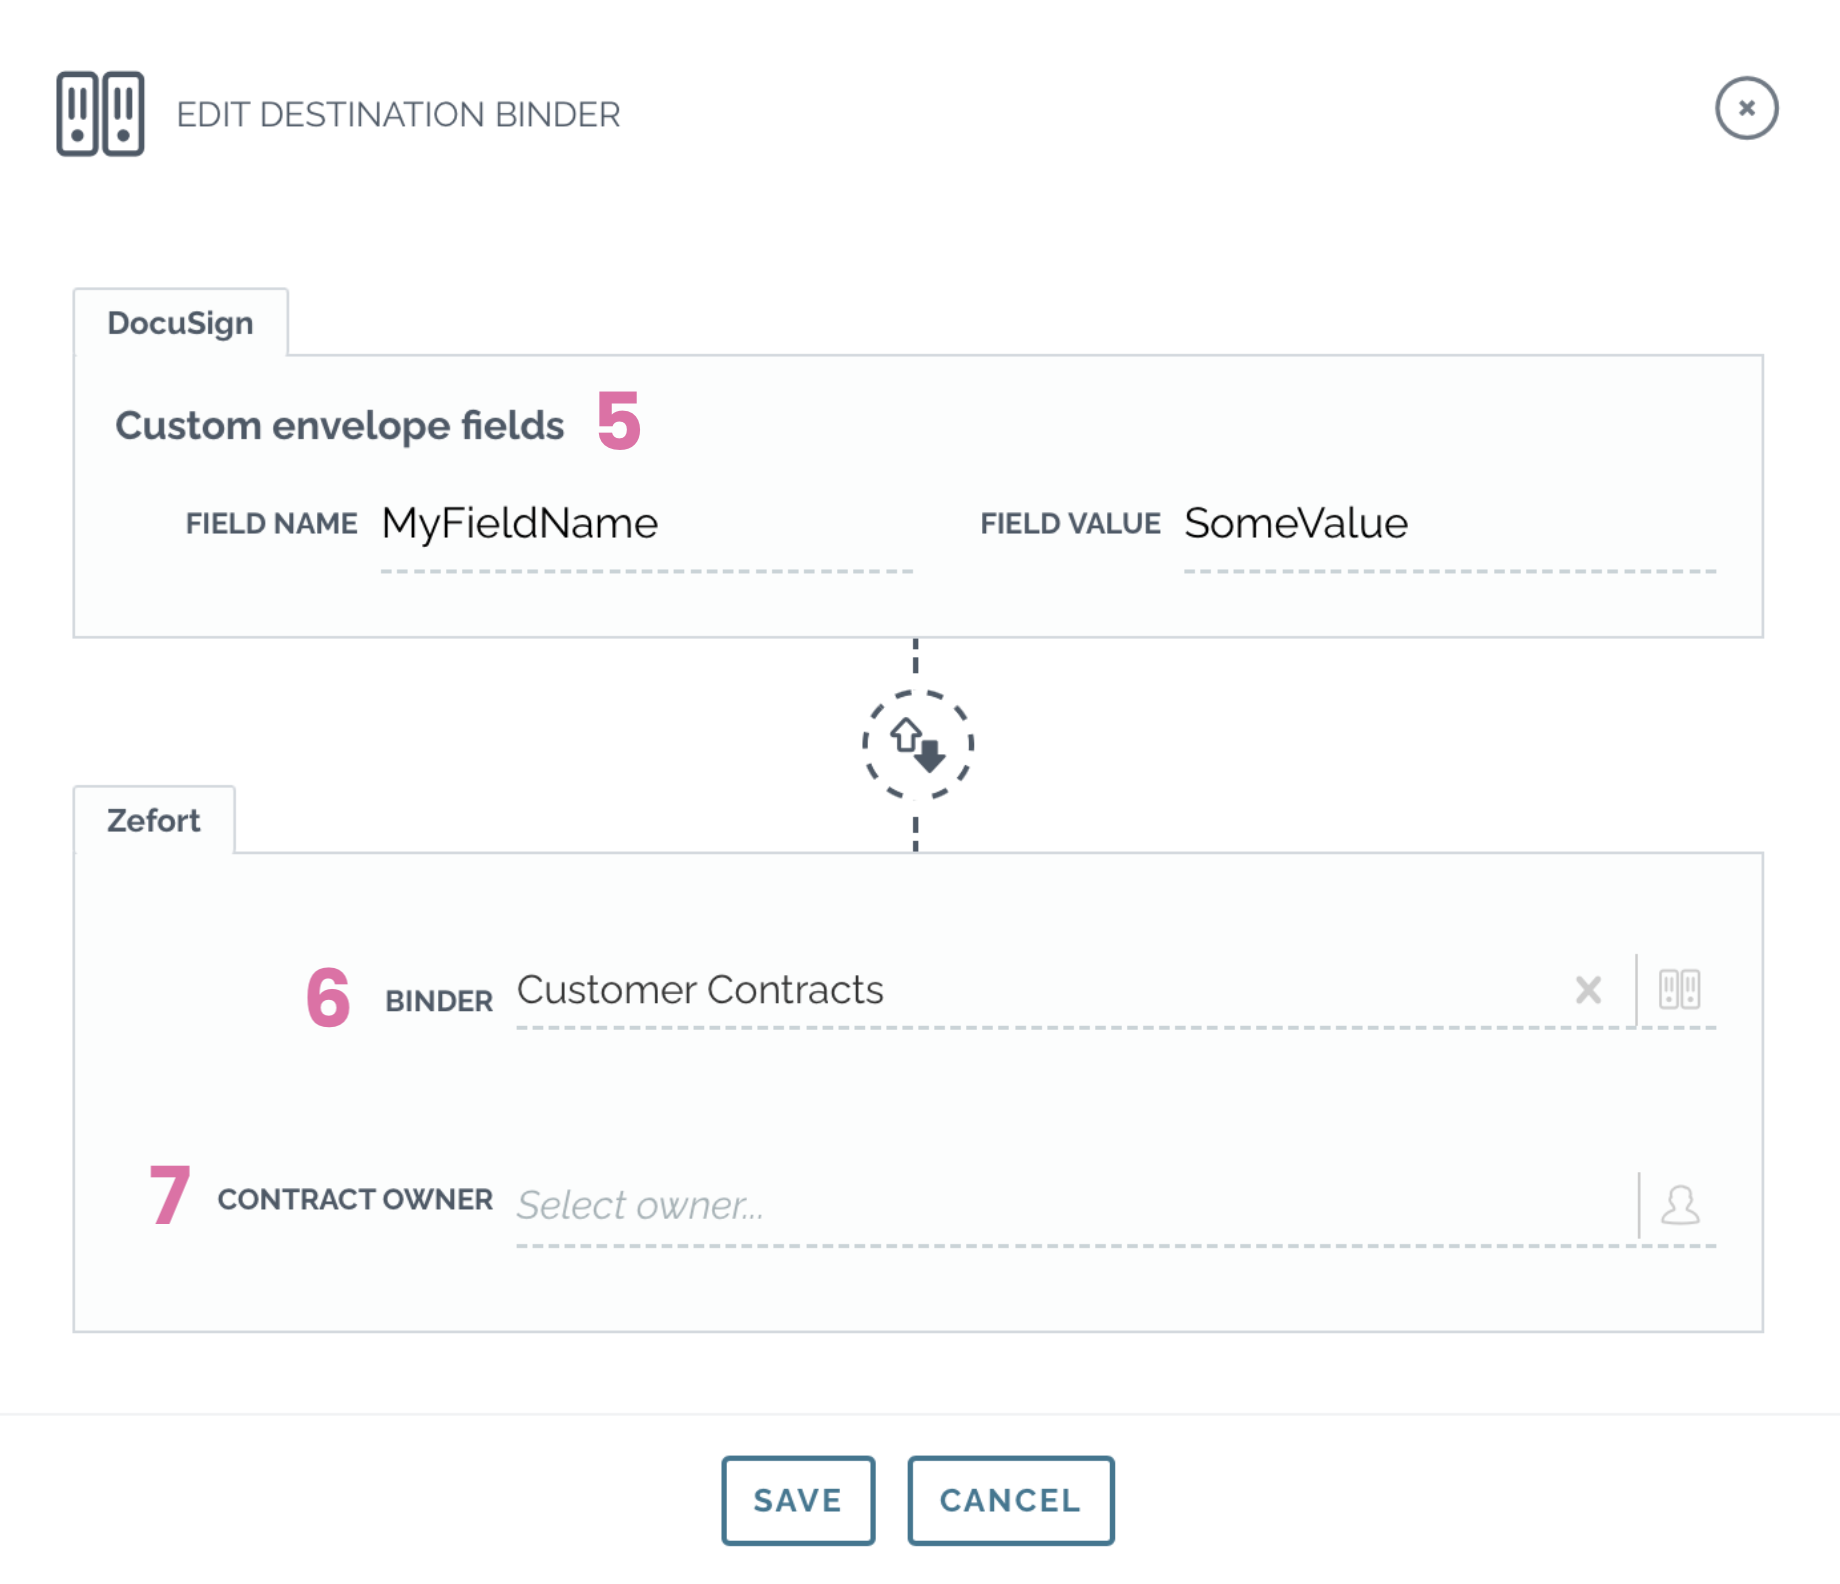
- Set status Active [8] and Save [9]
- Connecting additional DocuSign envelopes

- Click the Add button (in the top right corner of envelope table) and follow the steps [5,6,7] above.

- Click the Add button (in the top right corner of envelope table) and follow the steps [5,6,7] above.
DocuSign Personal
Before integrating DocuSign with Zefort, ensure that DocuSign Connect is enabled in your DocuSign account. Additionally, it is recommended to create a dedicated user account specifically for the integration, rather than using a personal DocuSign account.
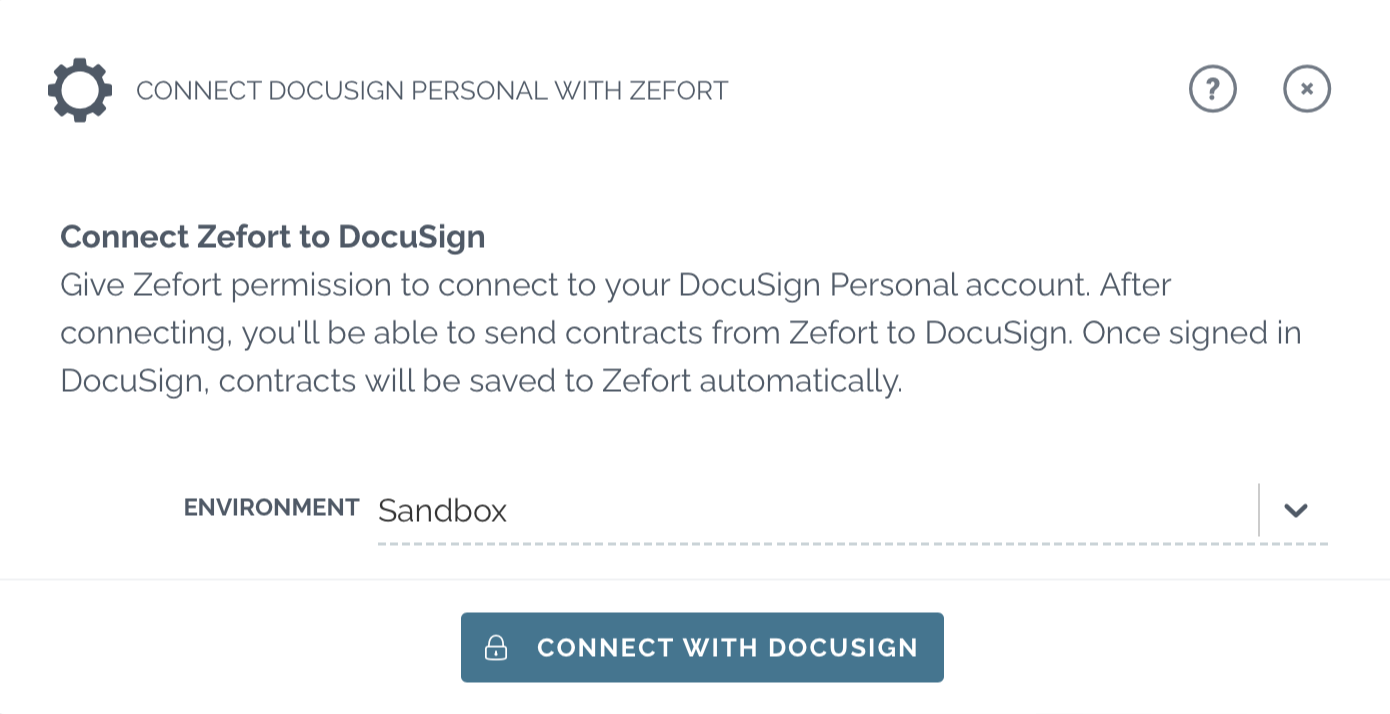
- Select environment (Sandbox or Production) and click connect with docusign
- Log in to DocuSign and grant access to Zefort
- Set integration Active
For further instruction about sending documents from Zefort to DocuSign, please check this article: Signing documents with DocuSign Personal.
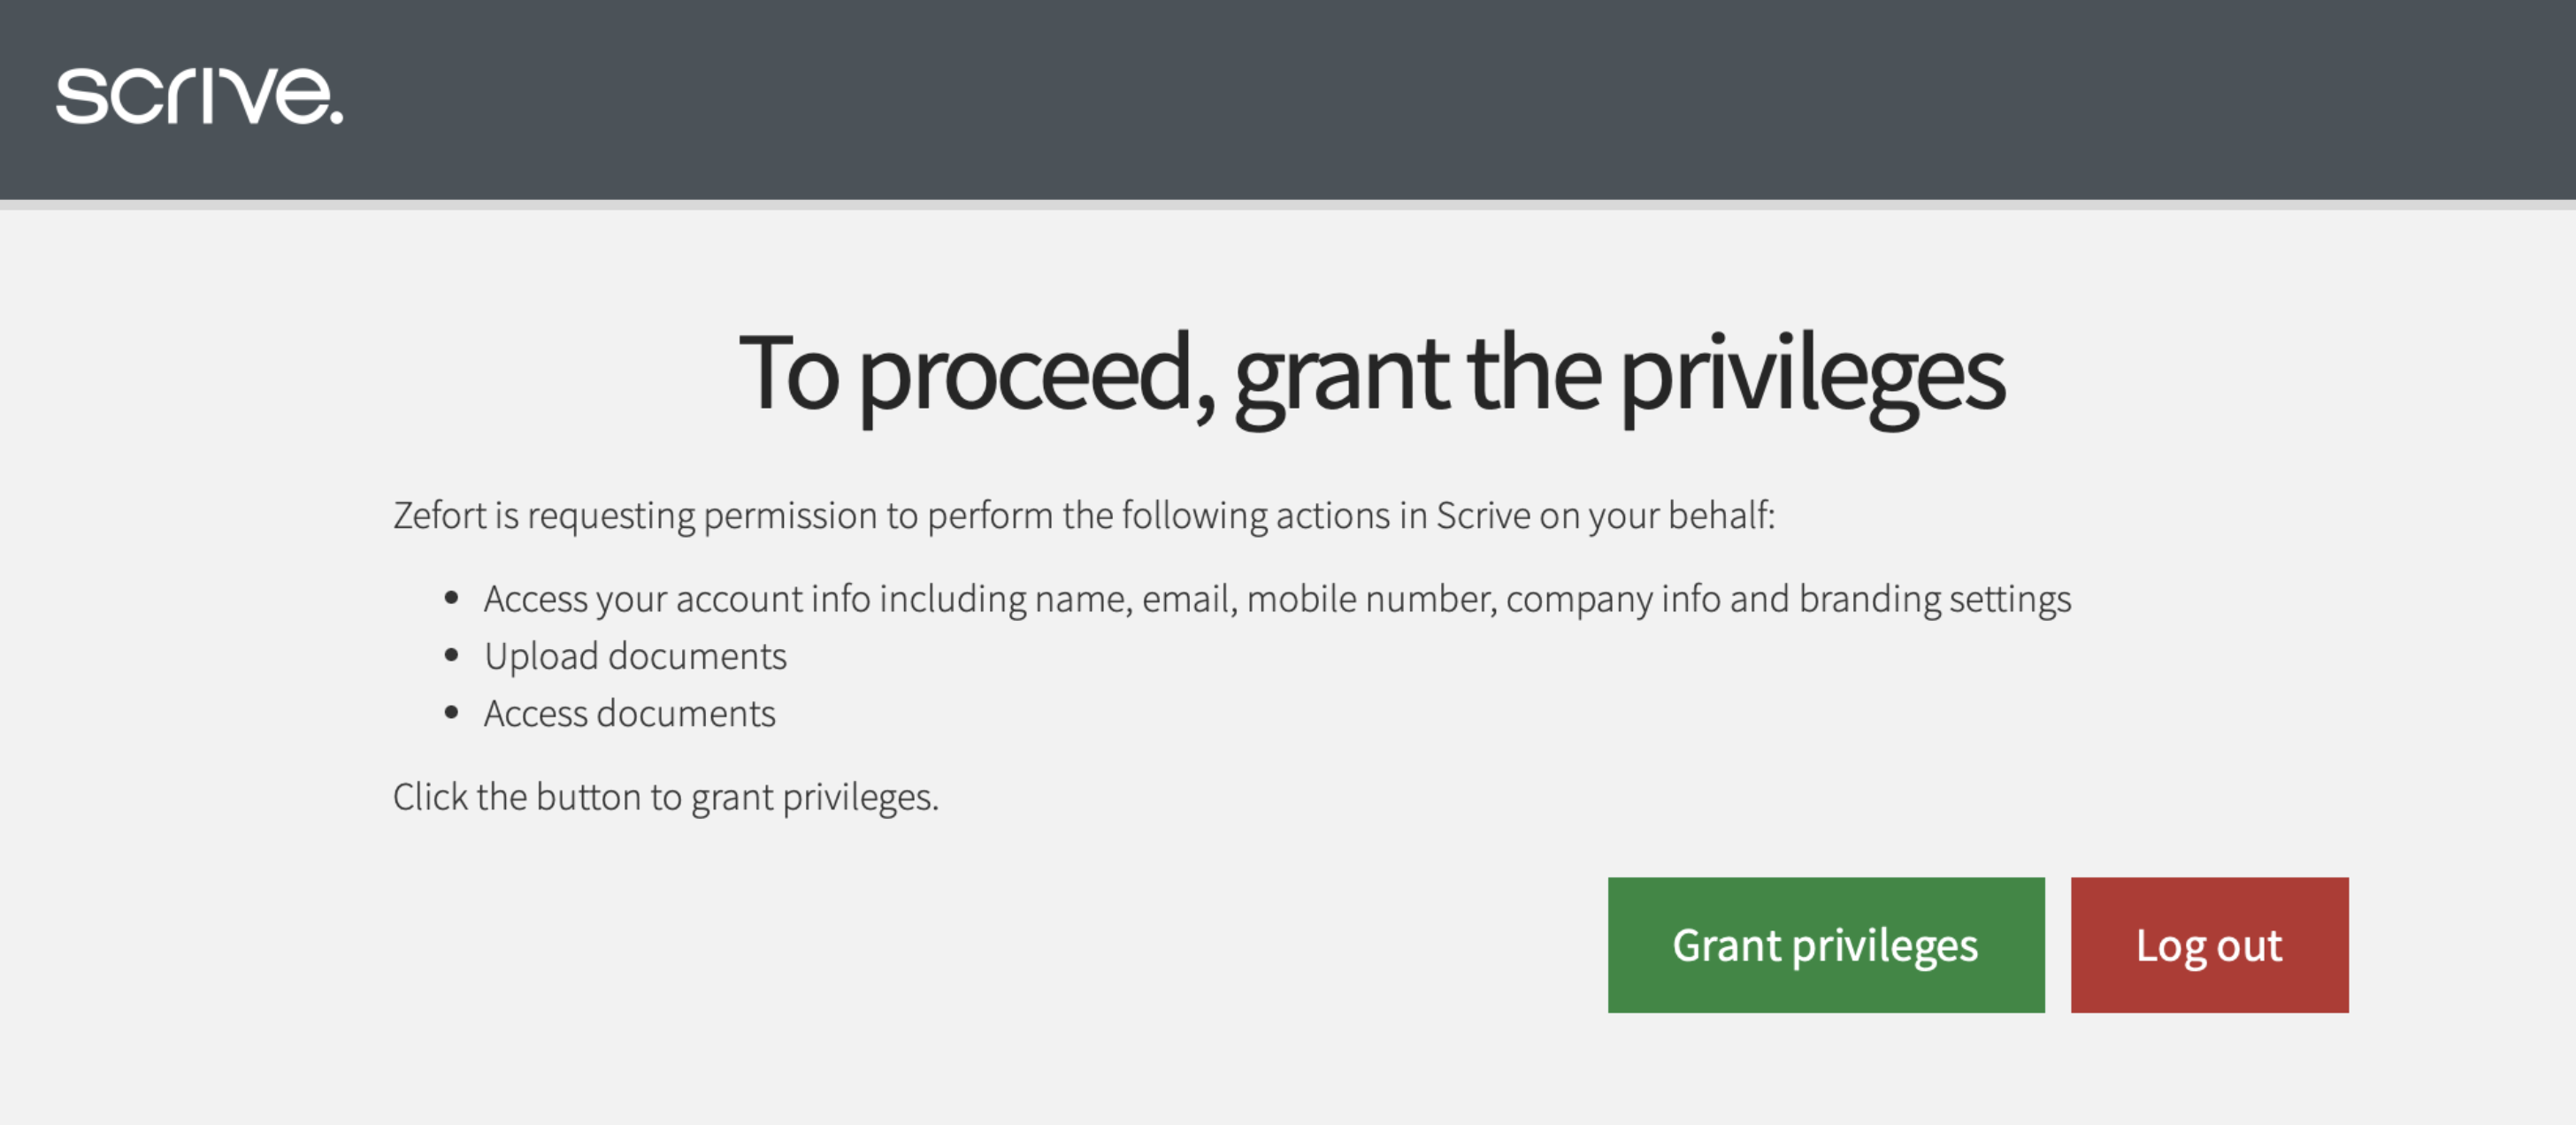
Scrive
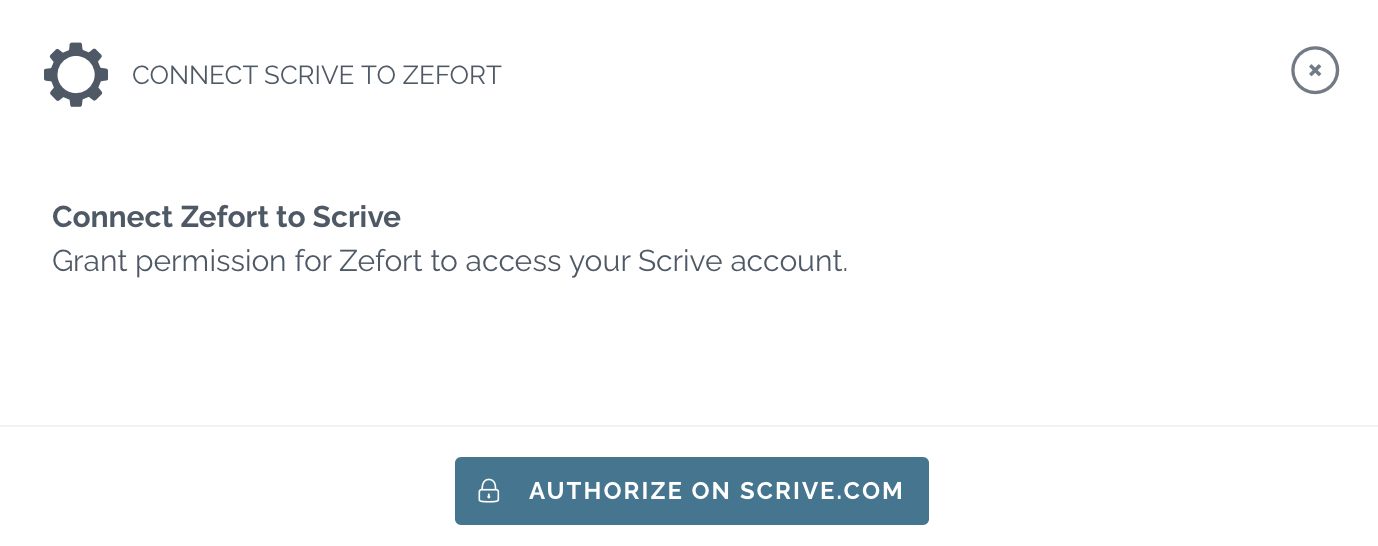
- Click authorize on scrive.com and grant privileges
- Give name to the integration and configure settings
- Template: select existing or create new Scrive template
- Destination binder: select Zefort binder for importing the contracts
- External ID attribute: fill Scrive contract ID to selected Zefort metadata field
(requires a custom text type attribute in Zefort)
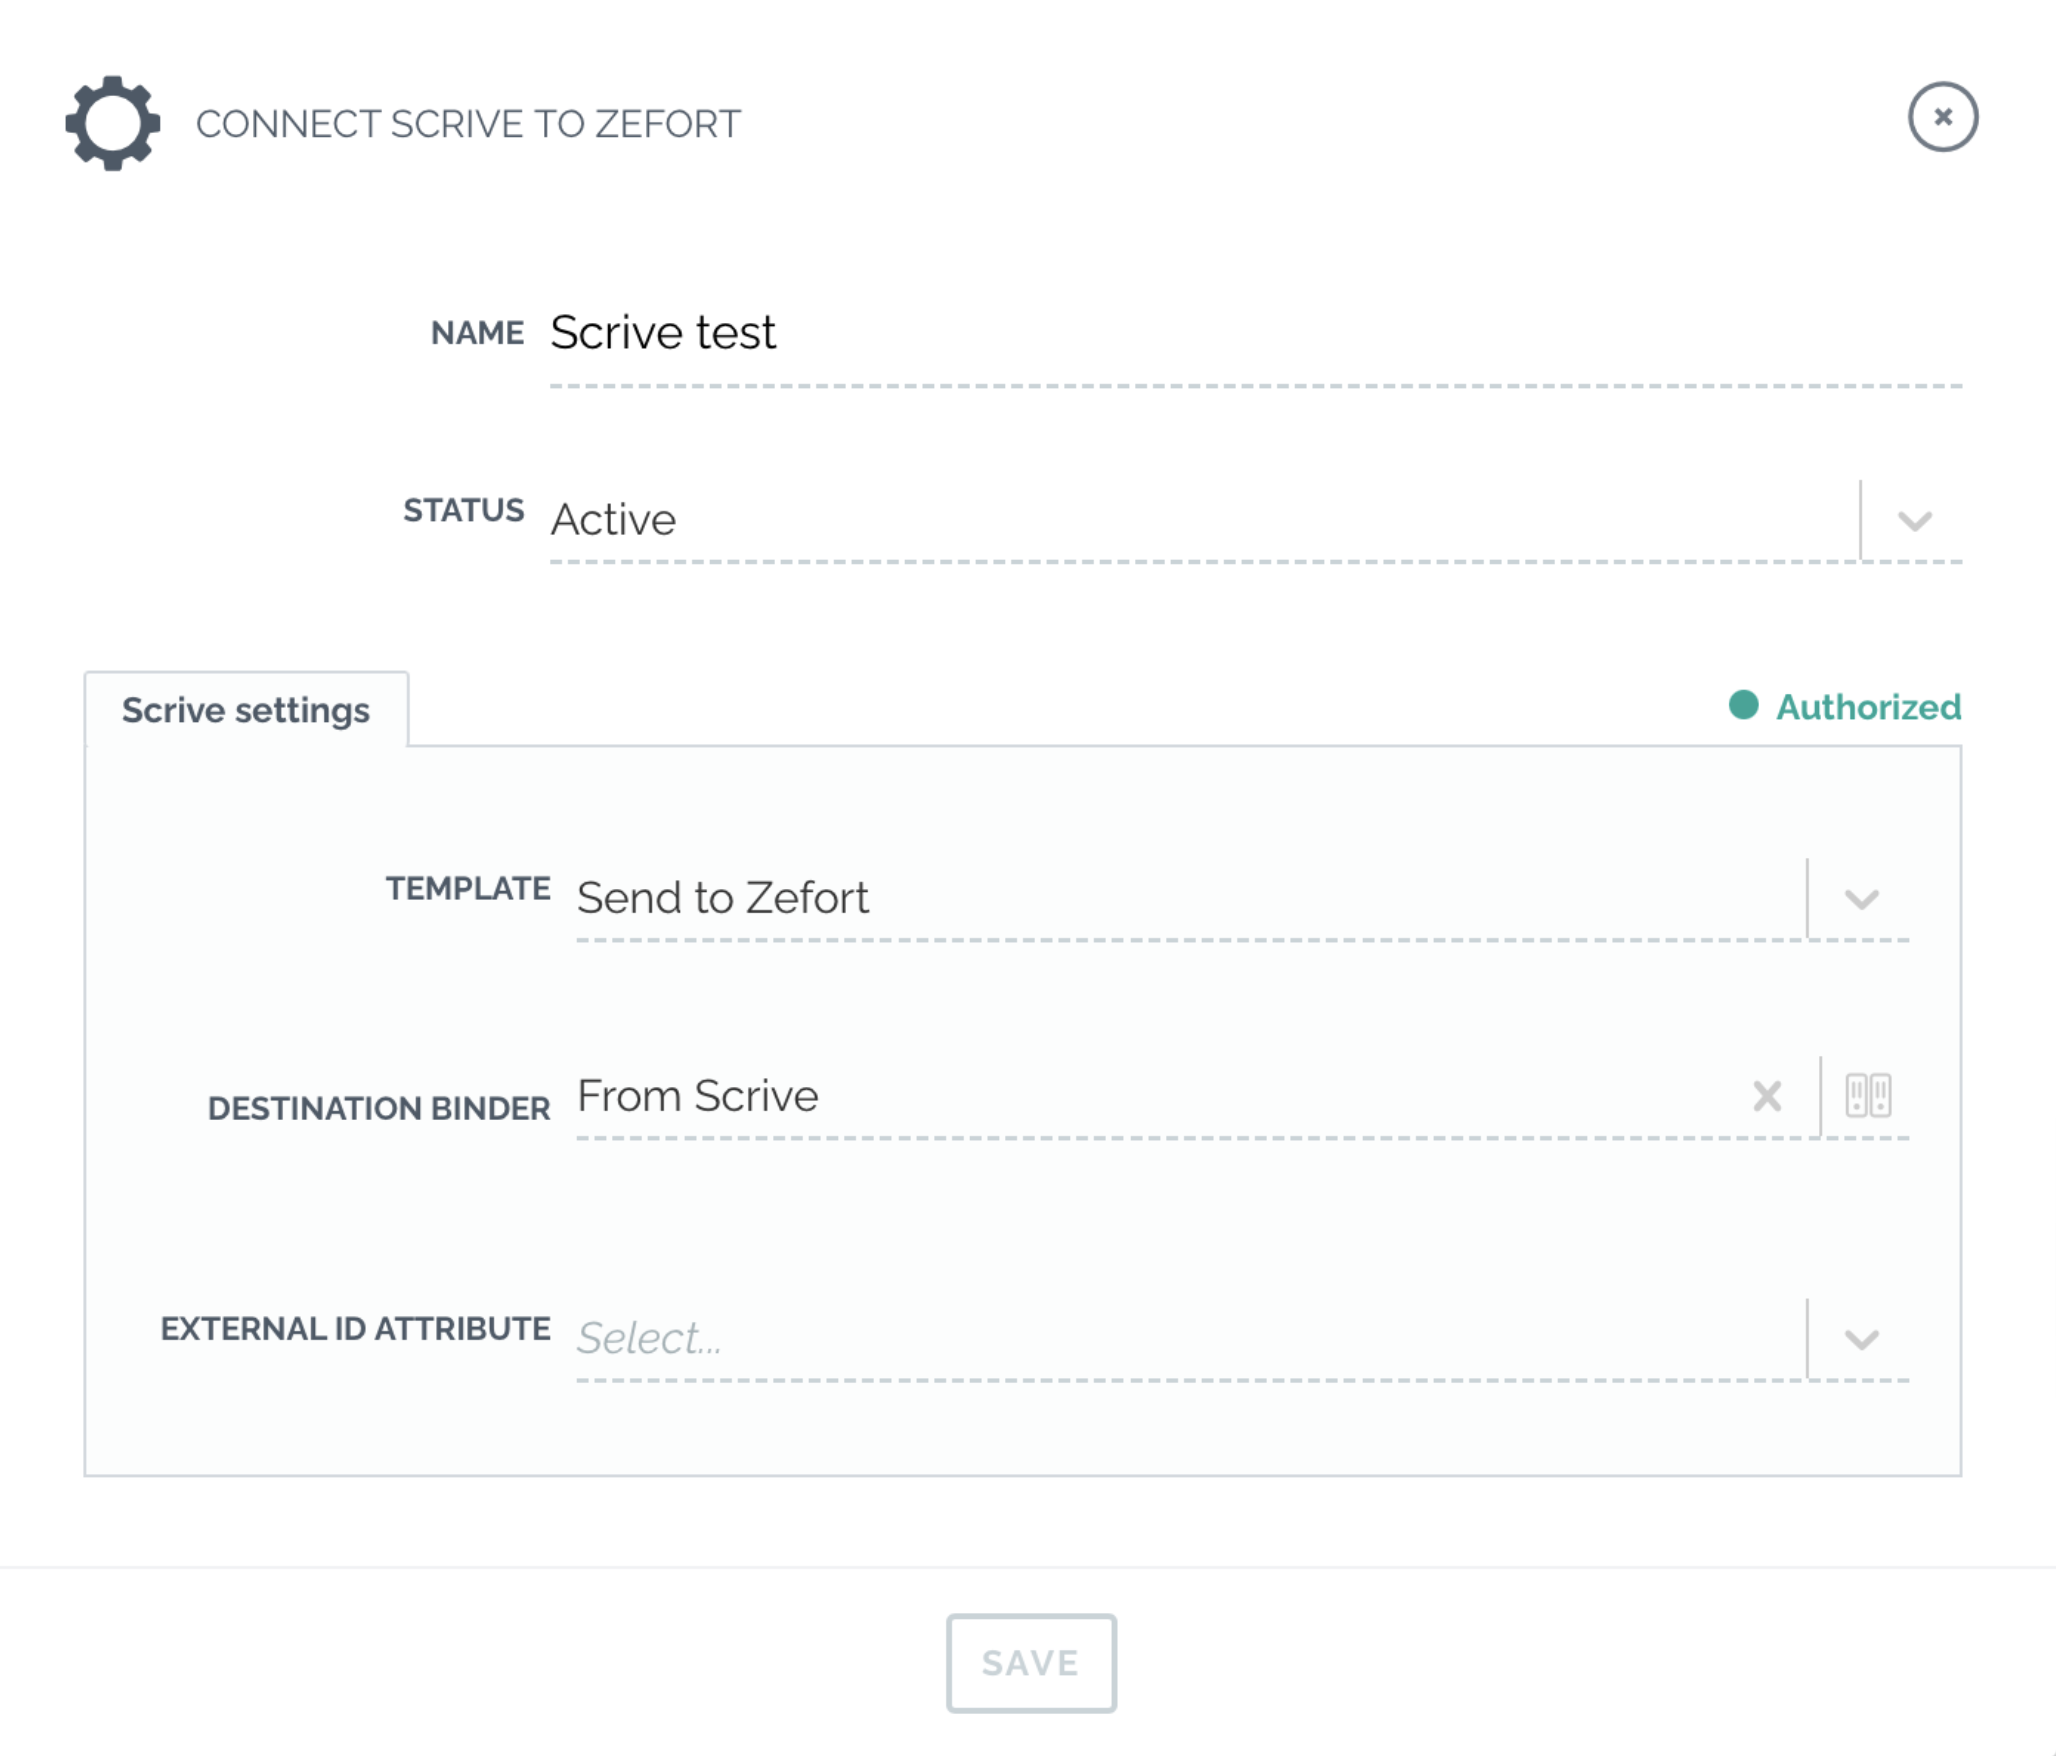
- Set status Active
- Select save
If you have several templates in Scrive which you want to import to Zefort, you need to create a separate integration for each of them.
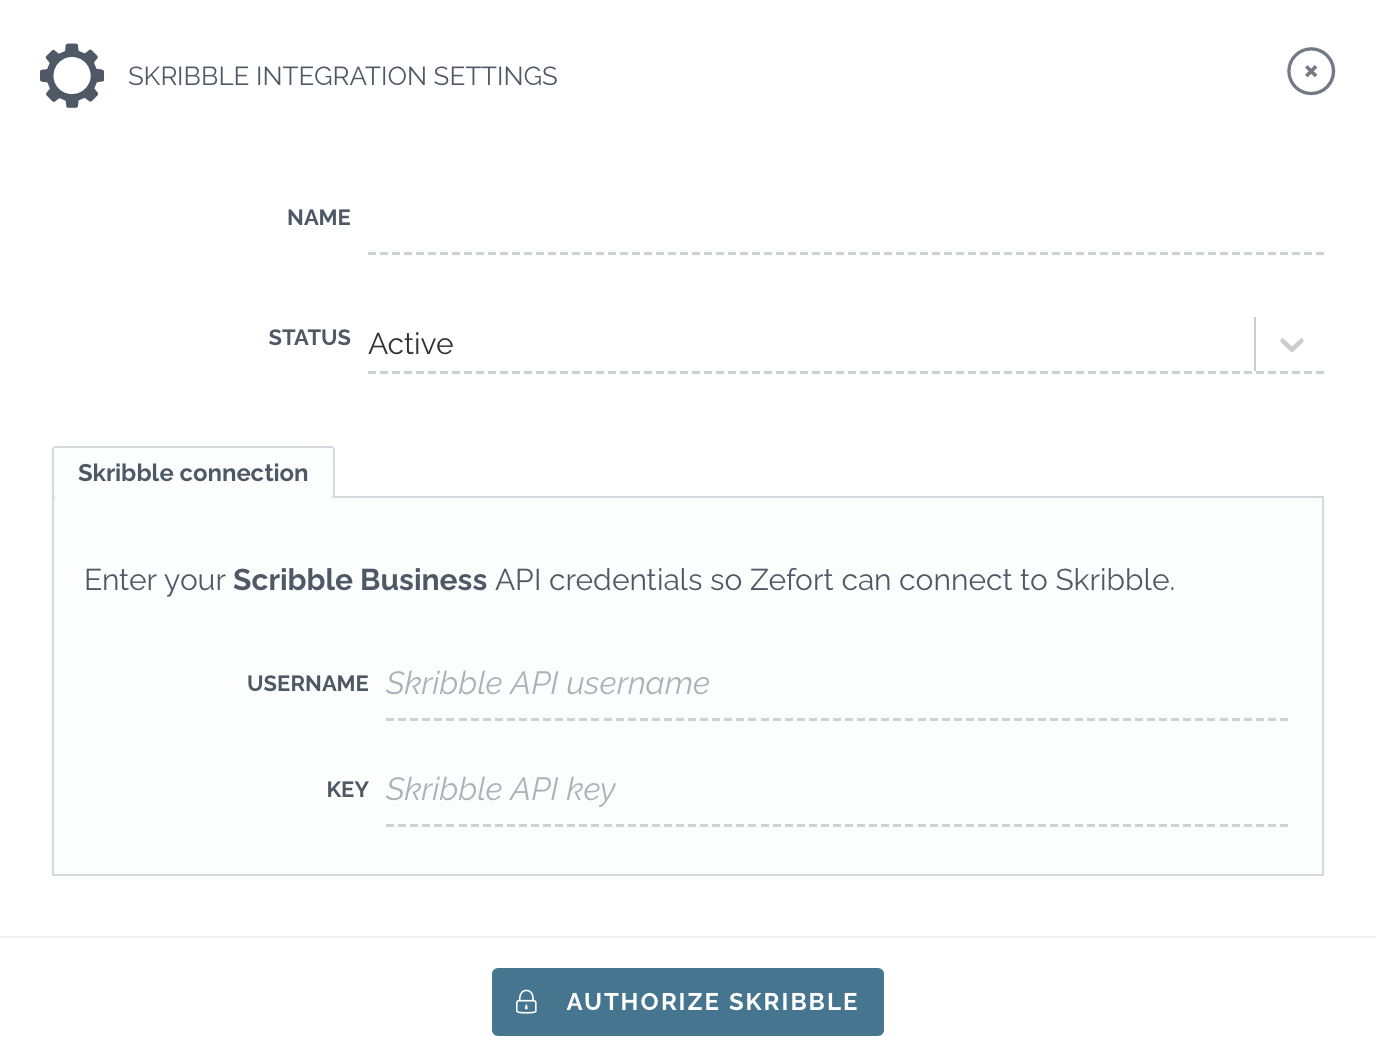
Skribble
- Give a name for the integration
- Enter Scribble Business API credentials
- Skribble API username
- Skribble API key
- Set integration status to Active
- Click authorize skribble
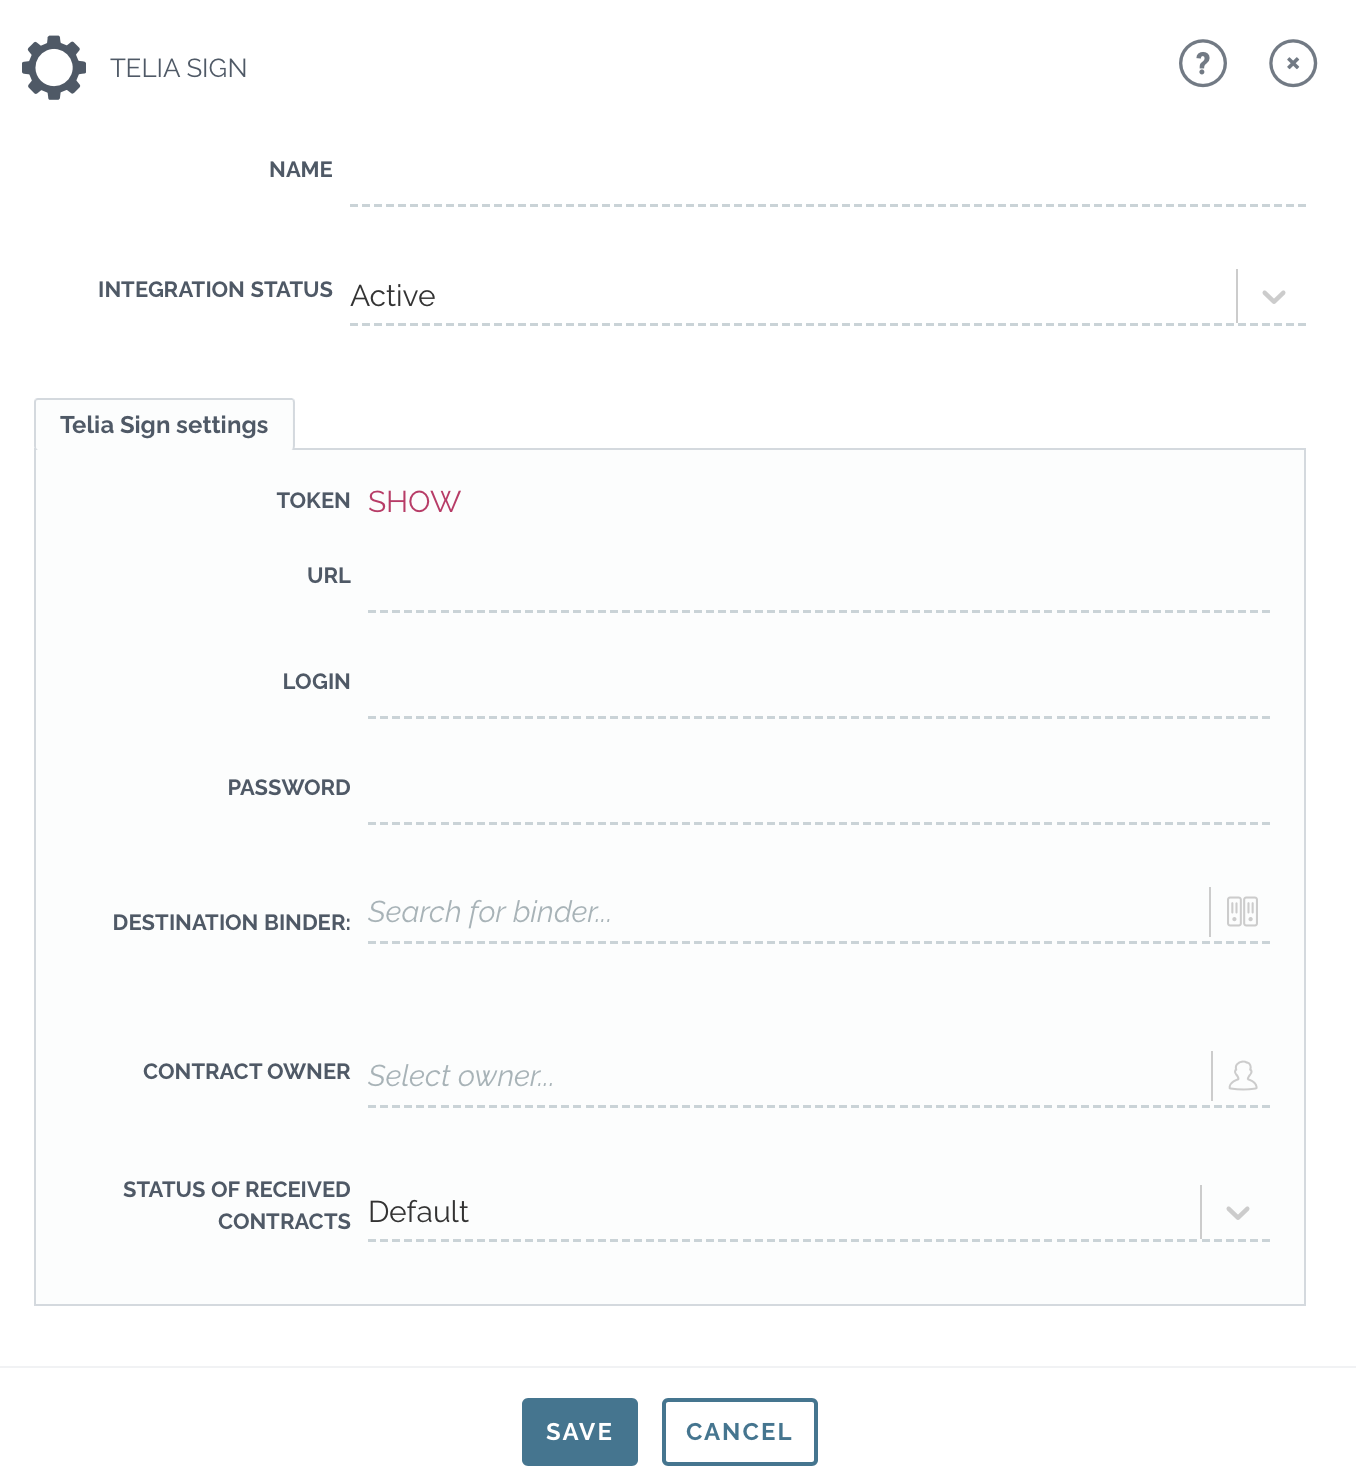
Telia Sign
- Add a name for the integration
- Telia Sign settings:
- Token: Click SHOW to see and copy the token
- URL: https://api.teliasign.com
- Login & password: designated Telia user account credentials and password
(Note: don’t use personal account to create the integration!) - Select destination binder and contract owner for imported contracts
- Select status of received contracts
- Set integration status Active
- Click Save
Contact Telia Sign support in order to complete activation from Telia’s side.
Verified
- Create verified.eu connection
(Note: use a designated Verified account for creating the Zefort integration!)- password
- company id
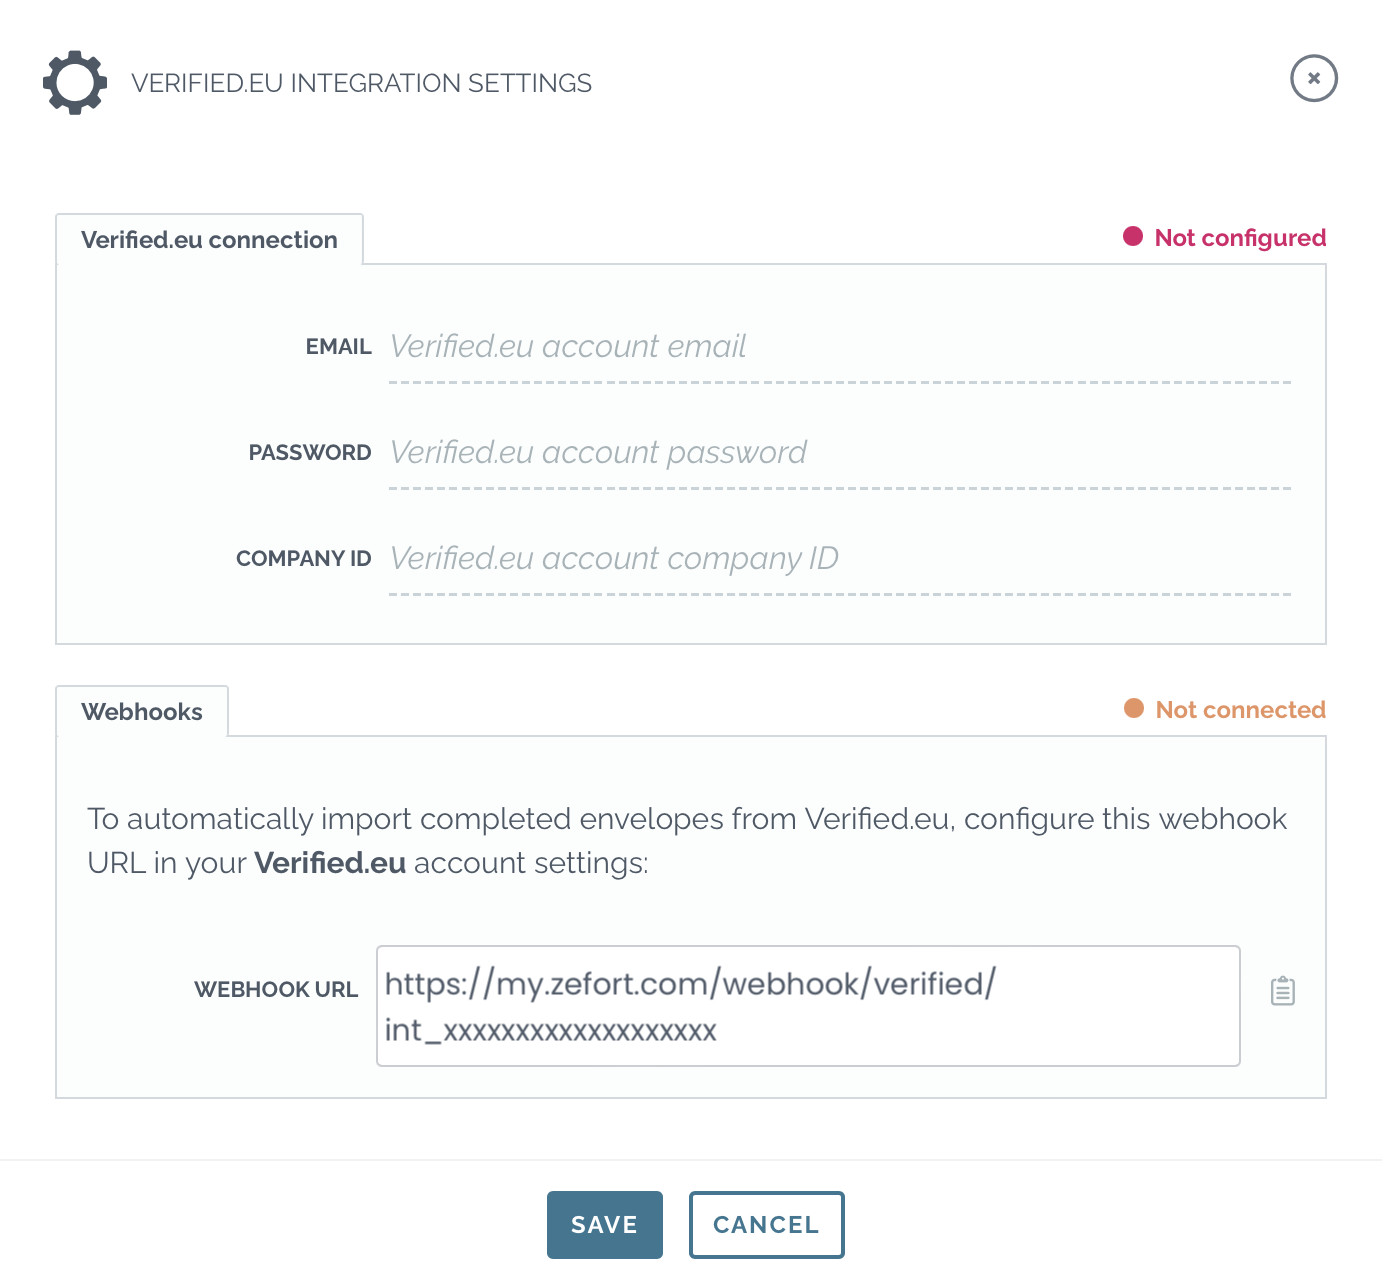
- Copy the webhook URL and configure it in the Verified.eu account settings
- Select destination binder and contract owner for imported documents
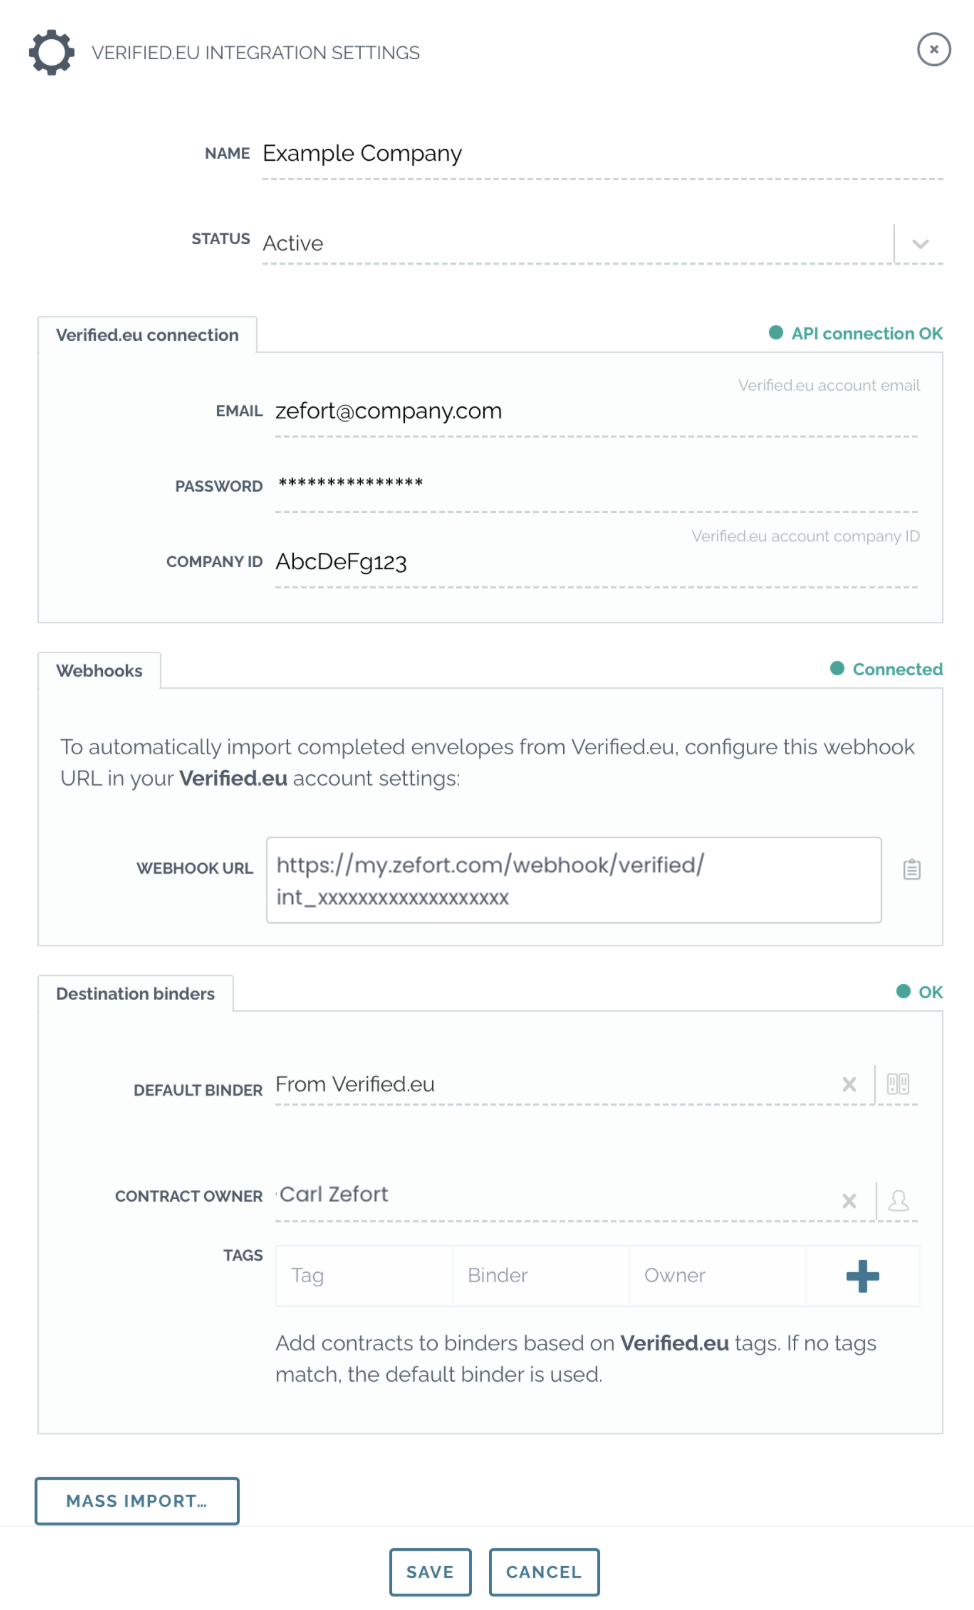
- Set status Active
- Click Save
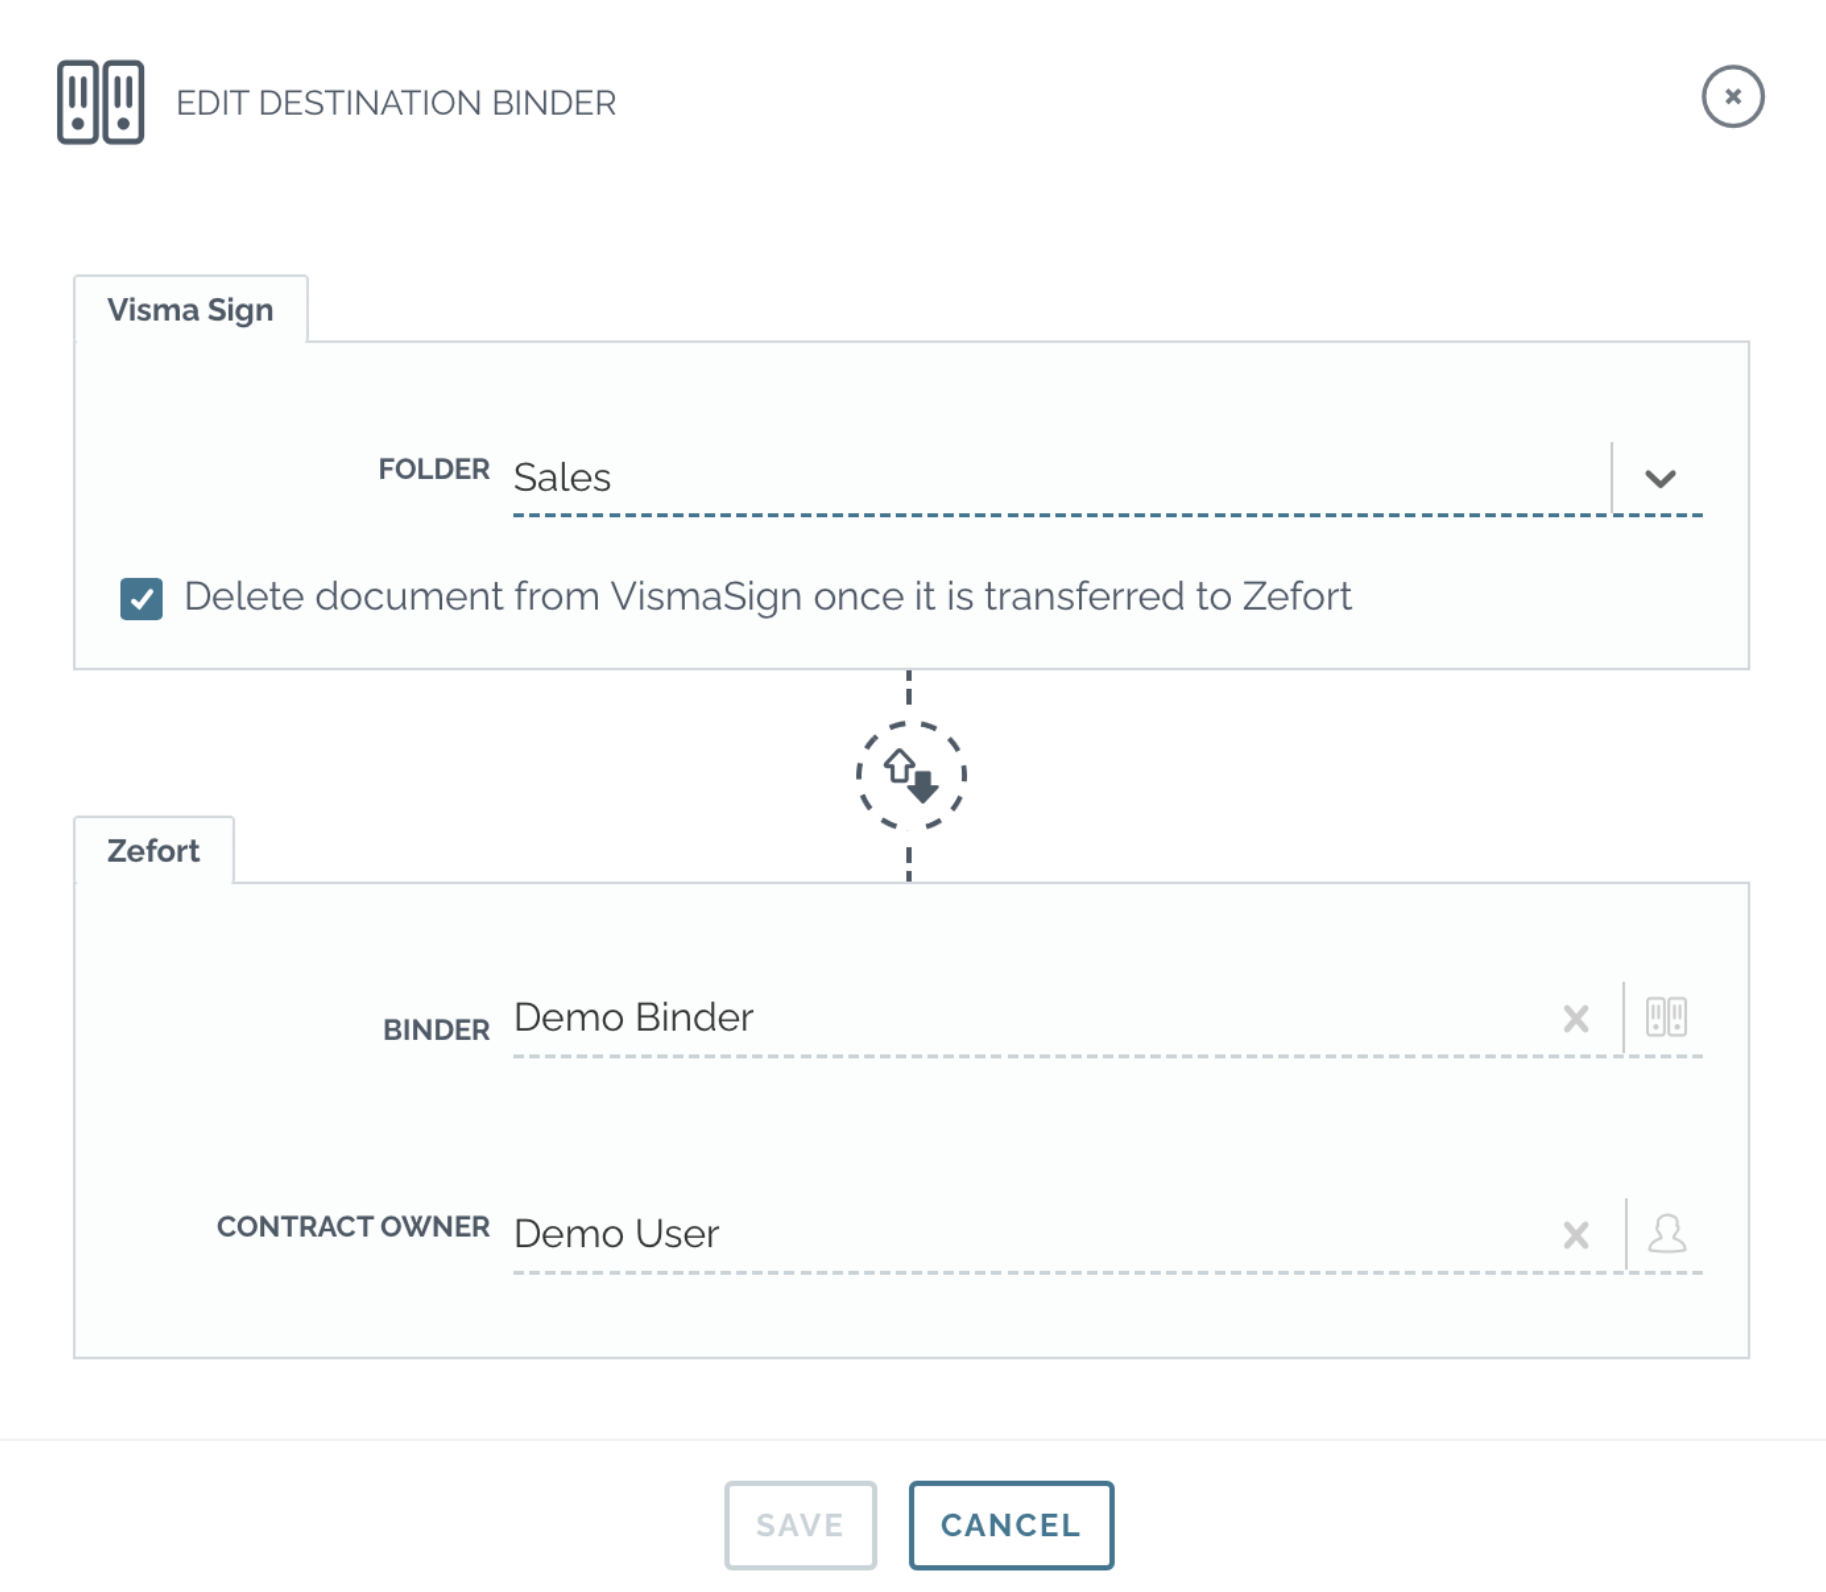
Visma Sign
- Select Production environment and fill in Visma API client details
- Identifier
- Secret
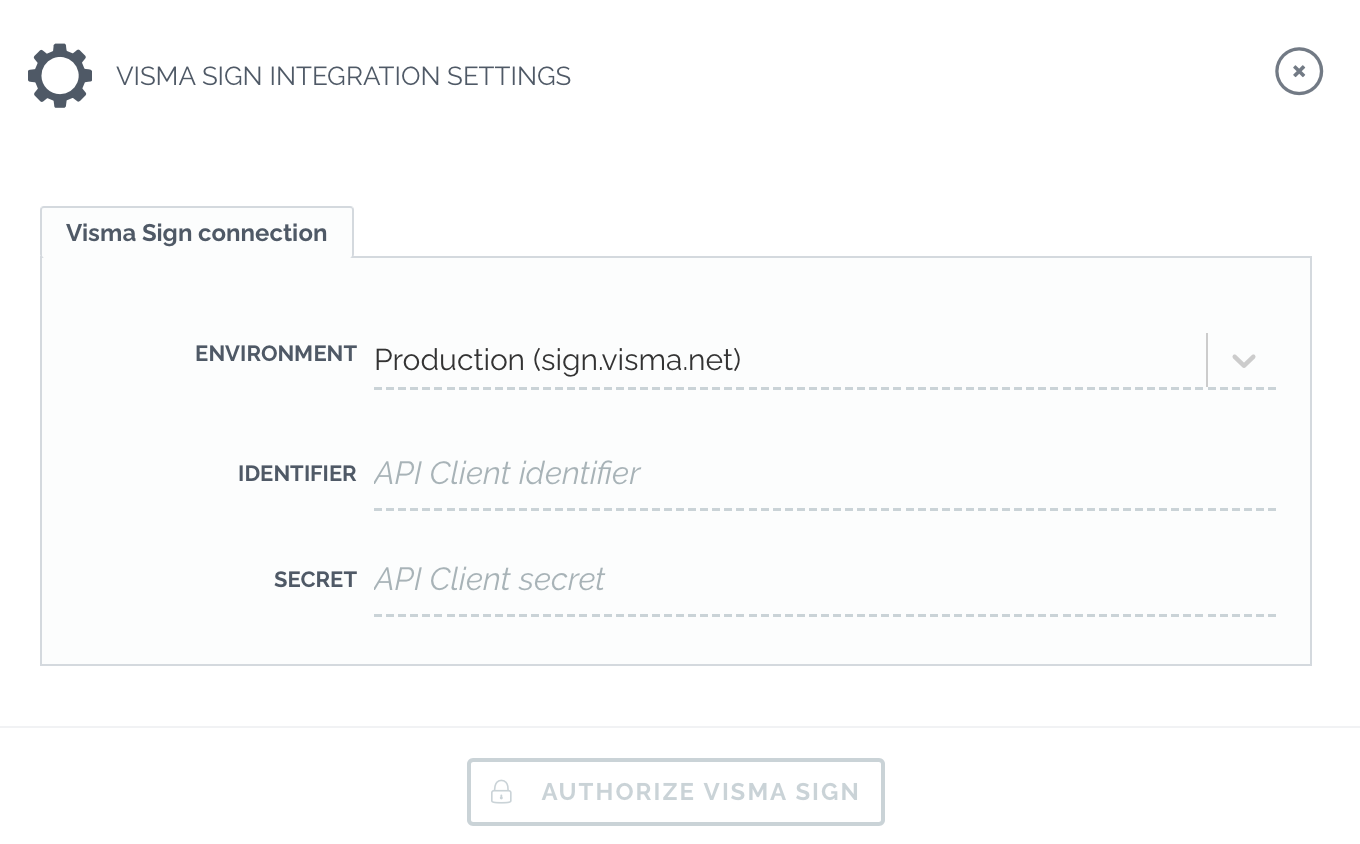
- Click authorize visma sign
- Configure destination binders (optional) by clicking “add” button

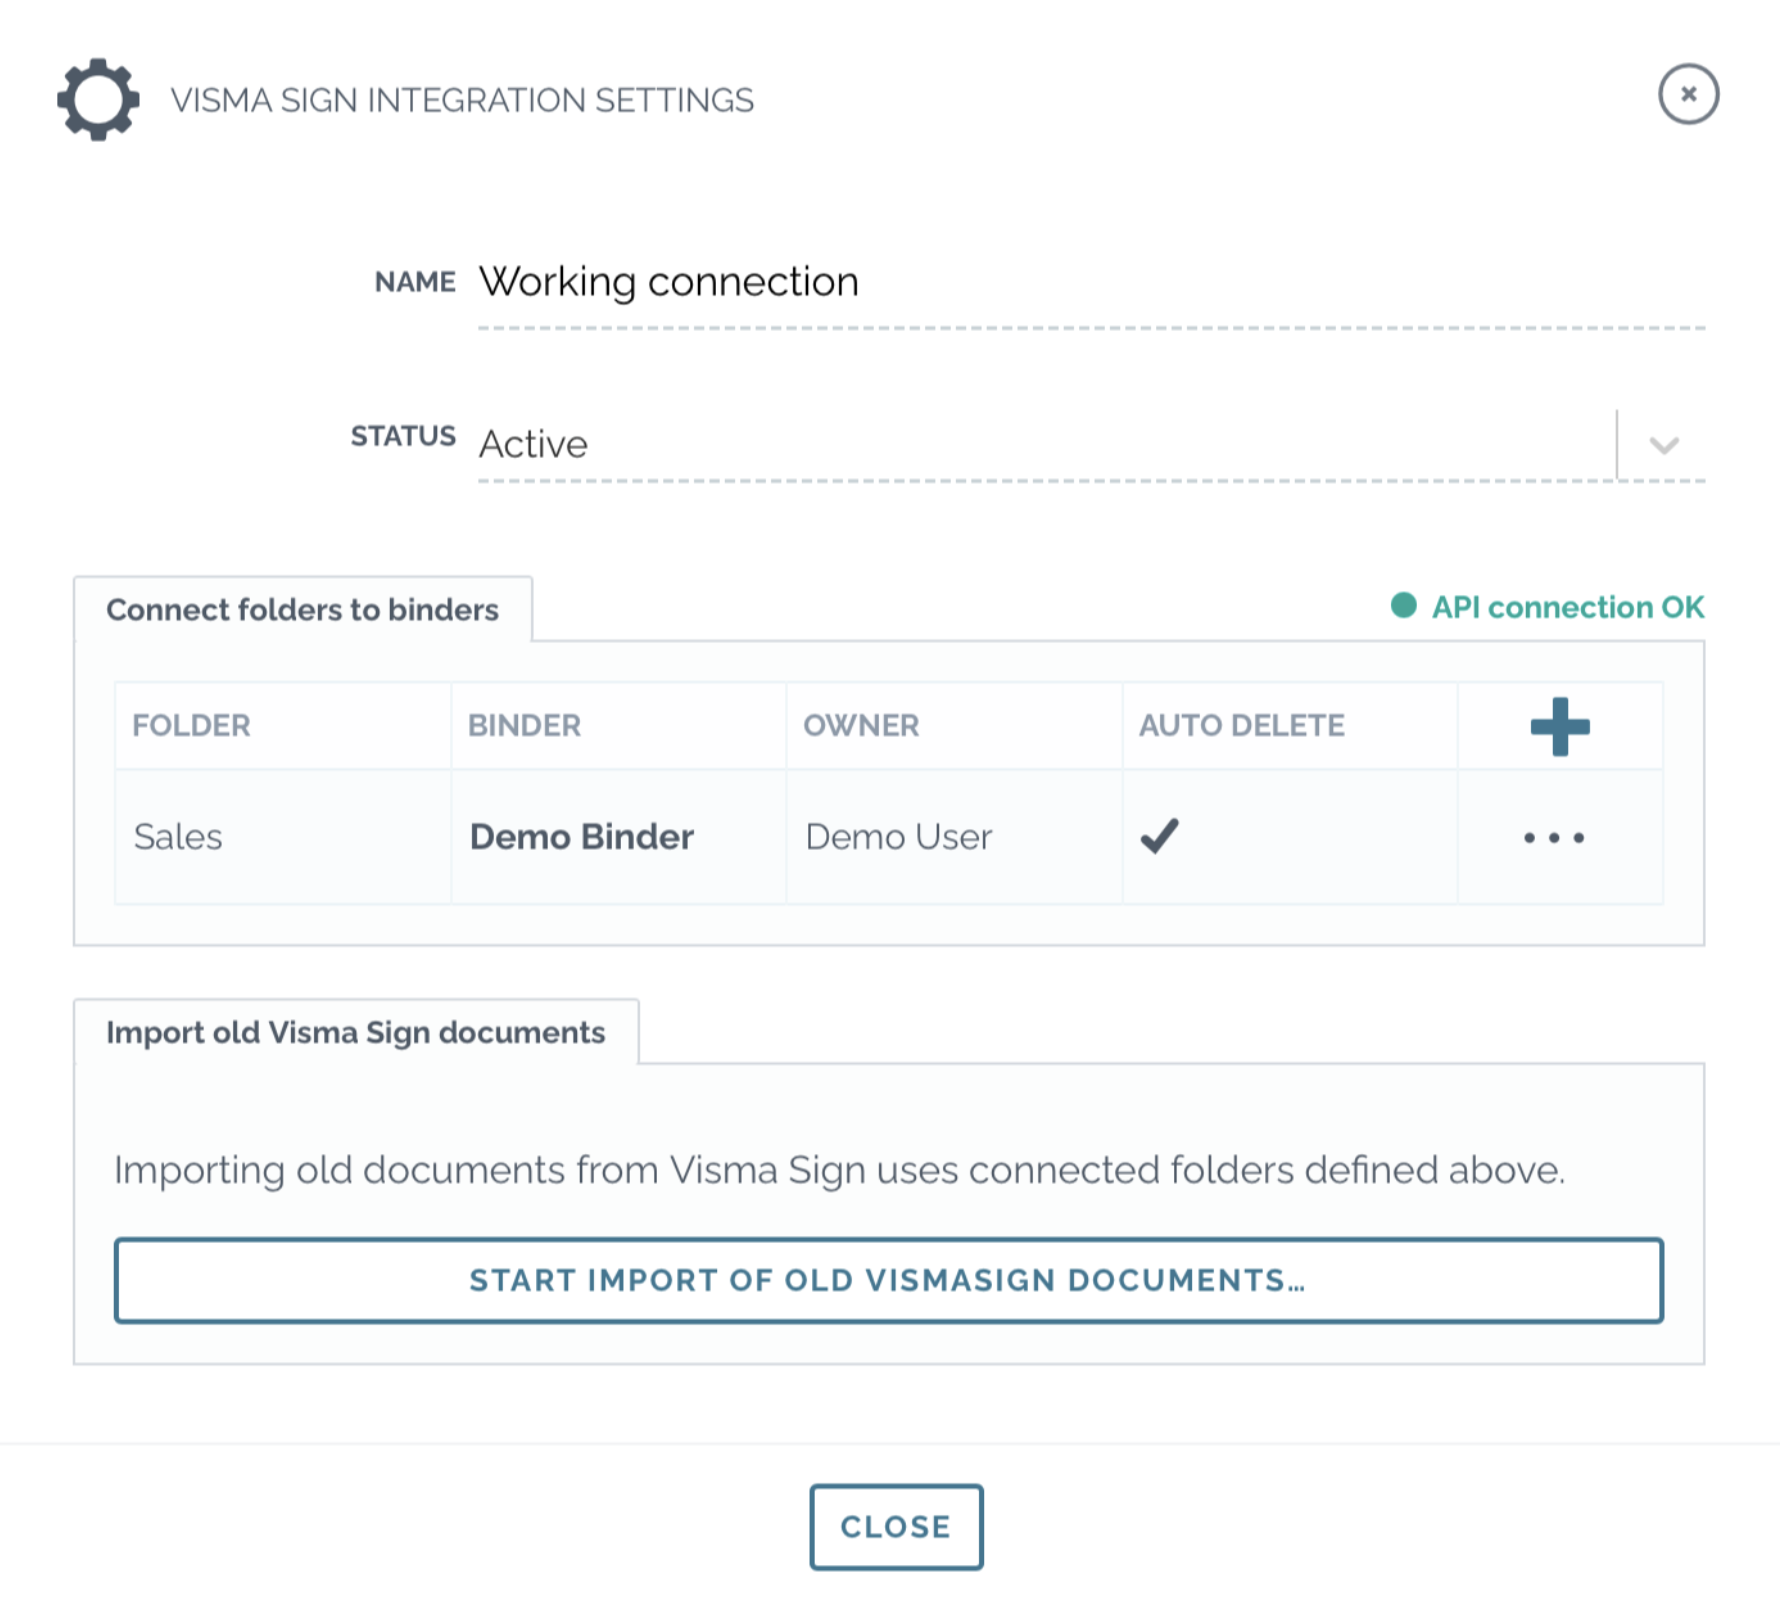
- Edit destination binder details
- Select Visma folder to be connected to Zefort binder
- Select contract owner
- Auto delete: when contract is imported to Zefort, Zefort removes the document from Visma
- Click save
- Set status Active and save
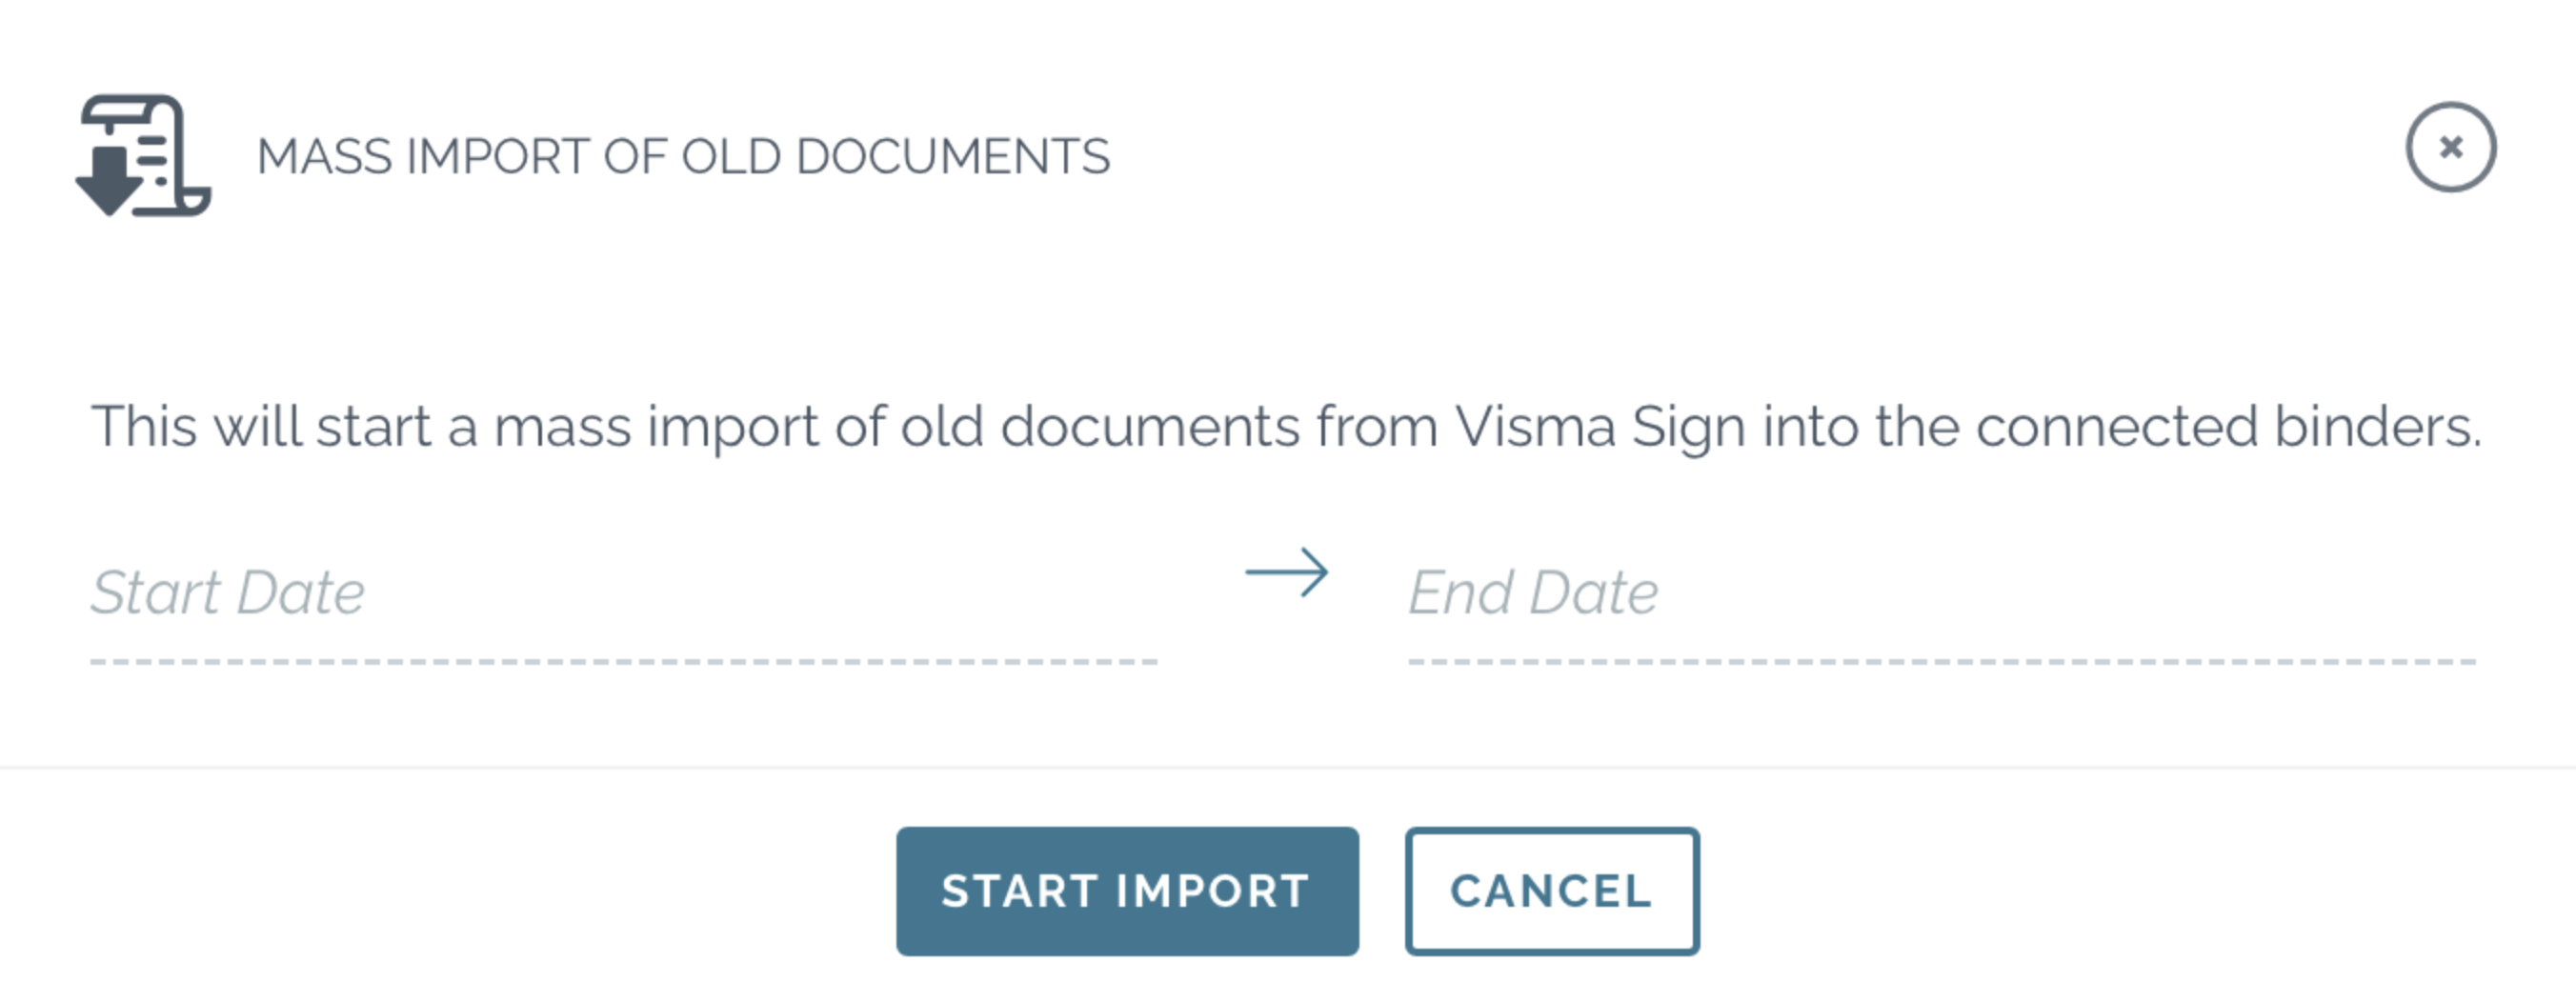
- Import old Visma Sign documents (optional):
- Click Start import of old visma documents…
- Select from which time period you want to import the Visma documents
- Click start import