Edit binders
This article explains how to perform the following actions on binders:
To learn about binder inboxes, check this article: Zefort email addresses > Binder inboxes
Required permissions for editing binders
For editing binders you need user permission “Can manage binders” + full binder permission OR admin level user permission “Can manage all contracts and binders“.
For information on binder permissions, refer to this article: Binder permission management
| Binder permissions required for binder editing | |||
Action |
Binder permission | ||
| Full | Edit | View | |
| Download a binder as zip file | yes | yes | yes |
| Add contracts in the binder | yes1 | yes1 | no |
| Manage binder’s access permissions | yes2 | no | no |
| Rename the binder | yes2 | no | no |
| Add a sub-binder | yes2 | no | no |
| Move the binder | yes2 | no | no |
| Merge binders | yes2 | no | no |
| Delete the binder | yes2 | no | no |
| Notes
1 requires user permission “Can add contracts” 2 requires user permission “Can manage binders” |
|||
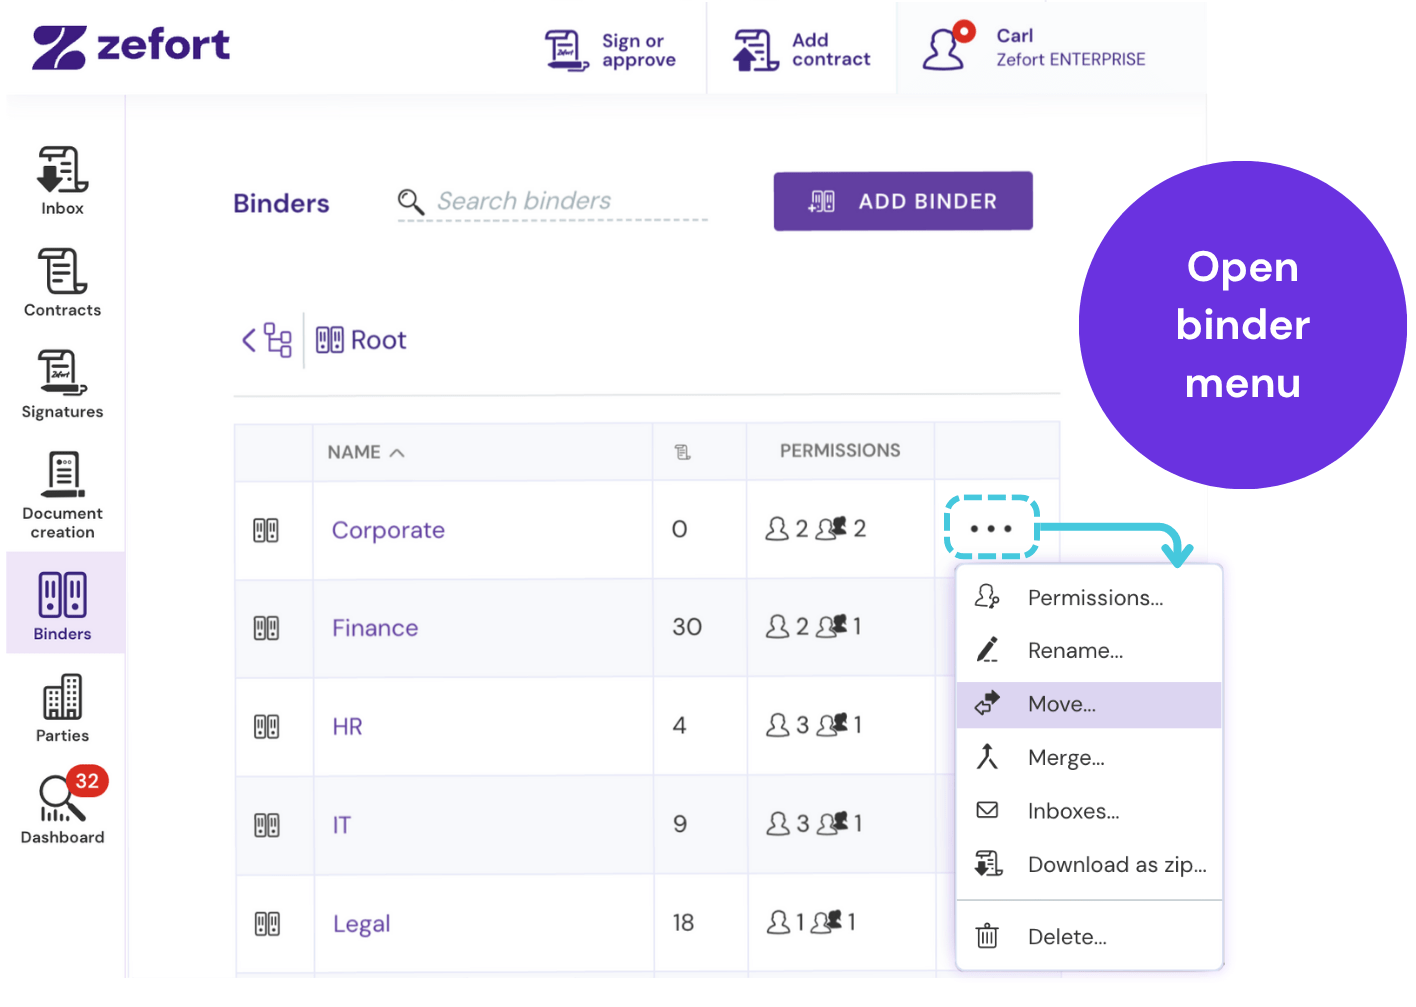
Accessing binder editing options
- Navigate to the Binders tab and locate the binder you wish to edit
- Click the binder menu ••• and select an action
Renaming a binder
- In binder menu, select Rename.
- Enter the new name for the binder.
- Click Save

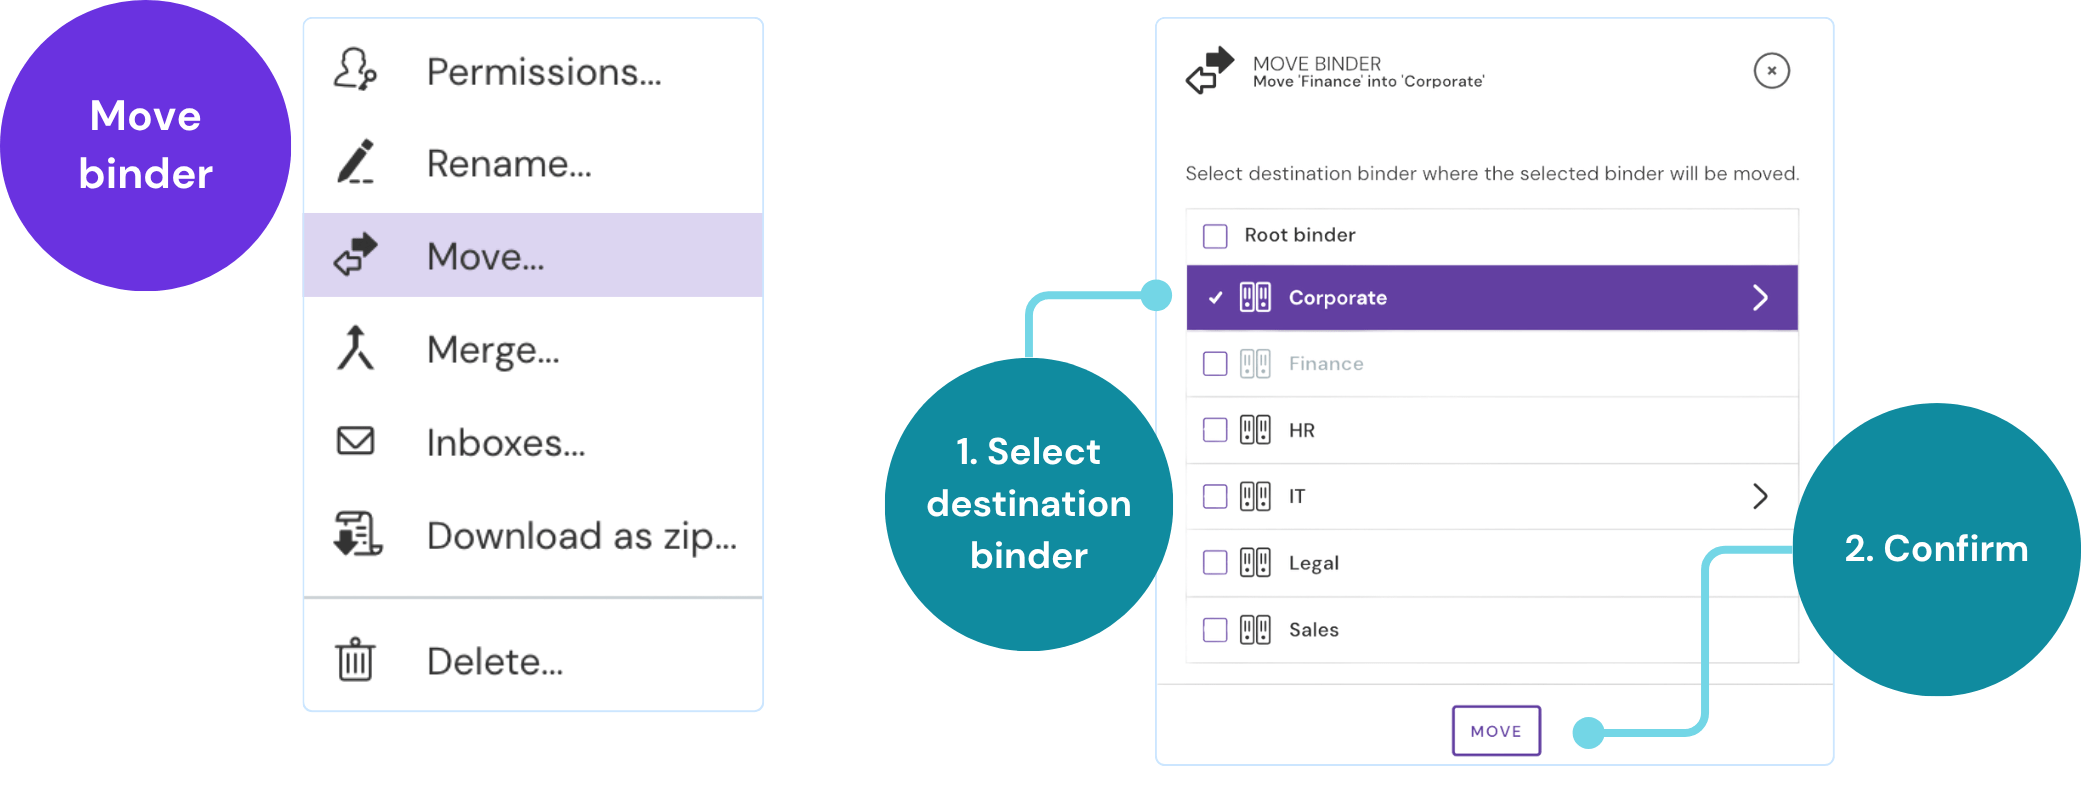
Moving a binder
Moves a binder to a different location in your binder hierarchy.
- In binder menu, select Move.
- Choose the new destination (e.g., under another binder or to the root level).
- Click Move
Inherited permissions will update based on the new parent binder.
Manually set permissions remain unchanged.
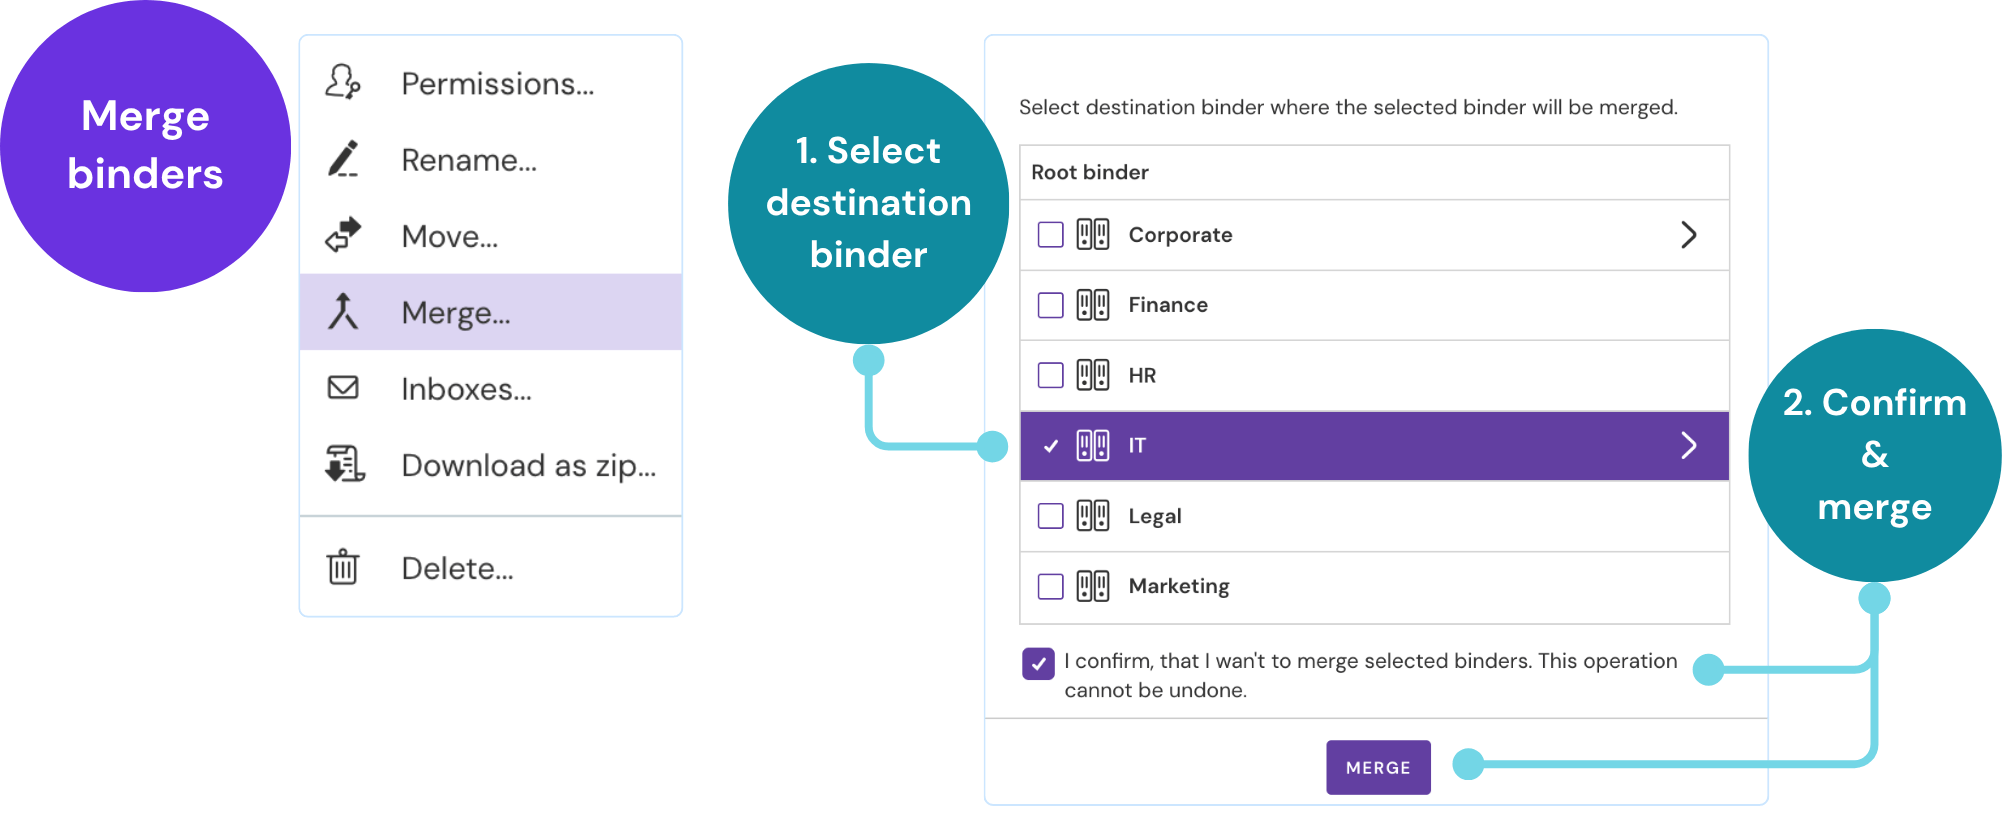
Merging binders
Combines one binder (source) into another (destination binder):
- From the source binder’s menu •••, select Merge.
- Select the destination binder.
- Click Merge
This action is irreversible.
After merging:
- All contracts from the source binder will be moved to the destination binder.
- Destination binder’s permissions apply to these moved contracts.
- Sub-binders from the source binder move under the destination binder.
- Sub-binder permissions after merge:
- Manually set permissions remain unchanged.
- If permissions were inherited, they will now be inherited from the new parent binder (the destination binder).
- Sub-binder permissions after merge:
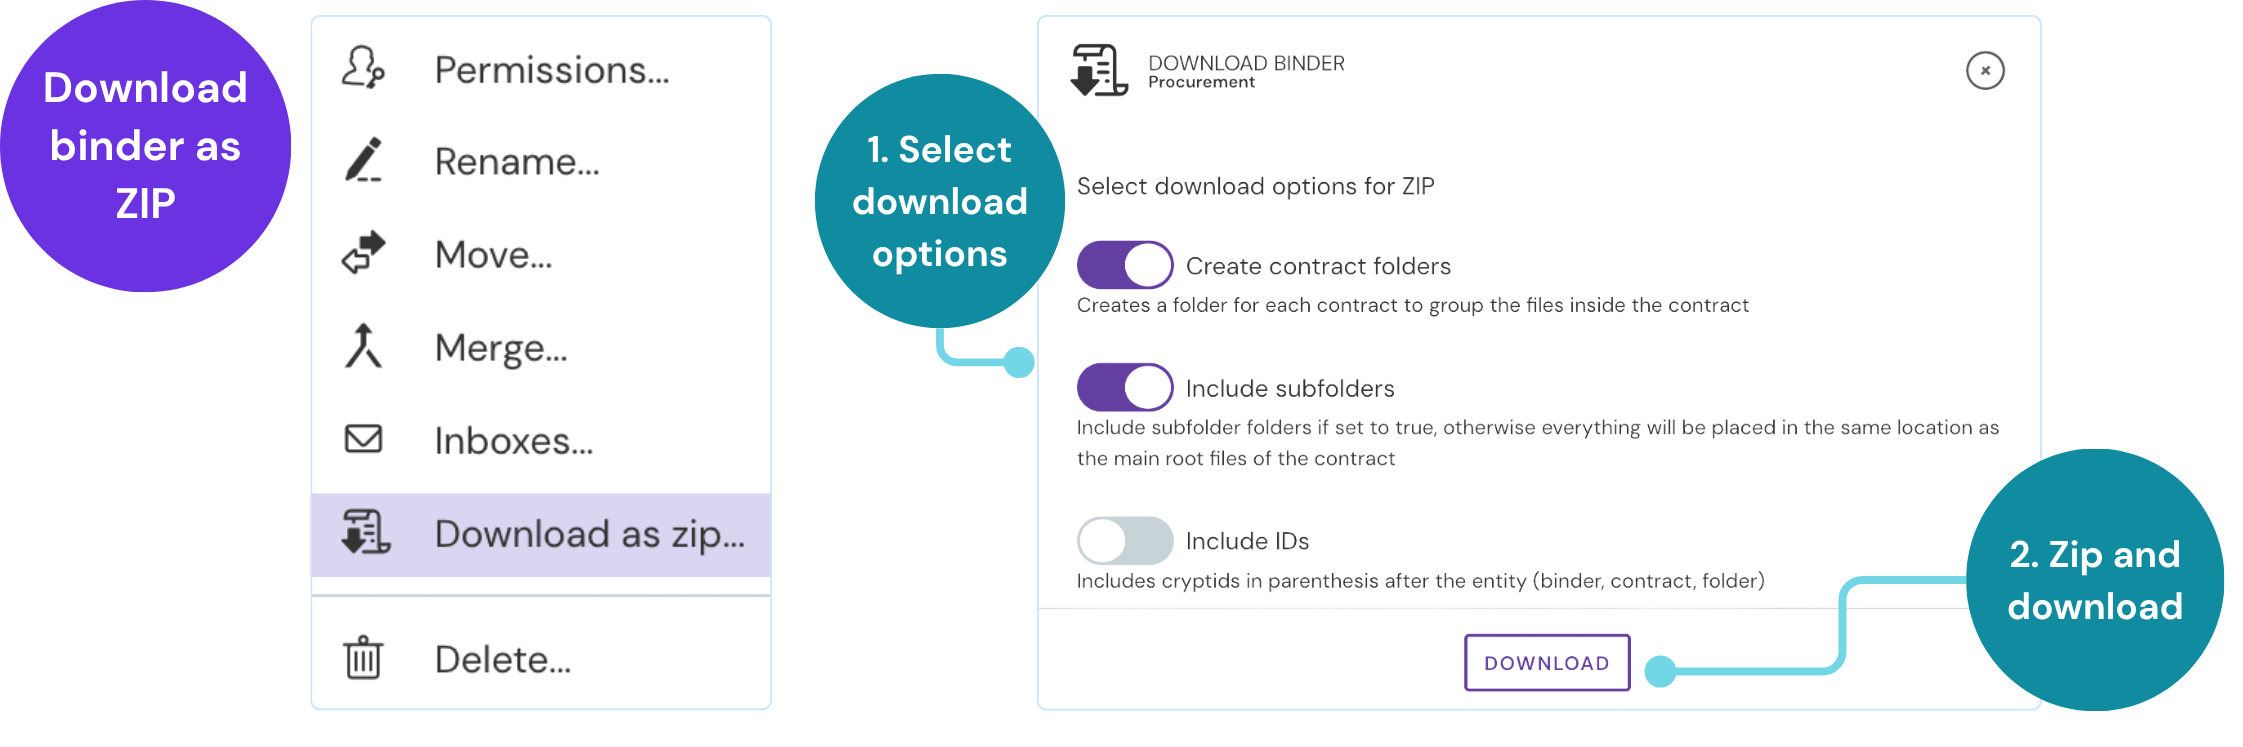
Downloading a binder as a ZIP file
You can download an entire binder, including all its sub-binders, as a single ZIP file. The original binder structure will be preserved within the ZIP file using folders.
- In binder menu, select Download as ZIP…
- Configure download options:
- Create contract folders: When enabled, this creates a separate folder for each contract to group all of its files together.
- Include contract subfolders: This controls whether the folder structure inside a contract is preserved.
- If enabled, any internal folders within a contract are recreated in the ZIP.
- If disabled, all of a contract’s files are placed together in the same folder.
- Include IDs: When enabled, this appends the unique system ID in parentheses to the names of binders, contracts, and contract folders (e.g., Binder (bnd_id), Contract (ct_id), Contract folder (fol_id).
- Click Download to zip binder
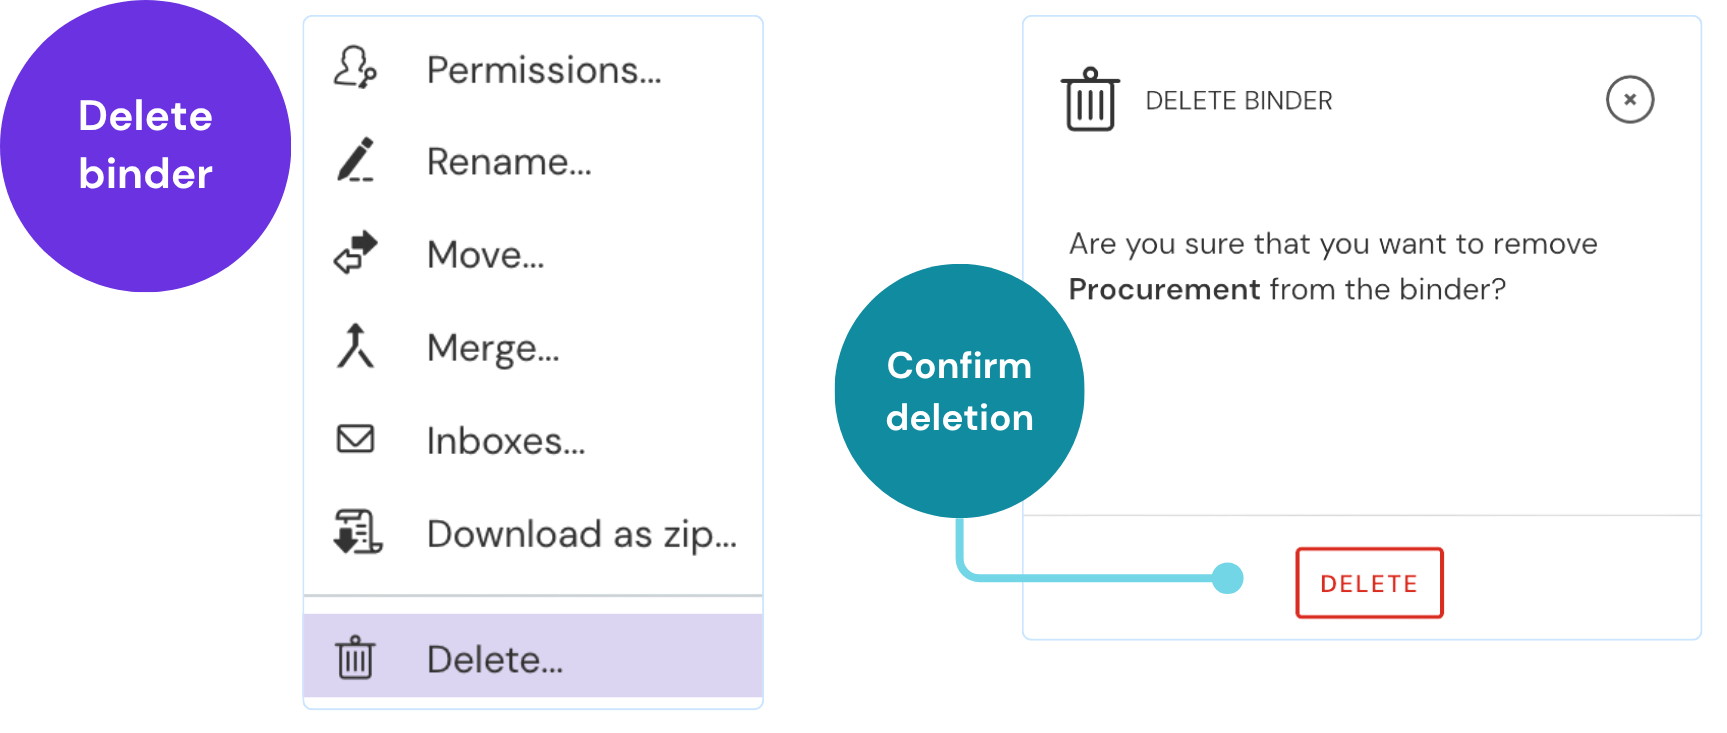
Deleting a binder
- In the binder menu, select Delete.
- Confirm by clicking delete
This action is irreversible.
Important considerations when deleting binders:
- Contracts are NOT deleted from Zefort: they remain in the system.
- Visibility of the contracts: if a contract was only in the deleted binder and is not linked to any other, its visibility changes. Such contracts will only be visible to their owner and to administrators with permission to view all account content.
- To ensure you don’t lose track of these contracts, you might want to add them to another binder before deleting the original binder.
If your intention is to delete the actual contract documents, please refer to these articles: