Configuring custom metadata
In addition to Zefort’s default metadata, it is possible to customize metadata if this functionality is included in your subscription. Customization options include:
Editing metadata layout
Adding custom metadata attributes
Translating metadata attributes
Configuring custom contract types
Defining attribute rules
Setting required parties and binders
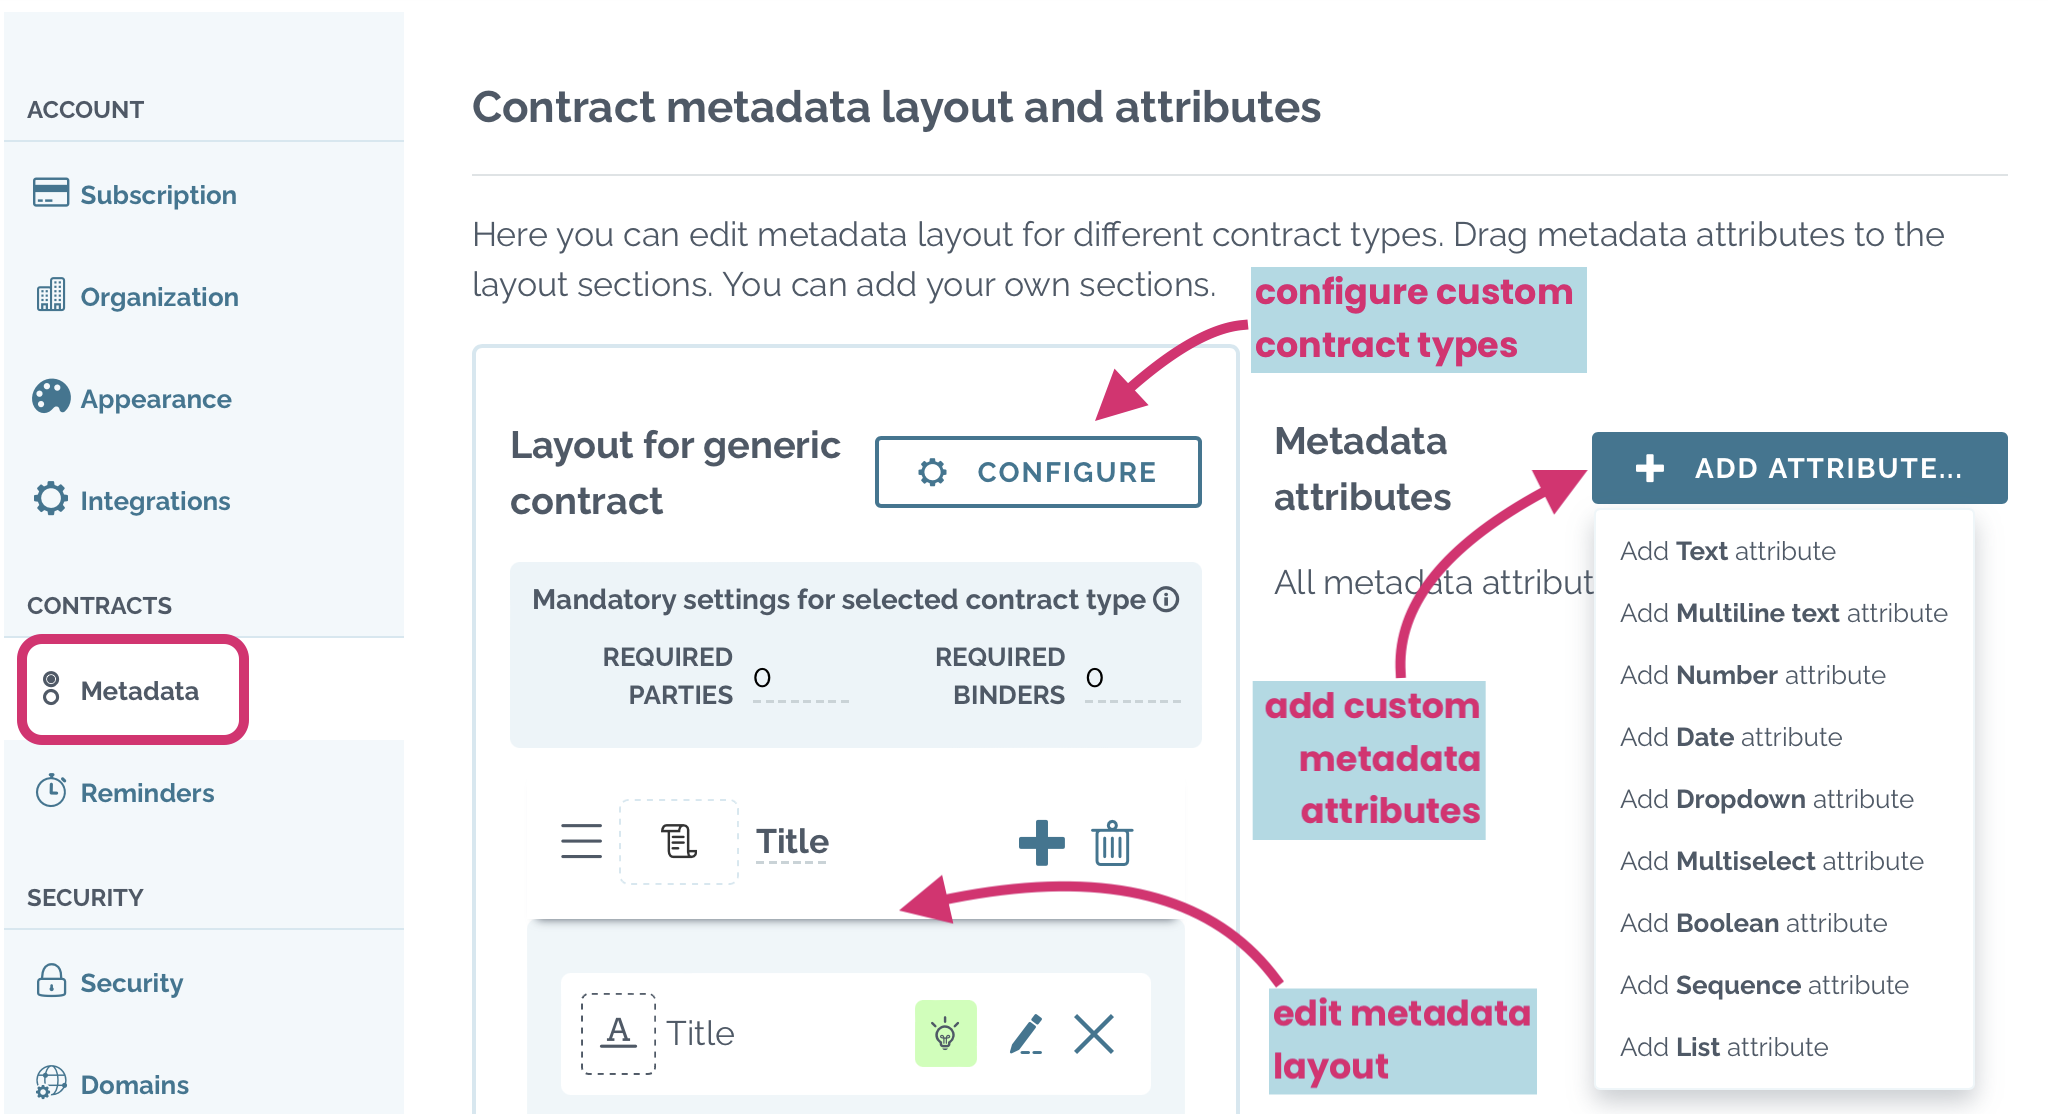
To customize metadata, go to account settings and open the “Metadata” tab. Note that only Admin with the “Can manage custom metadata” permission can access these settings.
Note: custom metadata is an optional feature and may not be active in all accounts. If you would like to manage contract metadata for your account, please contact our sales.
Watch video below to see how you can manage custom metadata.
Editing metadata layout
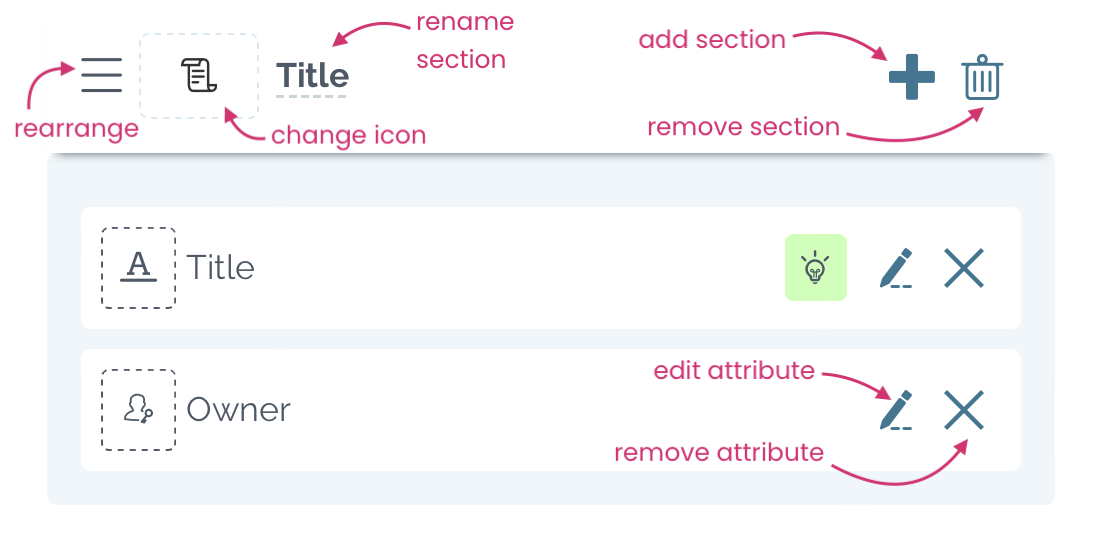
You can edit the metadata layout in various ways.
- Create, delete, rearrange and rename sections: modify the structure of your metadata layout.
- Add new metadata attributes: insert new attributes into sections.
- Rearrange attributes: change the order of attributes within sections by dragging.
- Move attributes between sections: drag attributes from one section to another
- Remove attributes from layout: remove attributes from sections by clickint the cross. The removed attributes remain available and can be re-added to the layout at any time, with all associated metadata kept in storage. *
* Note: when you delete the metadata attribute entirely (by clicking the trash icon), the deletion is permanent and cannot be undone.
Adding custom metadata attributes
Create custom metadata attributes by following these steps:
- Click + add attribute… and select the attribute type
- Text
- Multiline
- Number
- Date
- Dropdown
- Multiselect
- Boolean
- Sequence
- List
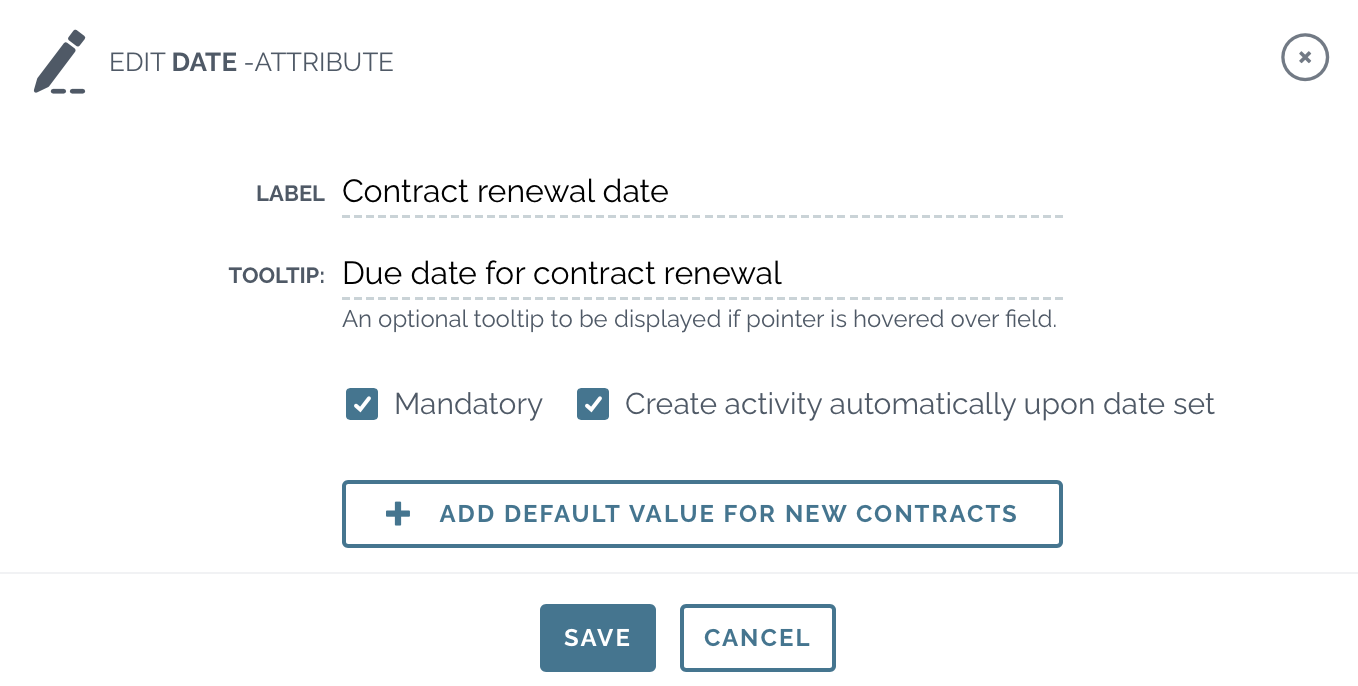
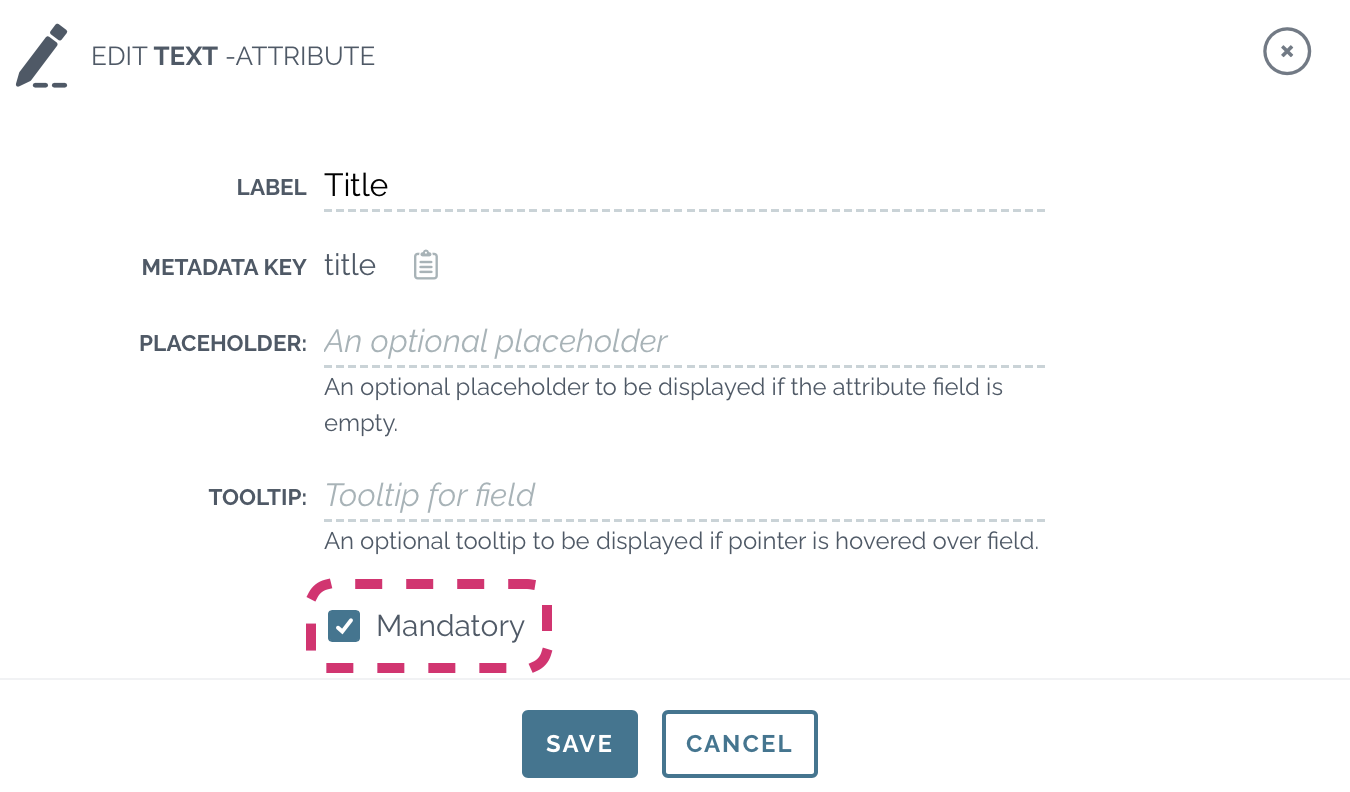
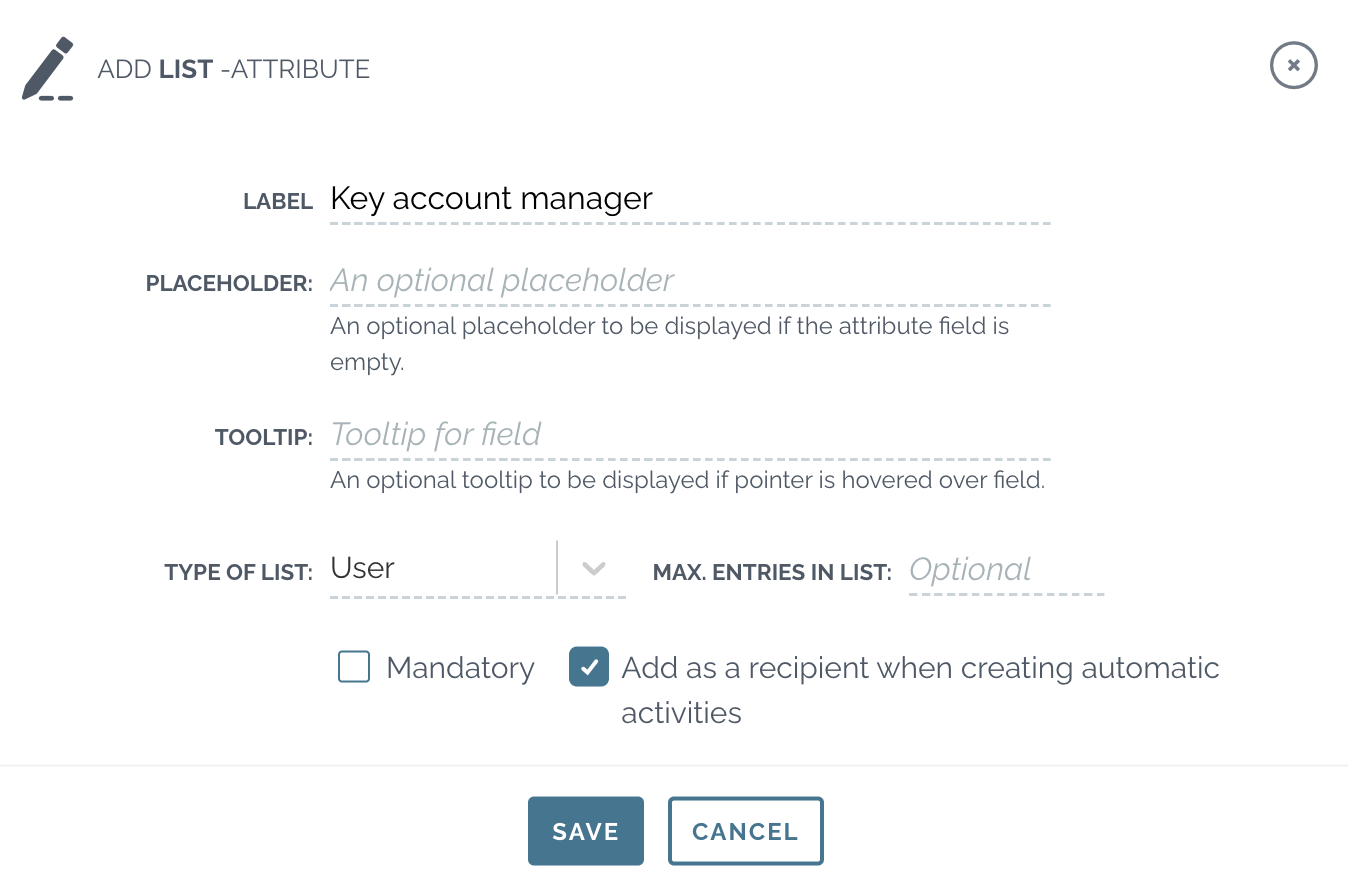
- Fill in attribute details and save
- Drag the attribute to desired metadata section
![]()
Pro tips! 
- Set mandatory attributes: you can set any attribute mandatory. This ensures that changing the contract status to “reviewed” is not possible until the mandatory metadata is filled in. Unfilled metadata fields will be prominently highlighted to draw the user’s attention and users will receive a warning when attempting to review contract with incomplete metadata.
- Quick creation of options: When creating a multiselect or dropdown attribute, you can quickly add the options by writing them in a single row, separated with commas, and then hitting enter. The options will automatically automatically split to separate rows.
- Automatic reminders for date attributes: You can set automatic reminders for date attributes. Read more here!
- List attribute: This allows you to add Zefort users or user groups in contracts’ metadata. If you click the option “add as a recipient when creating automatic activities” you can set the user / group as receiver of automatic reminders.
Translating metadata attributes
Selecting enabled languages
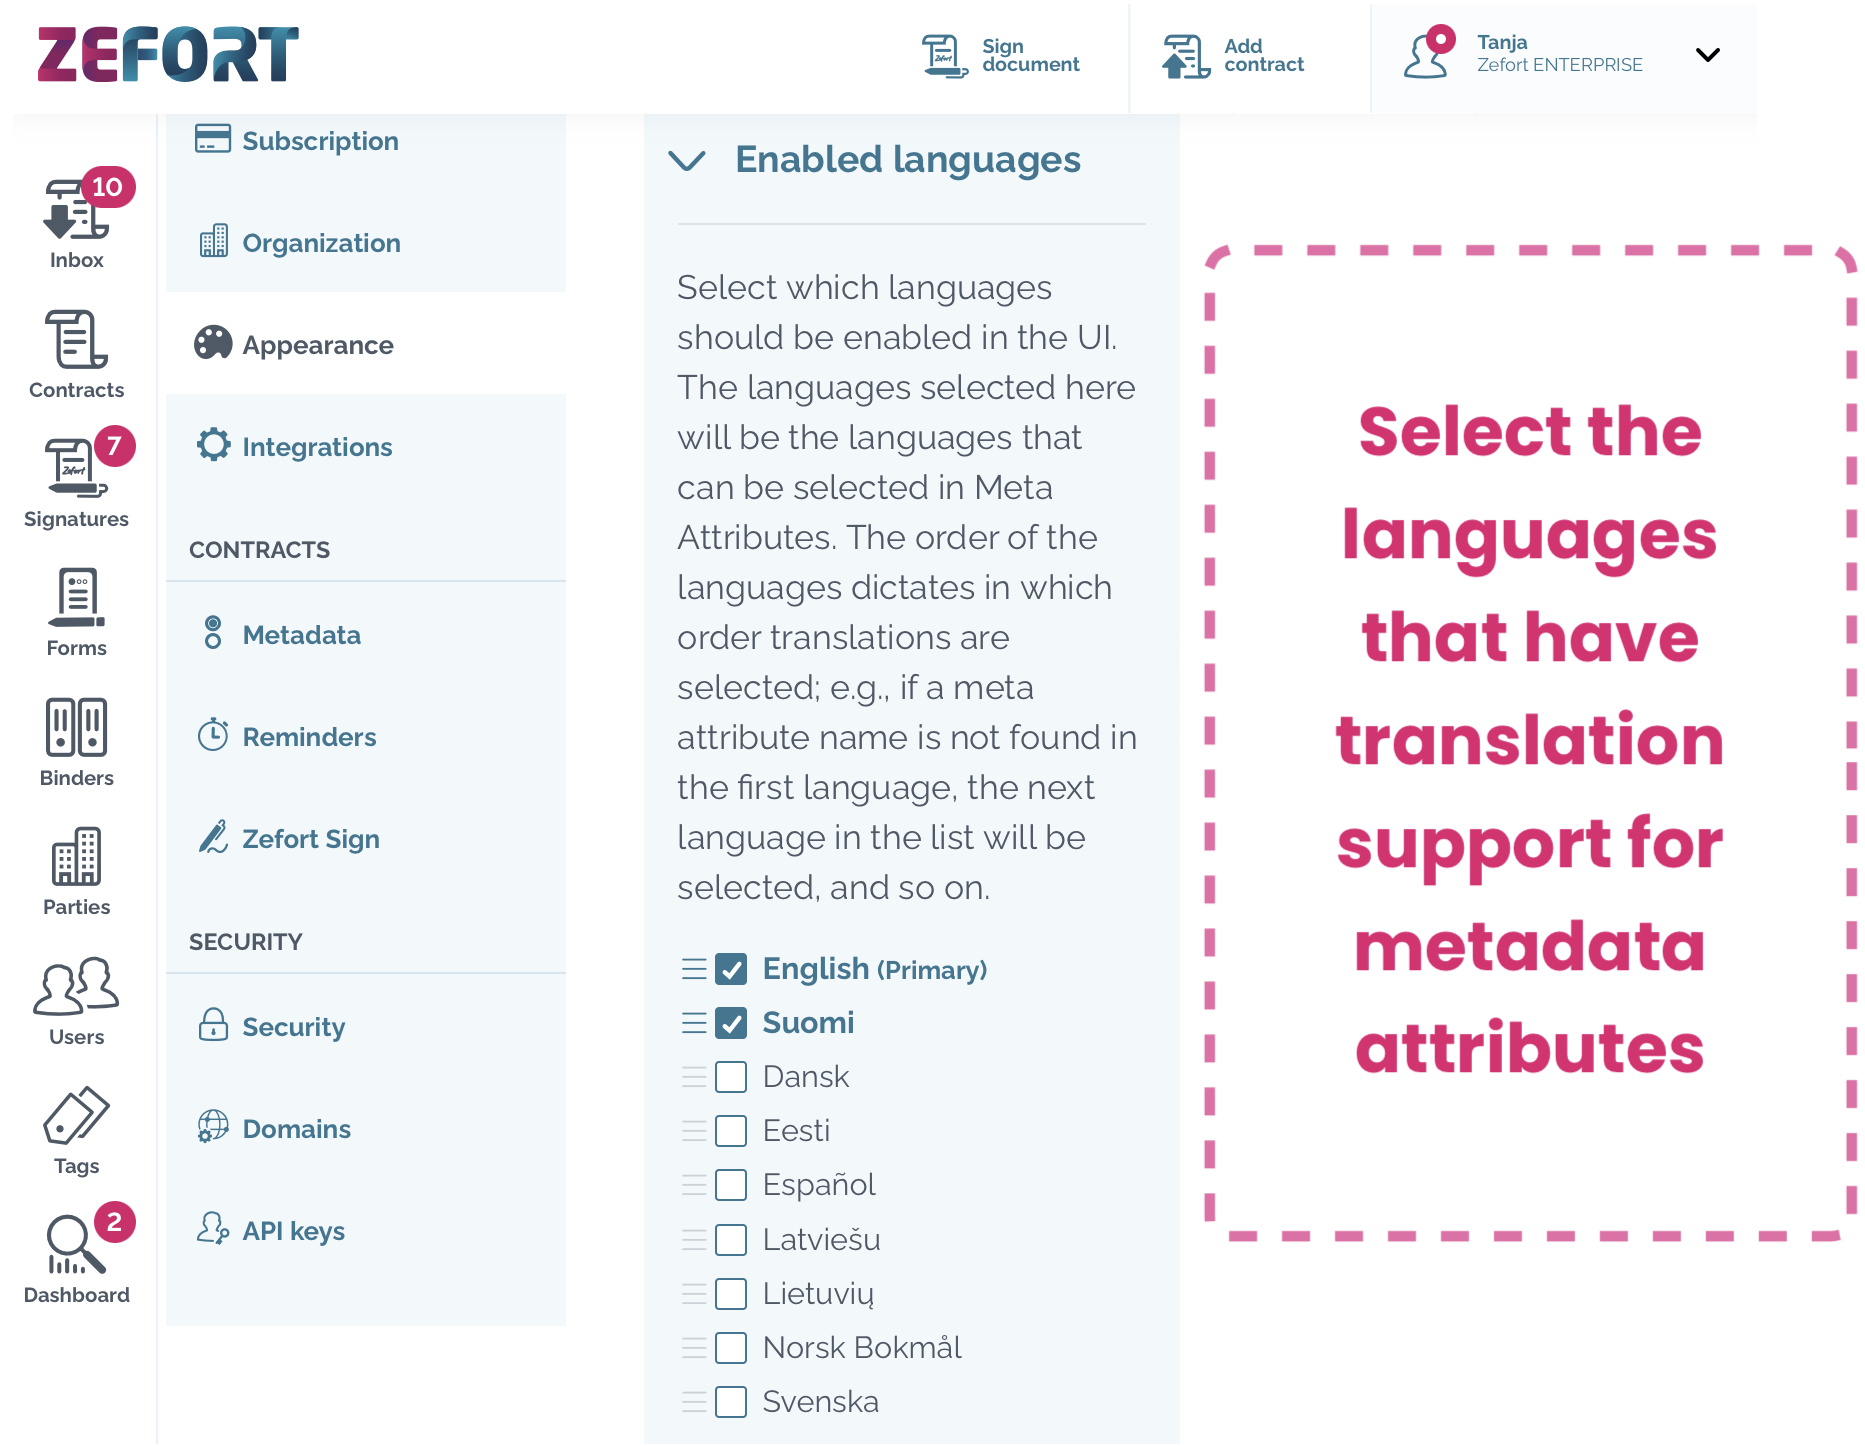
Account settings > Appearance > Enabled languages
Select enabled languages and define the primary language of the account by dragging it in the top of the list. The languages selected here will be the languages that can be selected in metadata attributes.
The order of the languages determines the order in which translations are selected. For example, if a metadata attribute name is not found in the first language, the system will check the next language in the list, and so on.
Creating metadata attribute translations
Account settings > Metadata
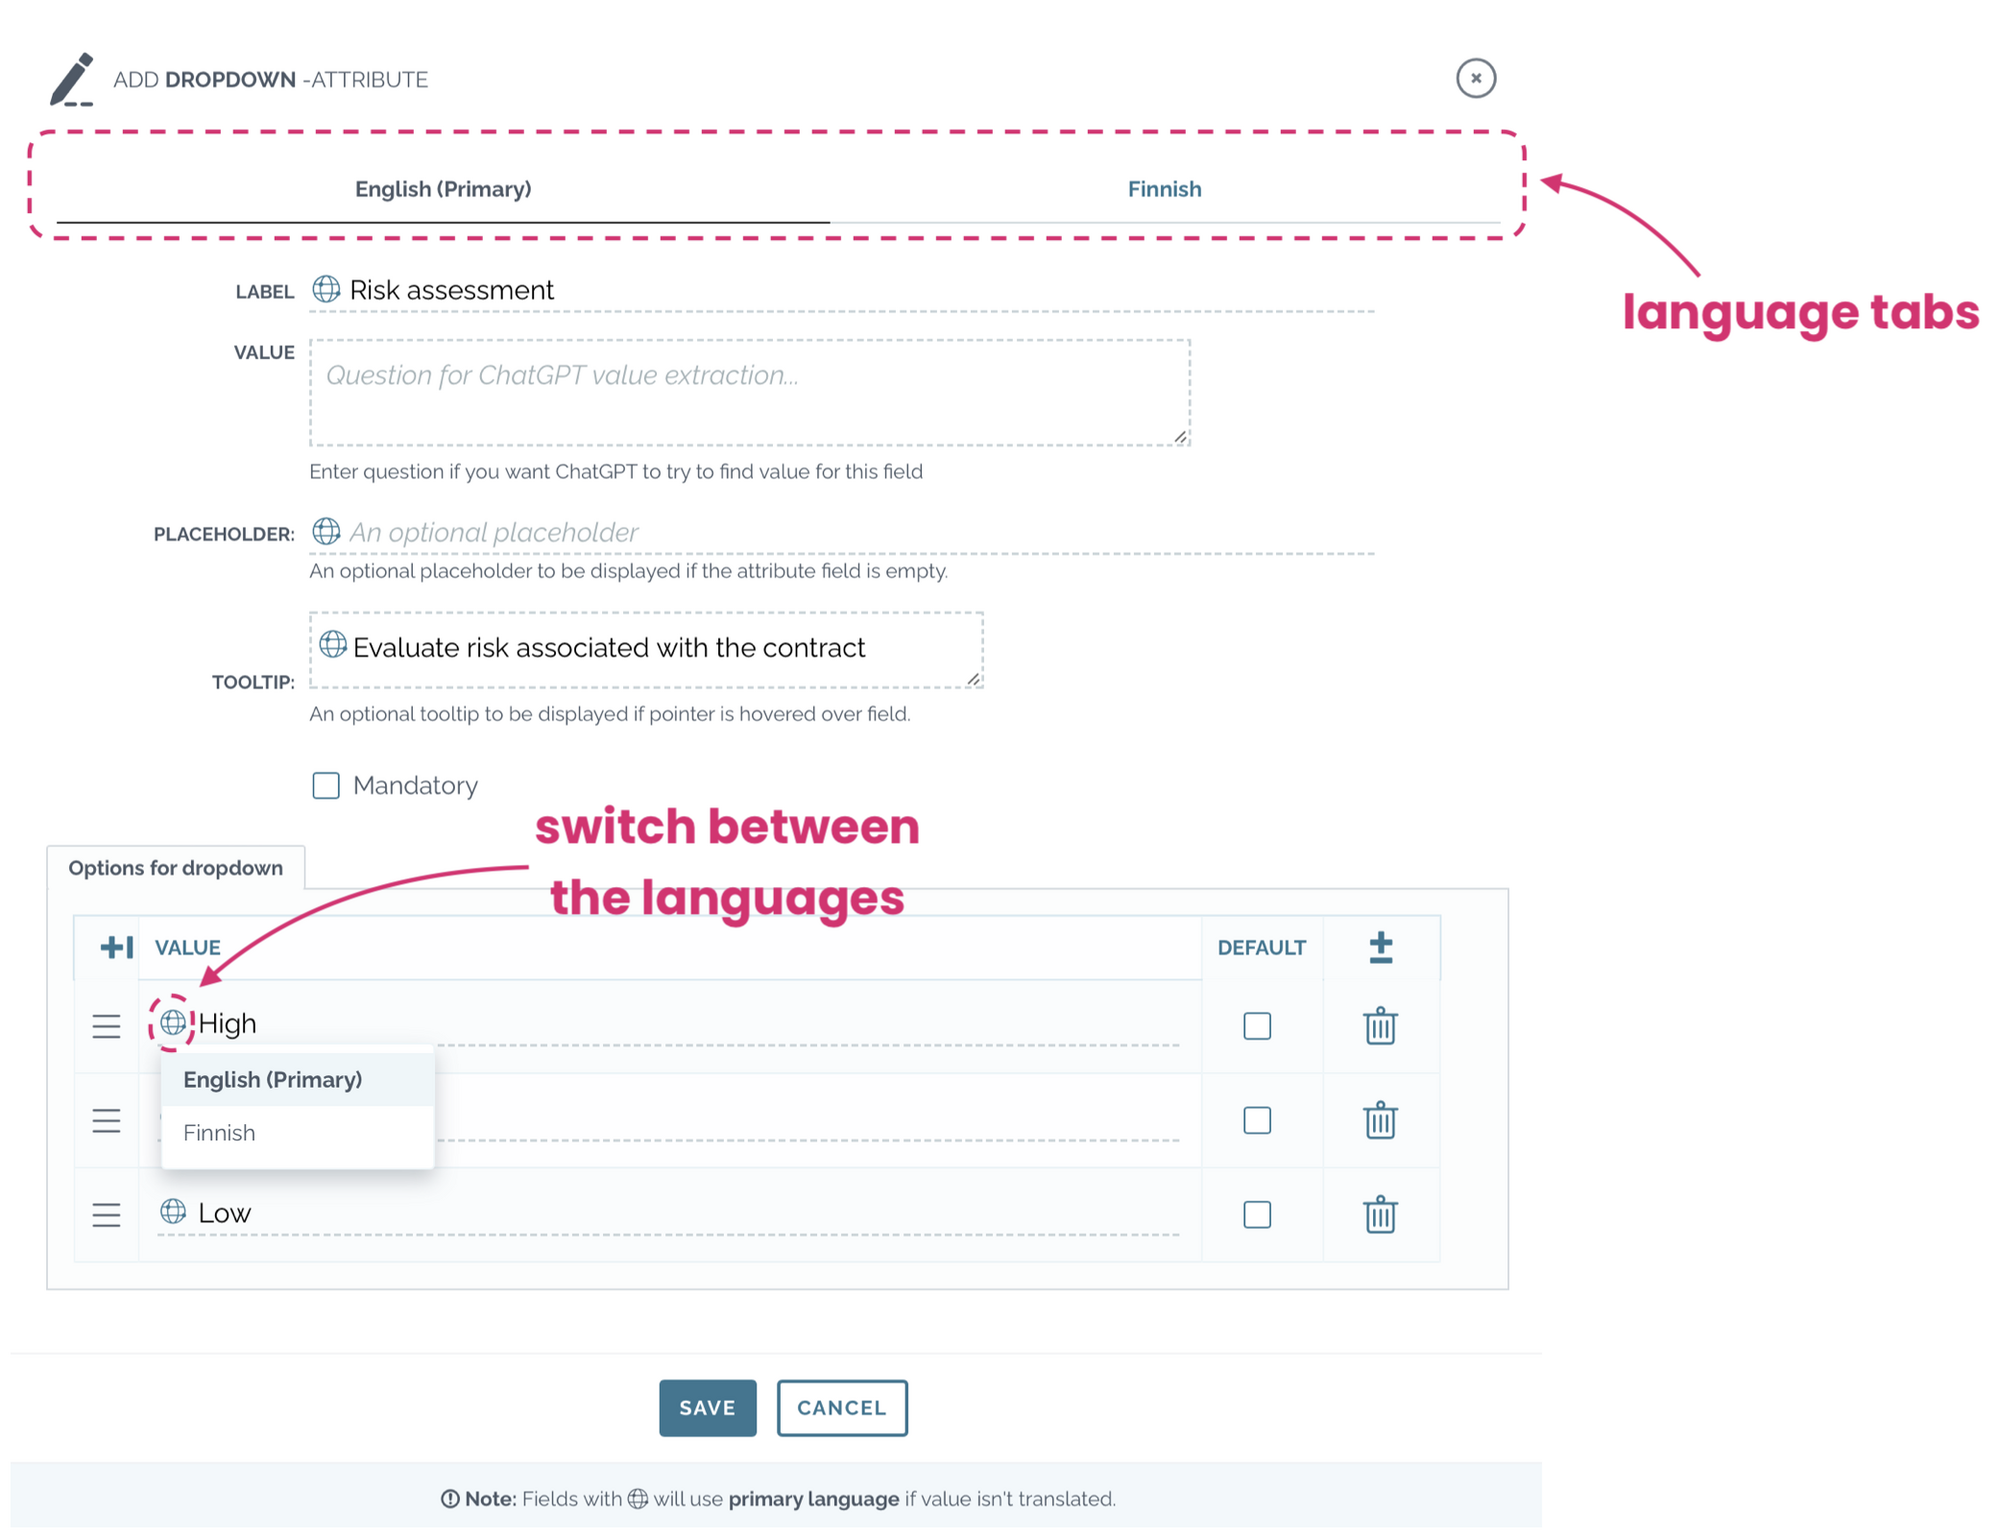
Create translations for the metadata attributes. All attribute texts with the globe icon, such as label, tooltip and options, can be translated in the enabled languages. Each enabled language has its own tab. You can switch between the language tabs to make the translations or click the globe icon to switch between the languages.
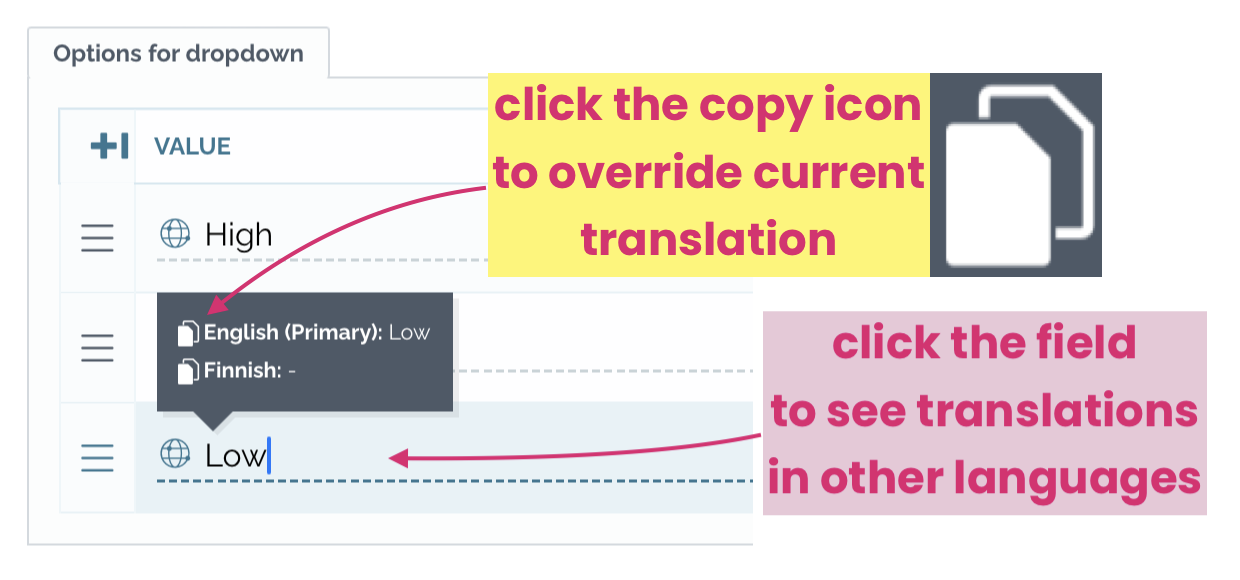
By clicking the field you see the translations in other languages without switching to another language version. If you click the copy icon next to a translation overrides the current value with that translation. If a value in field is not translated, the primary language will be used automatically.
Configuring custom contract types
You can define metadata fields specific to document types instead of using the generic metadata layout. This allows you to collect different metadata, for example, for your sales contracts and board meeting minutes.
Configuring custom layouts
To configure custom metadata layout in the account settings:
- Click configure
- Click add contract type
- Fill in the details for “Contract type”
- Click + add an optioN and add the contract types

Once you have created the different contract types, you can edit each contract type to match your needs: add custom metadata, rearrange and rename sections, and more.
Resetting default layout
If you only have one layout, you can reset it and restore the Zefort default layout.
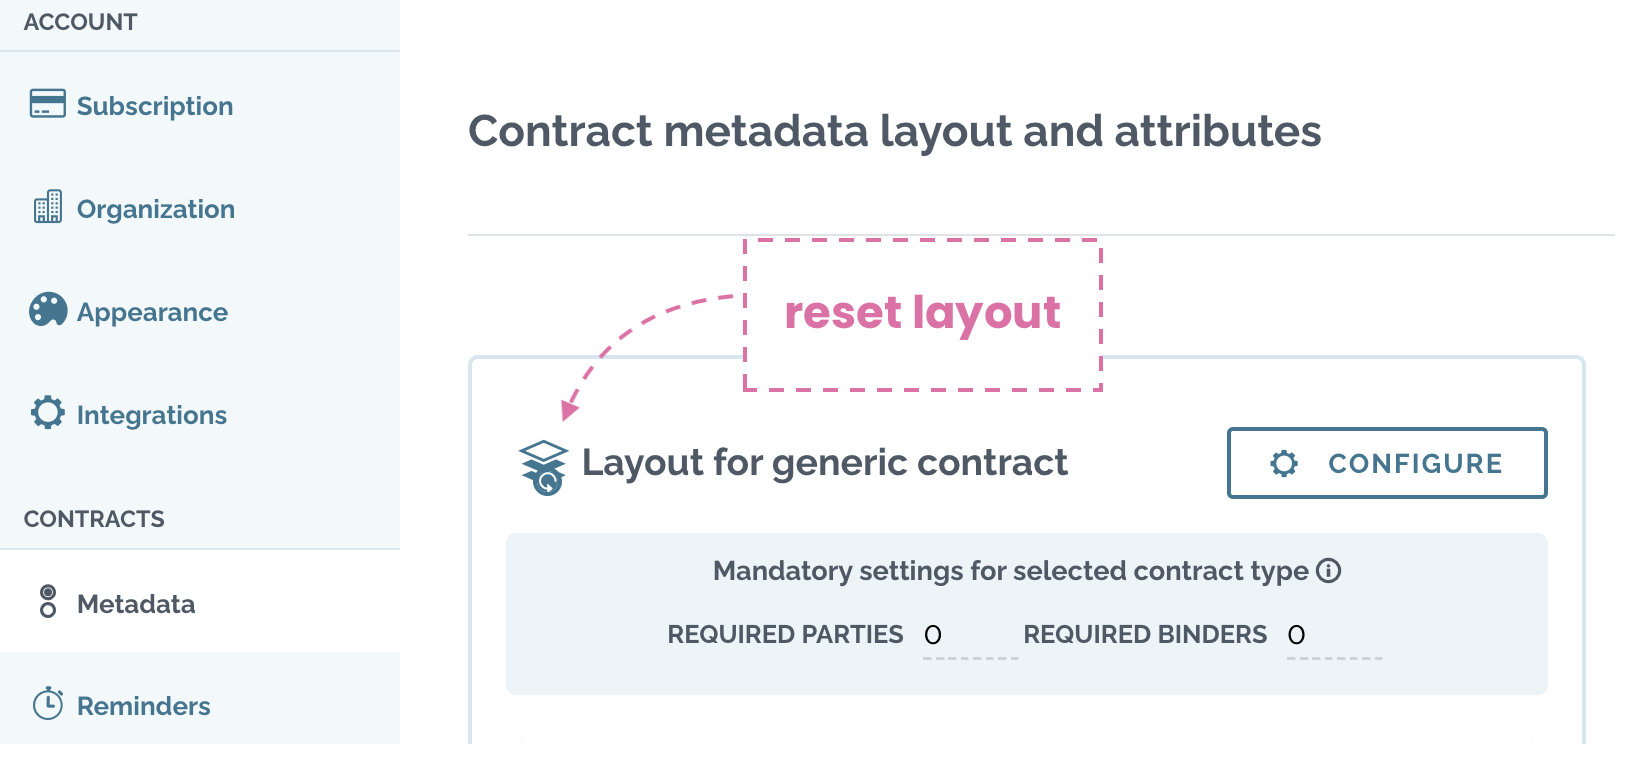
- Click the layer icon next to the layout
- Click reset layout
Overriding layout
If you have multiple layouts, you can copy the layout from another layout
- Open the layout that you want to override
- Click the layer icon next to the layout

- Select the layout to be copied from the dropdown
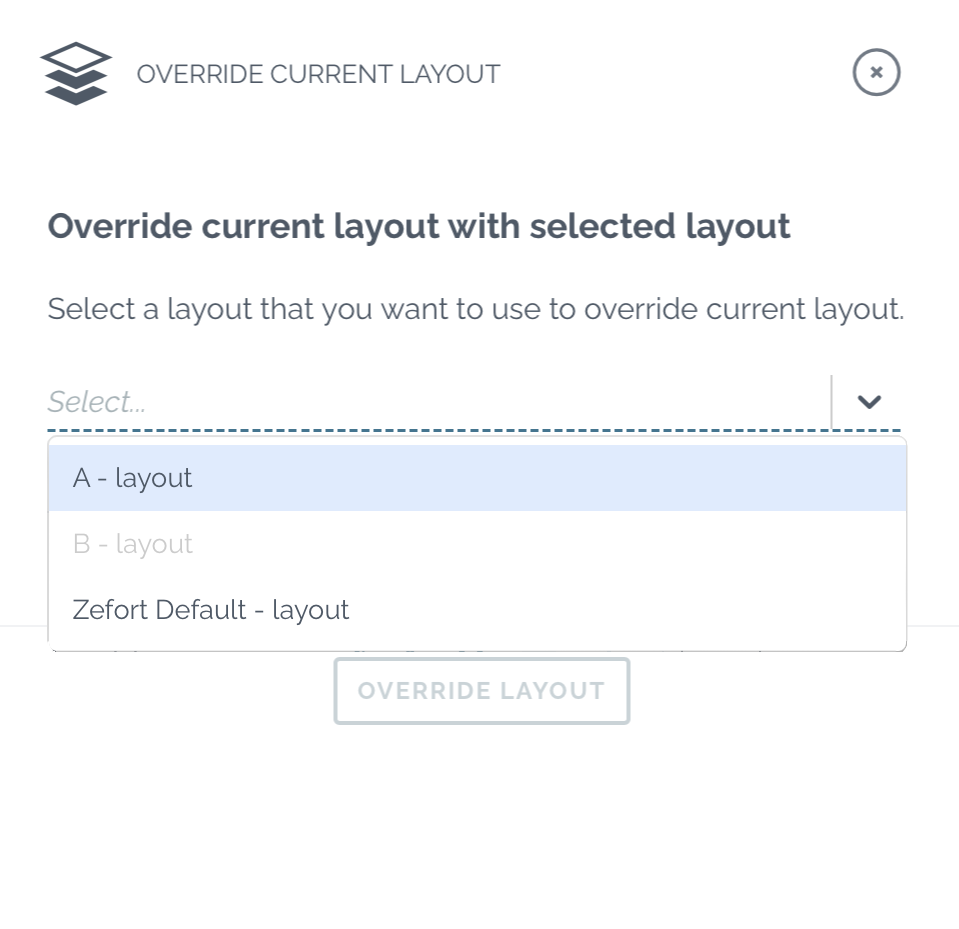
- Condfirm by selecting “I’m sure that I want to override current layout with selected layout”
- Click override layout
Restoring to generic layout
You can restore the original generic contract layout:
- Click the Configure button
- Click Restore to generic layout
- Confirm by clicking Change to generic layout
Defining attribute rules 
You can define rules for the metadata attributes to control their display, validation and mandatory status.
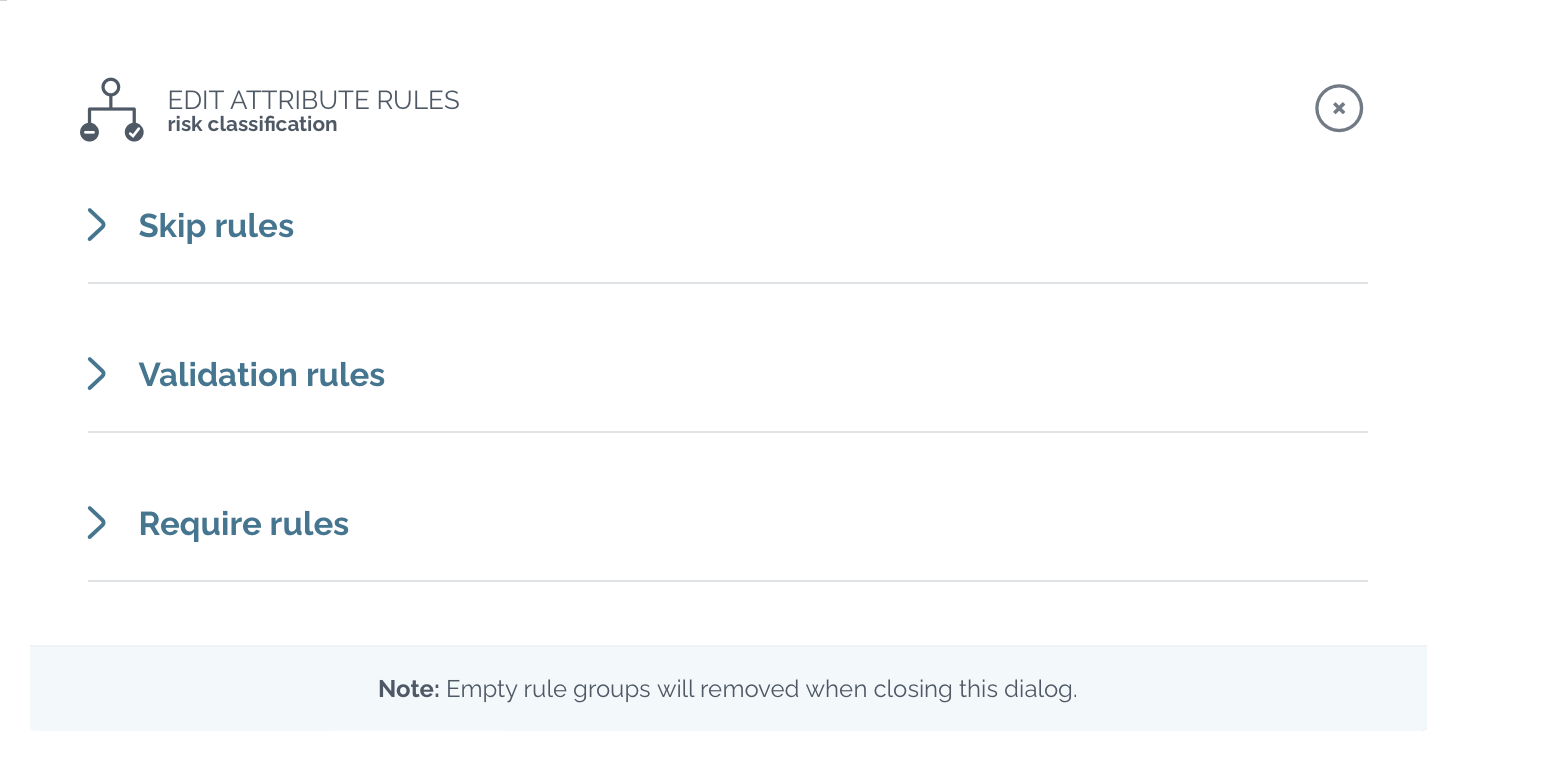
Skip rules
Skip rules hide metadata attributes when specific conditions are met. The skip rules can be applied to entire section or individual metadata attributes:
- Click the attribute rule icon
- Open Skip rules
- Click + add rules group to create the first rule
- Select attribute for value comparison
- Specify the rule
- Click the “Add rule” button
- To add another rule to the same group, select a new attribute for comparison (repeat step 4).
- All rules in this group must be valid to skip the metadata
- Optional rules can be created by adding additional rule groups (step 3).
- At least one of the rule groups must have all rules valid to hide the metadata attribute or section
Validation rules
Validation rules ensure that metadata attributes meet specified criteria:
- Click the attribute rule icon
- Open Validation rules
- Click + add rules group to create the first rule
- Specify the rule and click the “Add rule” button
- To add another rule to the same group, define the next rule (repeat step 4).
- All rules in the group must be met when filling in the metadata field.
- Optional rules can be created by adding additional rules groups (step 3).
- At least one rule group must have all rules met for the metadata field to be considered valid.
When filling in the metadata field, the value must meet the validation rules. Otherwise, the contract status cannot be set as “Reviewed“.
Require rules
Require rules make metadata fields mandatory under specific conditions:
- Click the attribute rule icon
- Open Require rules
- Click + add rules group to create the first rule
- Select attribute for value comparison
- Specify the rule and click “Add rule”
- To add another rule to the same group, select a new attribute for comparison (repeat step 4).
- Field becomes mandatory if all rules in the group are met
- Optional rules can be created by adding additional rules groups (step 3).
- Field becomes mandatory when all rules of at least one rule group are met
Required metadata field is marked with an asterisk icon. Setting contract status as reviewed is not possible until all required fields are filled in. User attempting to set the status without filling required fields will receive a “Mandatory attribute missing” warning.
Setting required parties and binders
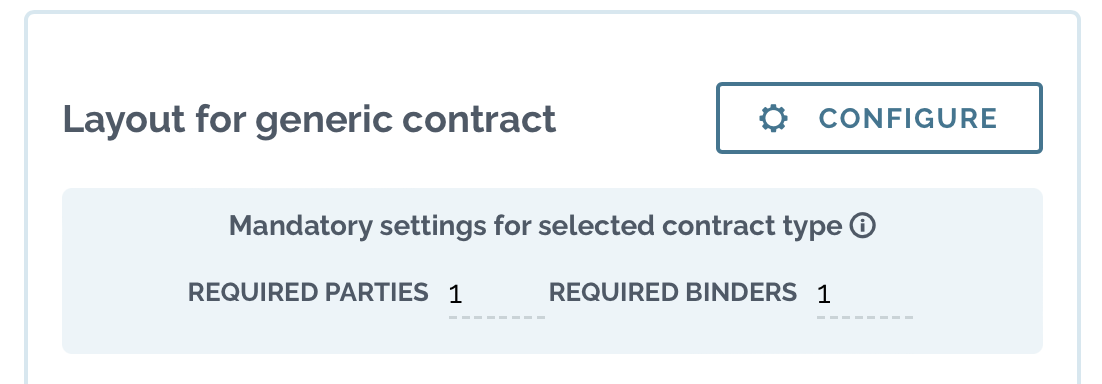
In the metadata settings, you can specify the number of required parties and binders. This ensures that certain conditions must be met before a contract can be marked as reviewed:
- Required parties: define to how many binders the contract must be added
- Required binders: define how many parties each contract must include (we recommend to have at least one mandatory binder to ensure contracts are not left in users’ contract inboxes)
User will get warning, if the mandatory requirements are not met when changing the contract status as “Reviewed“.