Contract files and emails
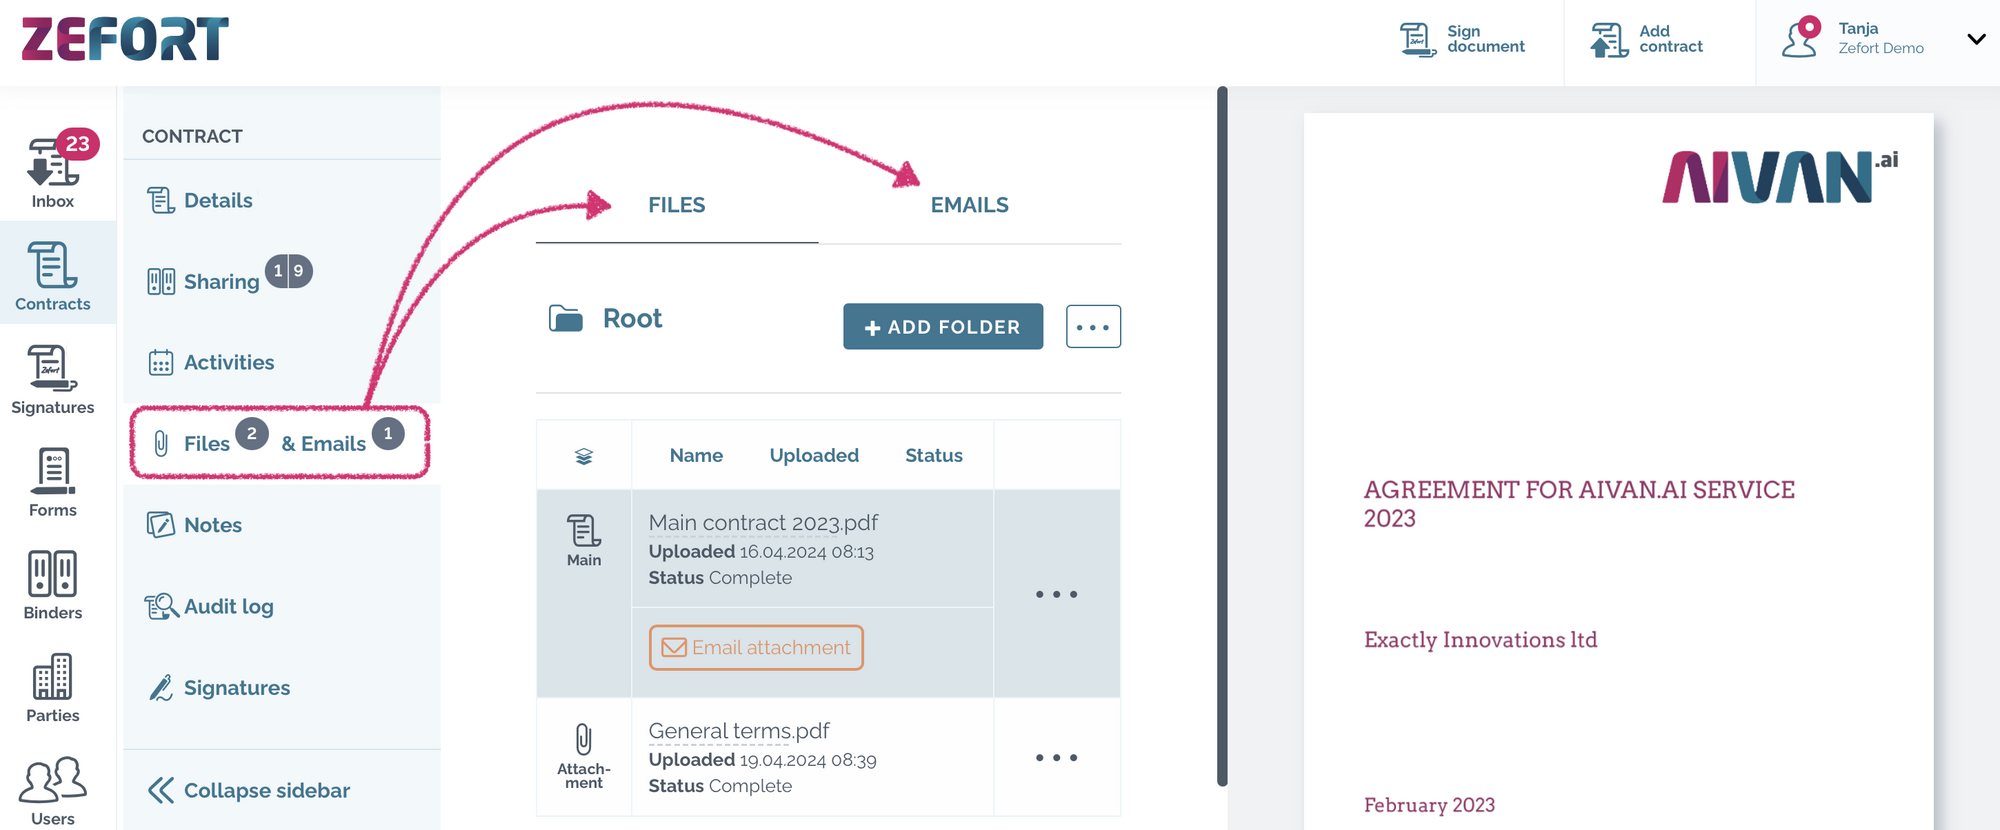
Access all contract documents and emails by navigating to the Files & Emails tab in the contract view.
Within Files you can view existing documents, add new files to the contract, manage the file properties, and organise them into folders.
In the Emails section you can create an email inbox for the contract and view the emails that were sent in contract’s inbox.
Files
In the Files tab you can view and manage all the documents which are part of the contract.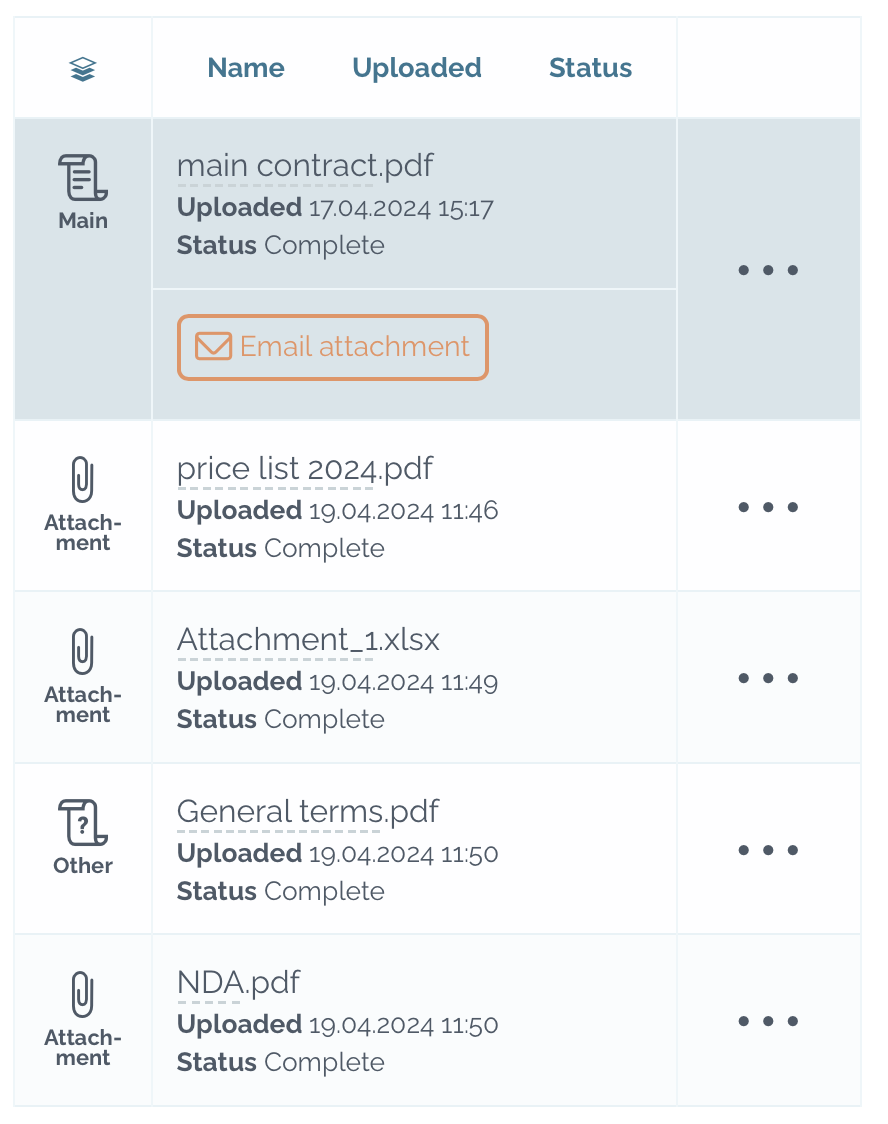
- Attaching new files to the contract
- Add document using form
- Hiding files
- Archiving files
- Sorting files
- Editing file properties
- Organizing files with folders
Attach new files to contract
You can add new attachments to contract from your computer
- Click Select files… and choose the files from your computer
- Click Upload files to complete
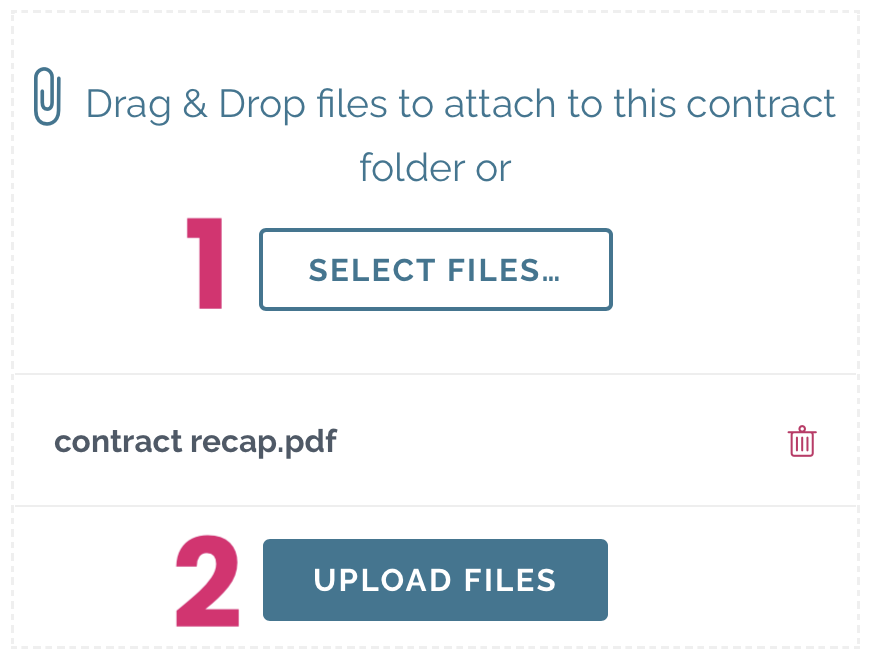
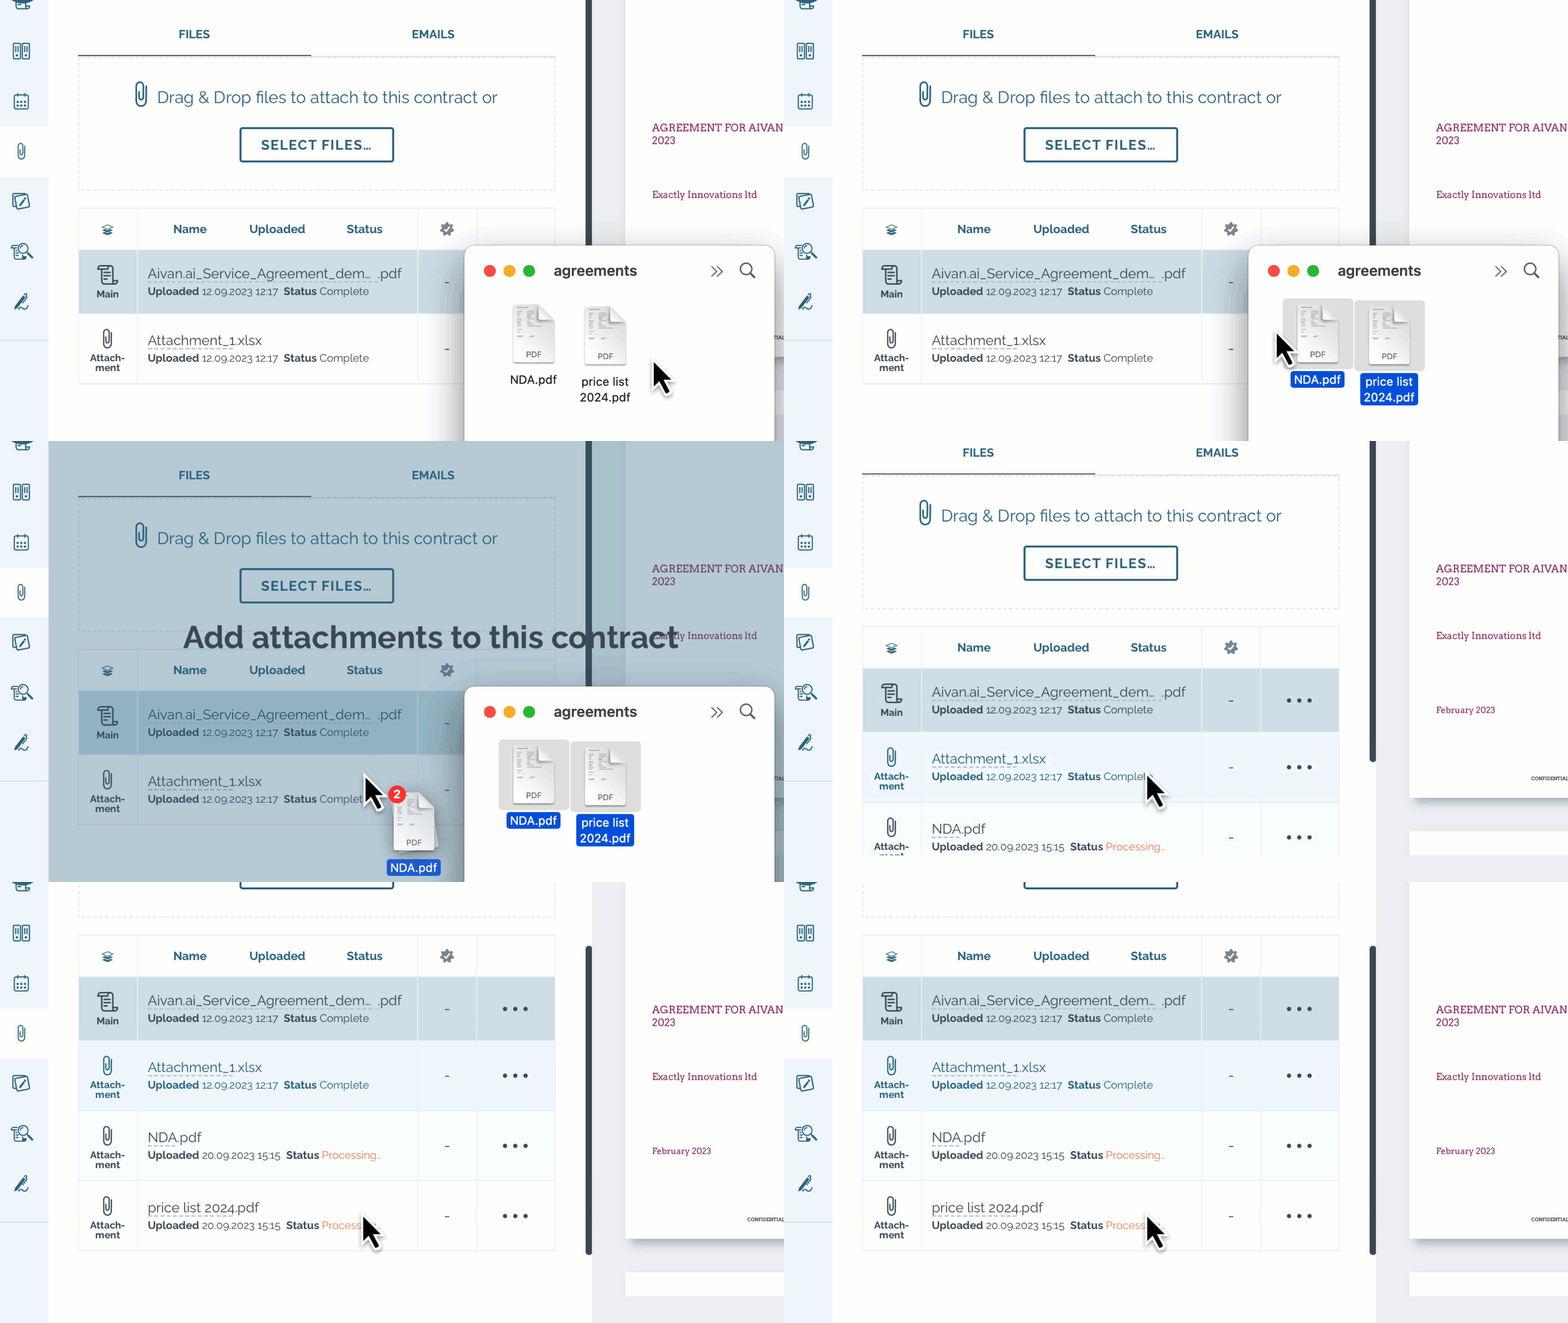
Or, just drag and drop the attachments to contract!
Add document using form
You can launch a form directly from a contract, and the completed document will be automatically added to the contract’s attachments.. If the form includes fields linked to metadata, the contract metadata will be updated automatically.
To use this feature, your account must have both Zefort Sign and Zefort Forms enabled, and the user must hold an Editor or Admin license. Additionally, pre-made forms need to be available in Zefort Forms.
How to use this feature:
- Open the document in Zefort and go to the Files & Emails tab.
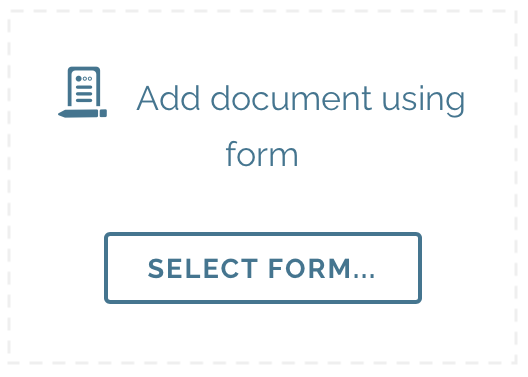
- Click “Select form…” and choose the appropriate form.
- Fill in the form and submit it.
- Zefort Forms will create the document, which will be automatically attached to the contract.
- The document can be approved / signed using Zefort Sign.
Please note that if the launched form has fields linked with metadata, the metadata will be automatically updated.
Hidden files
Contract owner and admin with the permission “Can manage all contracts and binders” can hide contract documents.
- Open the menu ••• of selected file
- Click “Hide this document…”
- Document will be hidden from the file list
- Users with permission to access the contract will not see the hidden documents
- To see the hidden files, toggle on the switch “Show hidden” (visible to contract owner and admin with permission “Can manage all contracts and binders”)

Archived files
Editor and admin users with editing rights can archive contract files.
- Open the menu ••• of selected file
- Click “Archive”
- Document will be hidden from the file list.
- Users with permission to access the contract can still see the archived documents
- To view the archived documents, toggle the switch “Show archived” ( visible to all users with access to the contract)

Sorting files
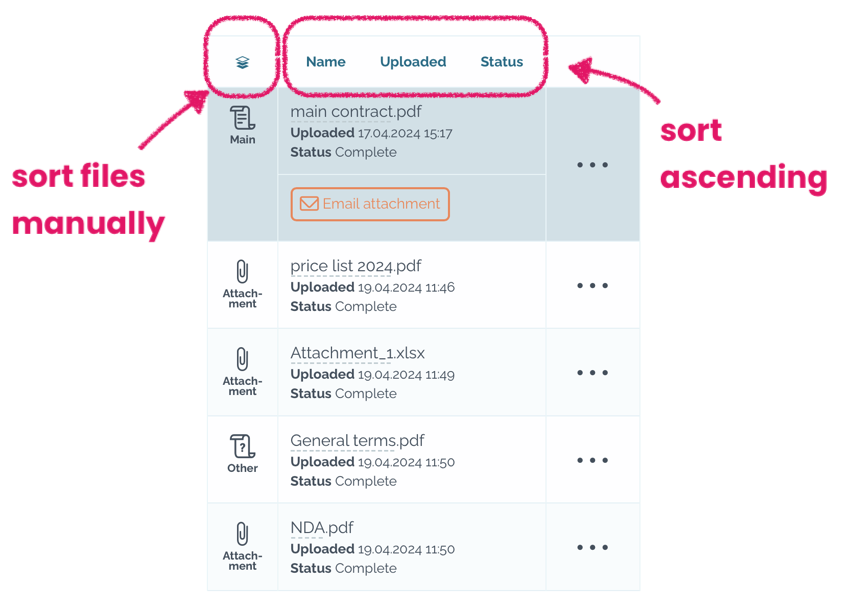
- Manual sorting: Click the sorting icon first, then drag the files into the desired order

- Ascending sorting: Click on the header line text (Name, Uploaded or Status) to sort files in ascending order
Edit file properties
To manage and edit contract files, open the menu ••• of the selected document.
| Start signature process for the selected document. | |
|
Change the file type to main / attachment / other.
|
|
Hide / unhide the document.
Only contract owner or admin with “can manage all contracts and binders” can perform this action. When hidden, the file is not visible to other users. |
| Download the selected file to your computer in its original format. | |
| Download the text content of the file as .txt file. | |
| Rename the selected file.
Pro tip: you can also rename by simply clicking the name of the file! |
|
| Detach the selected file from the contract and create it as a new, separate contract in Zefort. | |
|
Archive / unarchive the file.
File is not permanently removed, just hidden from the file list. All users with access to the contract can see the archived files by clicking “Show archived” |
| Move the file to a folder. | |
|
Delete the file.
Note: main document can’t be deleted. |
Organizing files with folders
You can manage the contracts also by creating an inner folder structure and placing the contract files within folders.
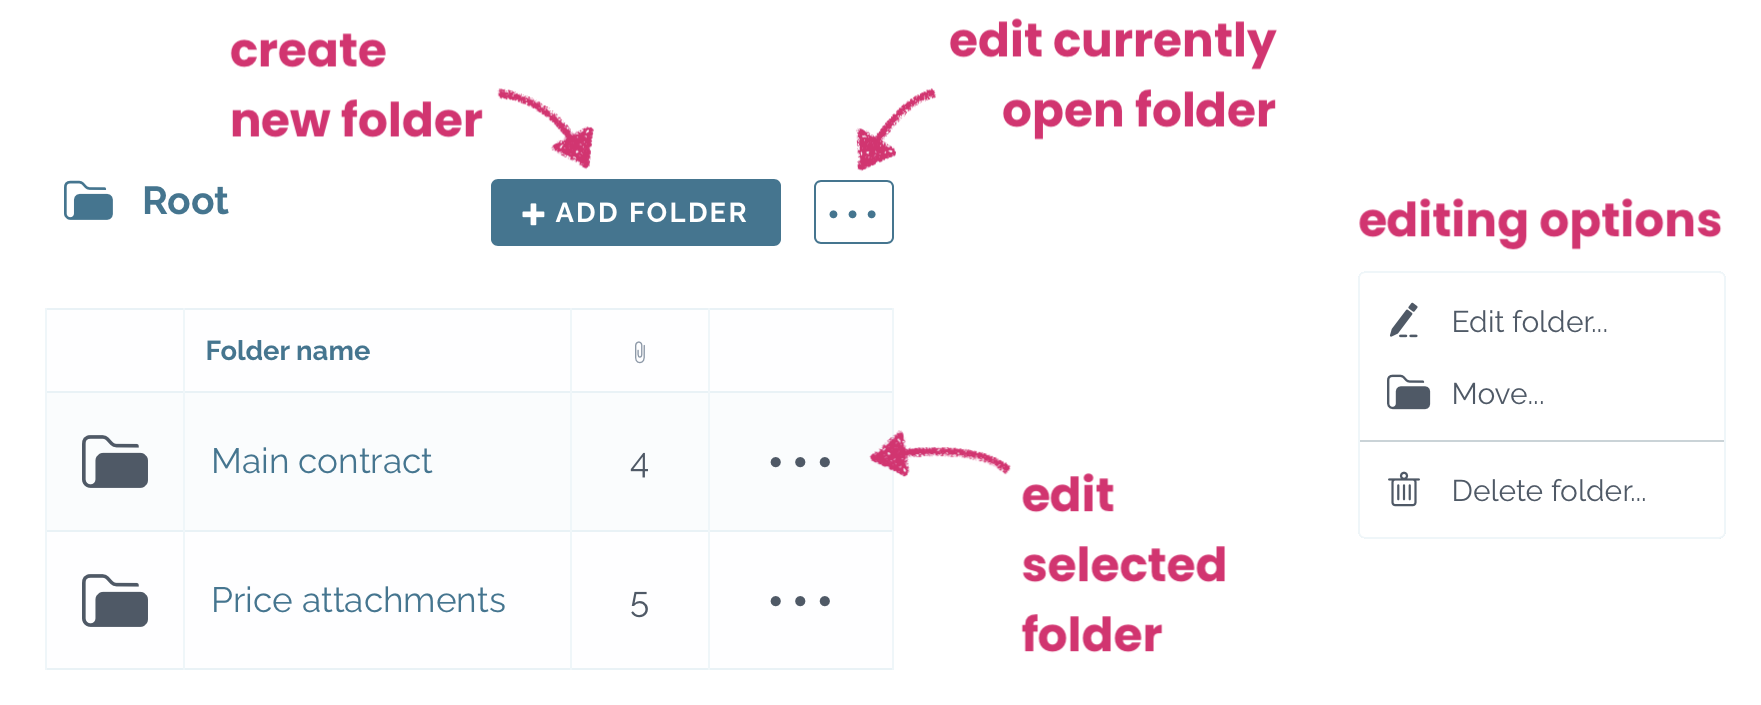
| Create a new folder |
|
| Add new file(s) to a folder |
|
| Move an existing file to a folder |
|
| Rename folder |
|
| Move folder |
|
| Delete folder |
|
Emails
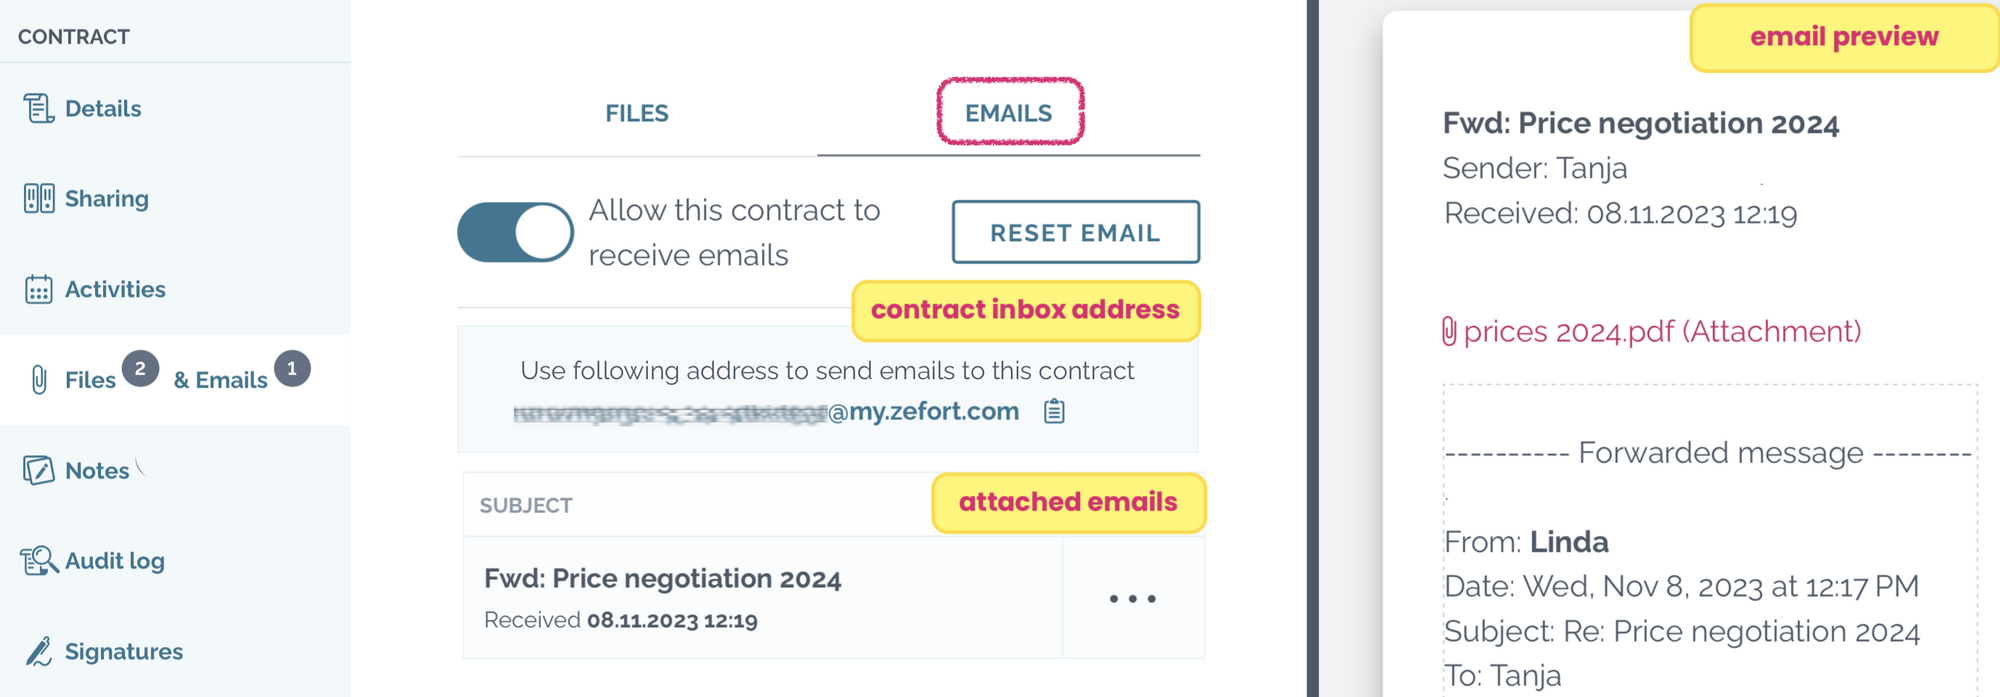
You can generate an inbox address for a contract, allowing you to send messages and attachments directly to the contract via email. Learn more about attaching email to a contract.
| Toggle the switch to generate an email inbox for the contract.
Toggle off to delete the contract’s inbox. |
|
| Click to copy email address to your clipboard. | |
| Reset email address (if needed). |
Email messages sent to the contract’s inbox are listed in the Emails tab. Files attached to the email are added in the Files tab.
 You will see the email attachment icon if the file was sent by email.
Click it to preview the original message.

