Best security practices
Here’s a summary of best security practices and recommendations, especially for the account admins to familiarize themselves with.
In the account settings, you’ll find tools to enhance the security of your account and safeguard the data.
Account settings
Manage access to the account
- Define the email addresses permitted to send email to Zefort
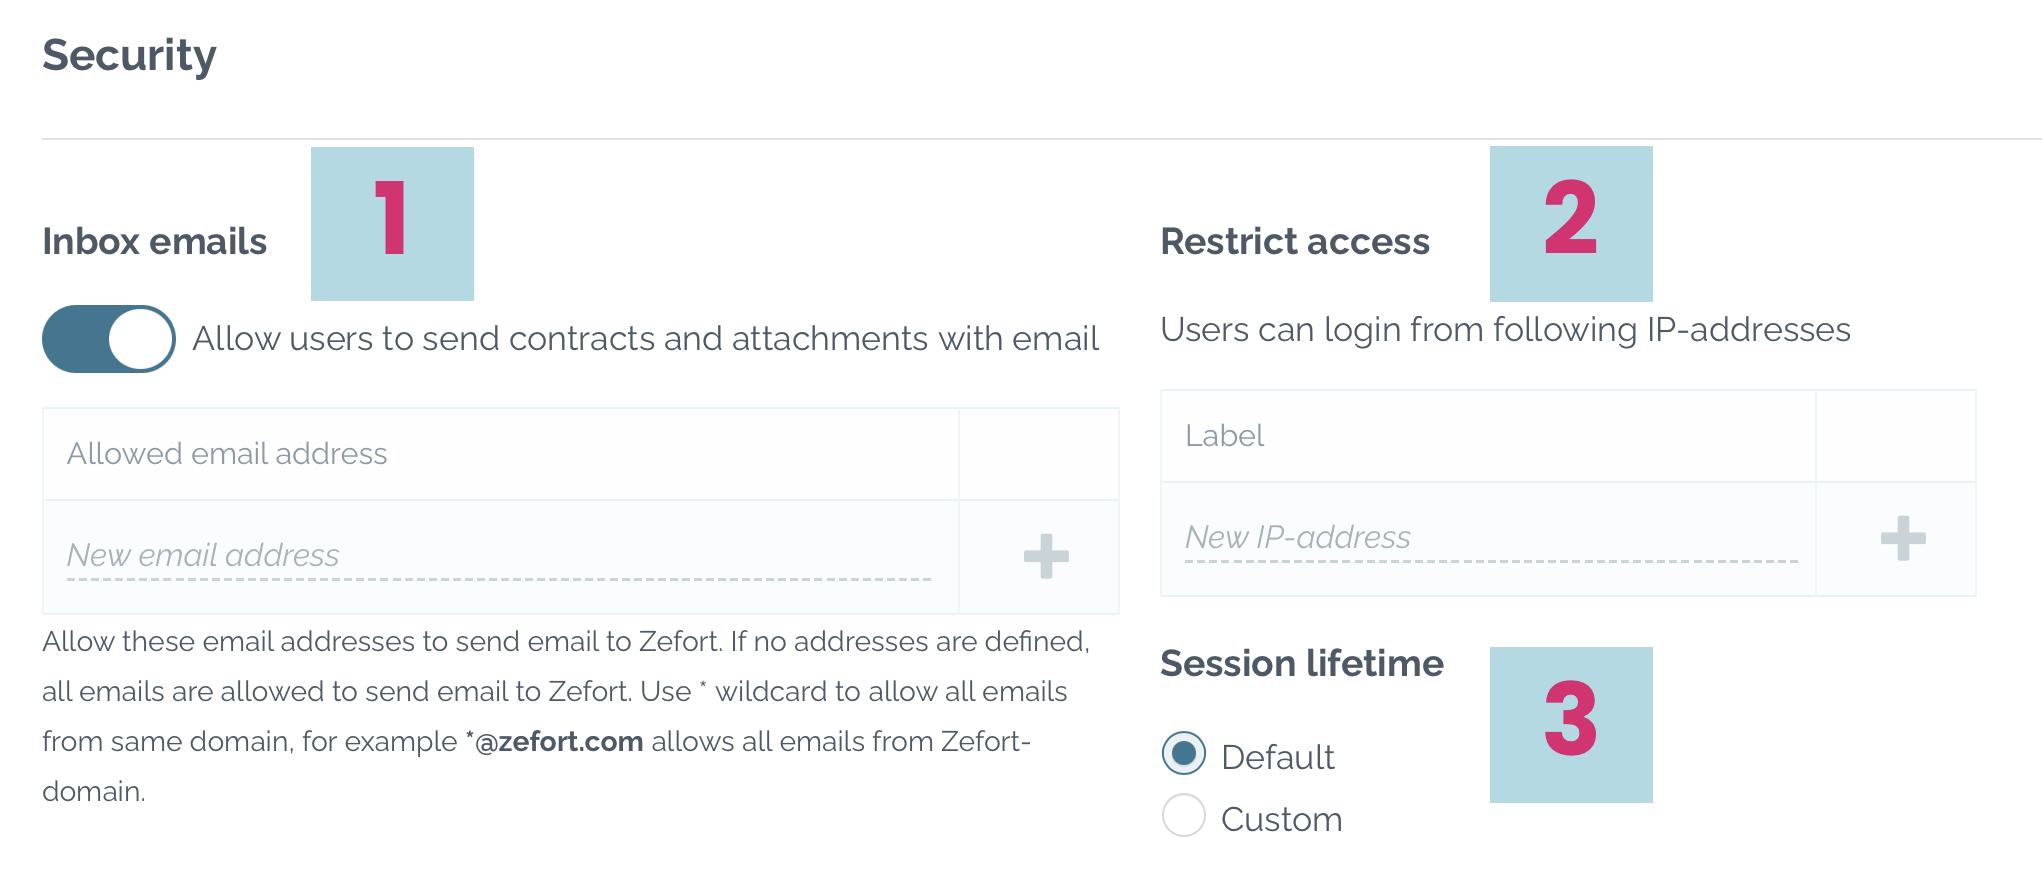
- Account settings > Security > Inbox emails [1]
- First, choose whether to allow emailing contracts to the system. By default, this function is enabled.
- You have the option to restrict email permissions to specific addresses or domains. If no addresses are defined, all emails are allowed. You can use asterisk (*) as a wildcard to permit all emails from a domain. For instance *@zefort.com allows all emails from the Zefort domain.
- List the IP addresses permitted for signing in
- Account settings > Security > Restrict access [2]
- This feature enables you to control access to your account by specifying allowed IP addresses.
- Regularly update the list to prevent unintended lockouts.
- Control session lifetime
- Account settings > Security > Session lifetime [3]
- Default maximum lifetime is set to 720 hours and window lifetime is configured 96 hours. Adjust these settings as needed to align with your security requirements and user preferences.
Trash management 
Admin of the account can manage trash settings: configure whether emptying the trash requires a full admin license and decide on automatic trash emptying.
Account settings > Organization
E-sign default settings 
Admin can manage the use of Zefort Sign.
- Select allowed authentication methods and default authentication method. You can for example exclude email as authentication method, if your organization requires strong authentication in all signed documents.
- Set “Automatically set ‘Authenticate before viewing documents’ checked when strong authentication method is selected” as default.
- Add e-sign sender names, allowing users to send the signature requests for example in your company’s name.
Dive deeper in this topic in our article Zefort Sign settings
Account settings > Zefort Sign
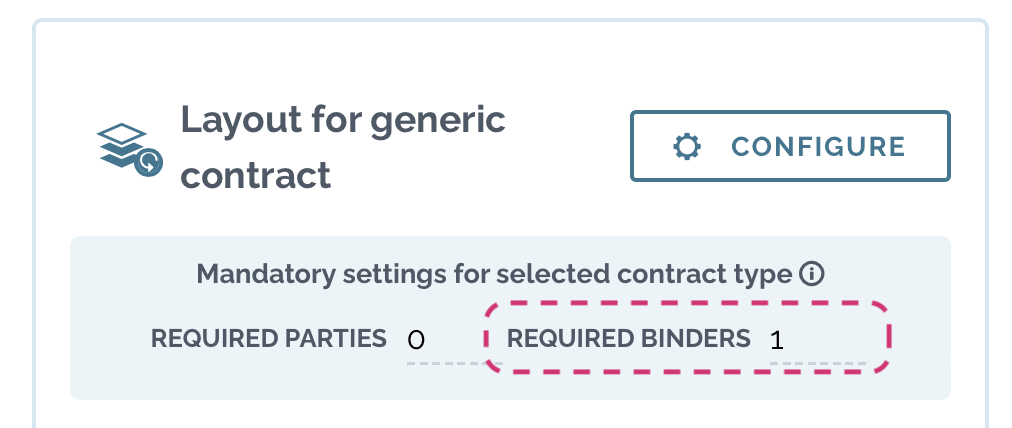
Required binders
Our recommendation is that you add at least one required binder* in the account . This way you can guide users to add contract to binder when they are reviewing them.
Check further instructions here.
Account settings > Metadata
* Setting available in Team and Enterprise level accounts
User and binder management
To ensure data security, it is important to grant right people access to the correct documents. Control user and binder access permissions to manage visibility of the contracts and binders. Take a moment to carefully read these articles:
![]() Binder access permission management
Binder access permission management
Binder access permissions
Binder access permission level determines what a user can do and see in the binder. Consider when it’s necessary for user to have full binder permission and when edit or view permission would be sufficient.
Note that target binders are visible to all users in the signature target binder list when creating a signature request, especially if the binder name contains sensitive information.
Be aware that by default, binder permissions are inherited from the parent binder. Remember to turn off binder permission inheritance if you intend to create a sub-binder with sensitive data.
Admin license and permissions
Please note that an admin user with permission “can manage all contracts and binders” has full access to account content, including visibility to every contract and binder. If your account has multiple admins, carefully consider which ones need access to all account content and adjust permissions accordingly.
We recommend having at least two administrators to prevent issues in case the sole admin is unavailable. Additionally, ensure that the admin license is transferred to another user when the previous admin leaves the organization. A best practice is to provide an admin license with limited permissions to the IT department.
Other security measures
Domains and IP addresses
Zefort’s built-in integrations, such as e-sign integrations and webhooks, may take connections to external systems. Whenever you are receiving connections from Zefort, it’s a good practice to make sure these events originate from a Zefort egress IP address.
Security alerts
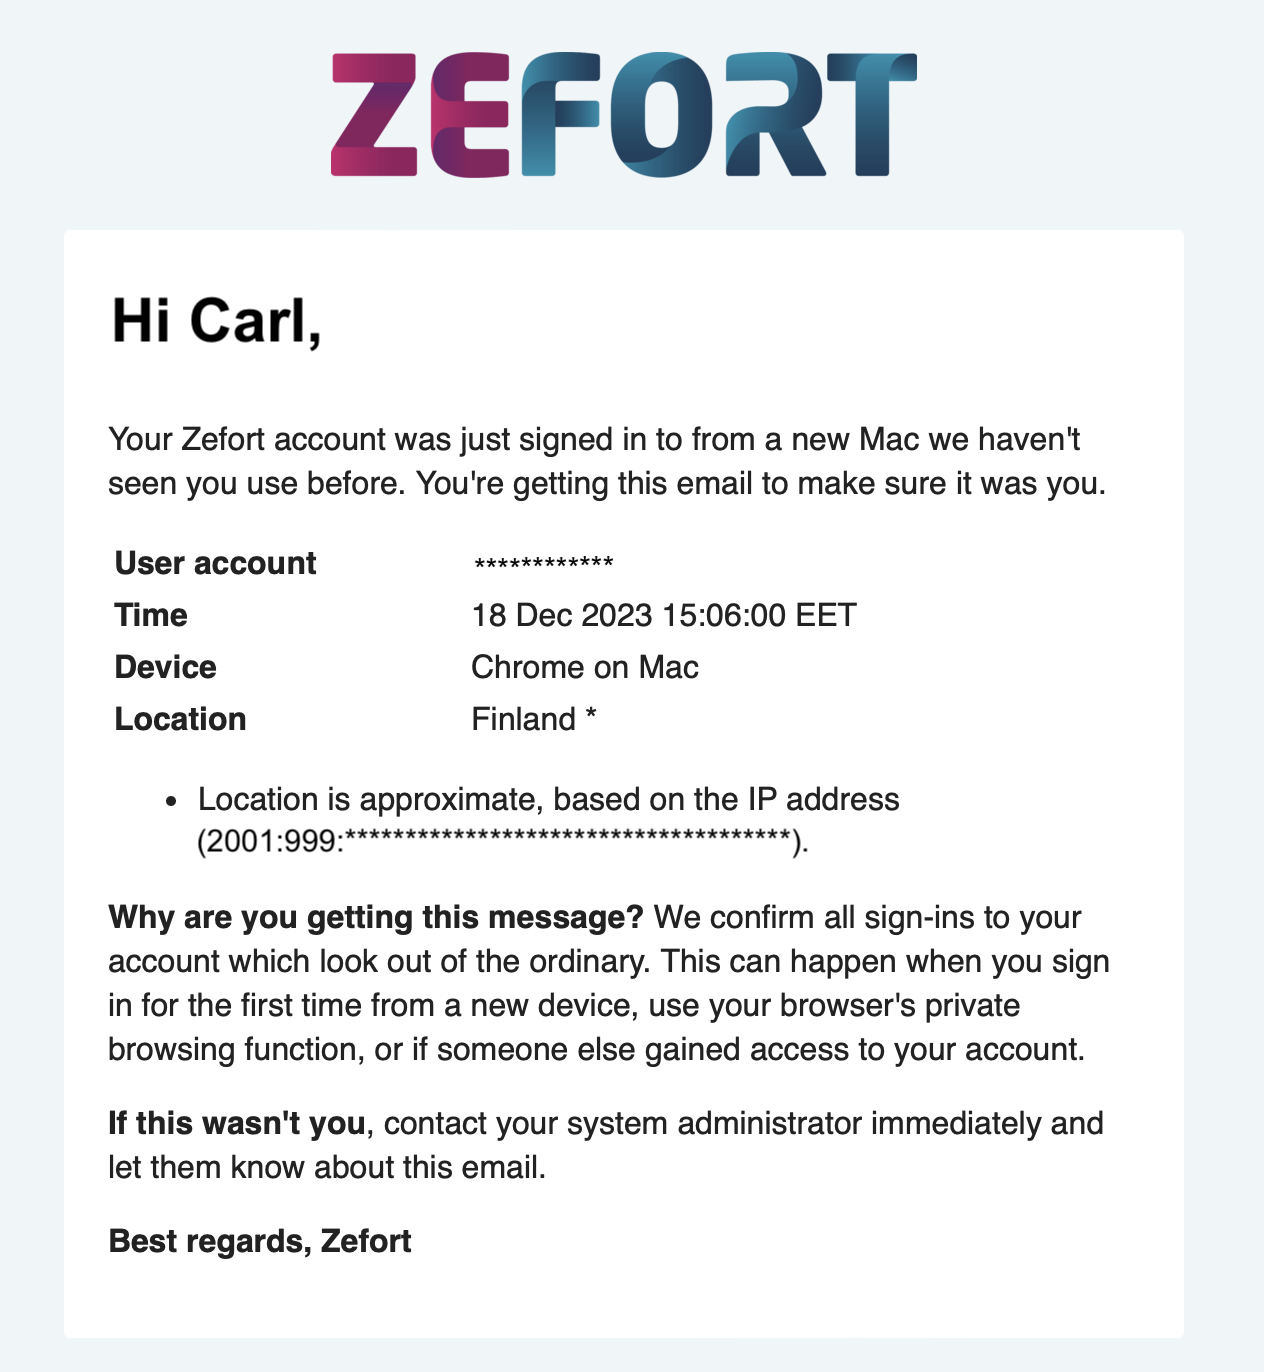
Users will receive security alert emails for significant events such as signing in from a new device, changing passwords, and updating email address in the account.
SSO
For customers using Azure AD, we recommend integrating SSO connection with it with OIDC.
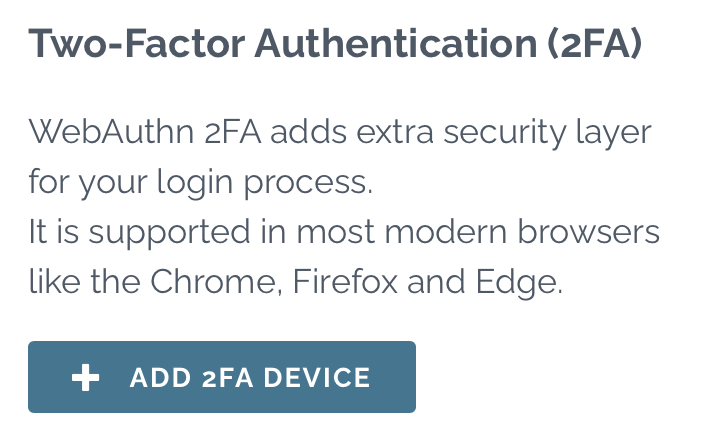
Two-factor authentication
For accounts without single sign-on, we recommend using two-factor authentication during sign-in for added security. A best practice is to set up 2FA with at least two devices. This way, in case you one device gets broken or stolen, you’ll still have backup device for logging in to Zefort.
Audit logs
Zefort features an audit log that enables you to review and download the audit trail for each contract. In the account settings, you can choose the user license required to access audit logs, and you also have the option to download the complete audit log. Additionally, in user management, you can the download audit log for individual users.